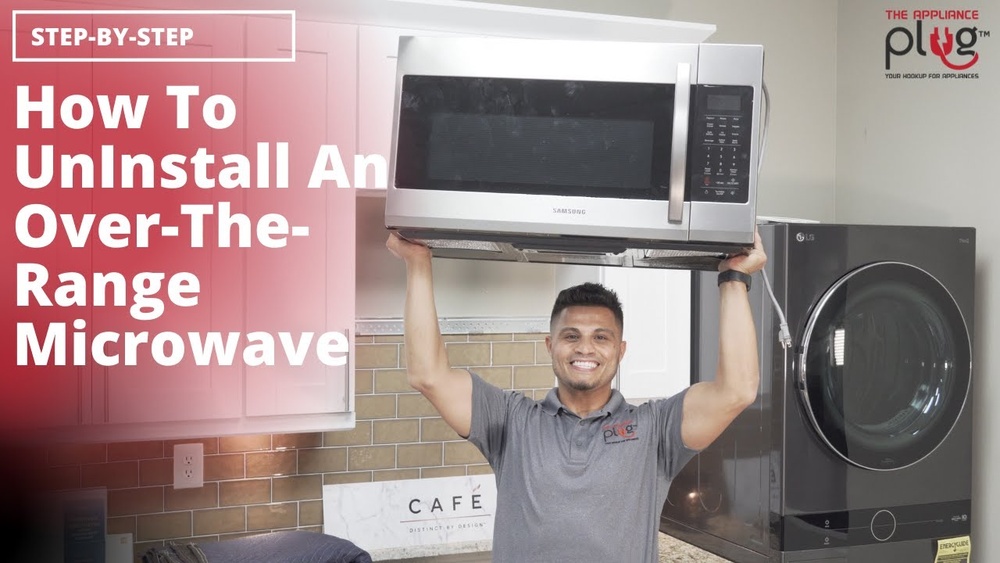
How to Uninstall a Over the Range Microwave: Easy Step-by-Step Guide
Thinking about removing your over-the-range microwave but not sure where to start? You’re not alone.
Uninstalling this type of microwave can seem tricky because it’s mounted high and often secured with multiple bolts and brackets. But with the right steps, you can safely and easily take it down yourself. In this guide, you’ll learn exactly how to uninstall your over-the-range microwave without stress or damage.
Keep reading to discover simple tips that will save you time, effort, and the cost of hiring a pro. Your kitchen upgrade starts here!
Tools And Materials Needed
Before uninstalling an over-the-range microwave, gather all necessary tools and materials. Having the right items ready makes the process faster and safer. This section lists the essential tools and materials needed for removal.
Safety Gear
Wear safety gloves to protect your hands from sharp edges. Use safety goggles to shield your eyes from dust or debris. These simple items help prevent injuries.
Basic Hand Tools
A screwdriver set is crucial, usually Phillips and flathead types. A drill with screwdriver bits may speed up bolt removal. A socket wrench set helps with nuts and bolts.
Support Tools
A sturdy step ladder or stool lets you reach the microwave easily. A helper is recommended to support the microwave during removal.
Electrical Tools
Turn off the power before starting. Use a voltage tester to confirm no electricity flows to the microwave. This tool ensures safety during unplugging.
Additional Materials
A flashlight helps in dim cabinets or tight spaces. A small container to keep screws and bolts prevents loss. Clean rags are useful for wiping dust after removal.
Prepare The Area
Preparing the area is the first step before uninstalling an over-the-range microwave. This step ensures safety and makes the removal process smooth. Take your time to get the space ready.
Clear The Surrounding Space
Remove any items near the microwave. Clear dishes, utensils, and small appliances from the stove and countertop. This gives you room to work freely. Also, clear the cabinet above the microwave if you need access to mounting screws.
Keep the area free of clutter to avoid accidents. A clean workspace helps you focus on the task. It also protects your belongings from dust or damage during removal.
Protect The Stove And Countertop
Cover the stove and countertop with a soft cloth or towel. This prevents scratches or dents while handling the microwave. Use painter’s tape to hold the covering in place if needed.
Make sure the cover does not block your view or workspace. Protecting surfaces saves you from extra cleaning or repairs after removal. This step adds safety and care to your project.
Turn Off Power And Ventilation
Before uninstalling an over the range microwave, ensure all power and ventilation are safely turned off. This step prevents electrical shocks and damage. It also helps avoid problems with the ventilation system. Follow each step carefully to keep yourself safe during removal.
Unplug The Microwave
Locate the microwave’s power cord behind the unit. Gently pull the plug from the electrical outlet. Do not yank the cord to avoid damage. Confirm the microwave is no longer receiving power before proceeding.
Switch Off Circuit Breaker
Find your home’s circuit breaker panel. Identify the breaker controlling the microwave’s power. Flip the breaker switch to the off position. This adds an extra layer of safety by cutting power to the microwave’s circuit.
Disconnect Ventilation Duct
Check the ventilation duct connected to the microwave. Use a screwdriver to loosen any screws or clamps holding the duct in place. Carefully detach the duct from the microwave’s vent outlet. This step prevents air leaks and prepares the unit for removal.
Credit: www.revistaconstruccion.uy
Access Mounting Hardware
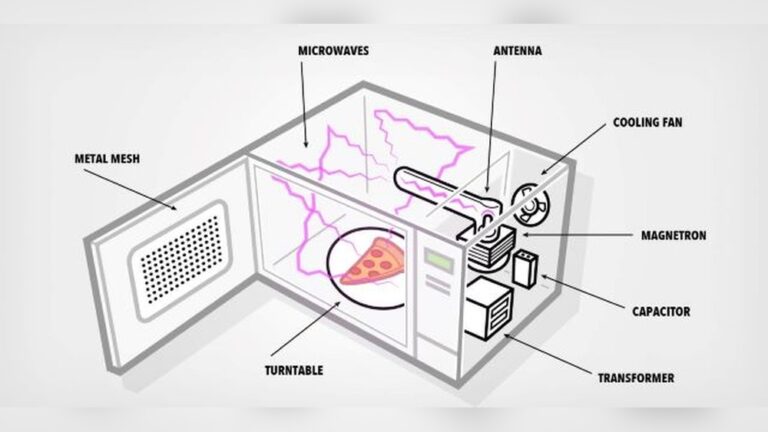
Accessing the mounting hardware is the first key step to uninstall an over the range microwave. The microwave is held tightly in place by screws and brackets. These secure it to the cabinet above and the wall behind. Removing these fasteners lets you safely take down the unit.
Start by opening the cabinet above the microwave. This reveals the mounting area and lets you see the screws holding the microwave in place. Proper access here makes the removal process smoother and safer.
Open Cabinet Above Microwave
Stand on a sturdy step stool or ladder for better reach. Open the cabinet doors fully to get clear access. Use a flashlight if the area is dark. Look inside the bottom panel of the cabinet. You will find screws or bolts that hold the microwave’s mounting bracket. Clear any items from the cabinet to avoid accidents.
Locate And Remove Screws
Identify all screws securing the microwave to the cabinet and wall. Usually, screws run through the cabinet floor into the microwave’s top. Use a suitable screwdriver or drill to remove them carefully. Keep the screws in a safe place for later use or disposal. Some microwaves also have screws on the sides or back. Double-check these spots to ensure all fasteners are removed before trying to take down the unit.
Support The Microwave
Supporting the microwave properly is key before removing it. This step keeps the unit steady and prevents accidents. It helps protect both you and the microwave from damage. Use the right support methods to hold the microwave in place during uninstallation. Prepare carefully to make the process smooth and safe.
Get Help To Hold The Unit
Always ask someone to assist you. The microwave is heavy and bulky. Holding it alone can be risky. An extra pair of hands makes the task easier. Your helper can keep the microwave steady. This teamwork lowers the chance of dropping or hurting yourself.
Use A Secure Support Method
Choose a strong support tool like a sturdy shelf or a ladder. Place it under the microwave to hold its weight. Avoid using weak or unstable objects. Secure the microwave well before loosening any screws. Good support prevents sudden falls and damage. Double-check the setup before starting to remove the unit.
Remove Microwave From Wall Bracket
Removing an over-the-range microwave from its wall bracket is a key step in uninstalling the appliance. This process requires care to avoid damage to the microwave or the wall. Proper support and steady handling make the removal smooth and safe.
Follow these steps to detach the microwave from the wall bracket easily. Focus on controlling the microwave’s weight and securing its release from the mounting hardware.
Tilt Microwave Forward
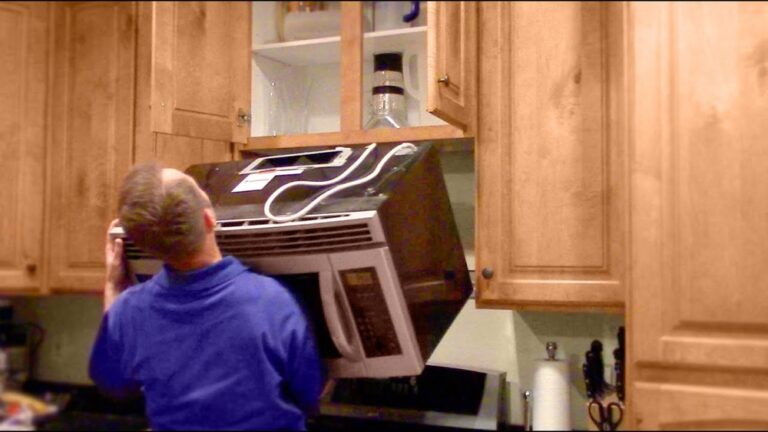
First, stand in front of the microwave. Hold the bottom edge firmly with both hands. Gently tilt the microwave forward. This angle helps release the back of the microwave from the wall bracket. Keep a steady grip to prevent slipping. The tilt allows access to the mounting tabs behind the unit.
Lift Off Wall Mount Tabs
After tilting, locate the wall mount tabs at the back. These tabs hook onto the mounting bracket attached to the wall. Carefully lift the microwave upwards to unhook it from the tabs. Support the microwave’s weight fully as you do this. Once free, gently pull the microwave away from the wall. Place it on a safe, stable surface to avoid damage.
Disconnect Electrical Connections
Disconnecting the electrical connections is a key step when uninstalling an over the range microwave. Safety is the top priority during this process. Properly cutting off the power prevents electrical shocks and damage.
Take your time to ensure all connections are fully disconnected before moving the microwave. This step makes the removal smooth and safe.
Unplug From Power Source
First, locate the microwave’s power cord. It is usually plugged into an outlet above the microwave or inside the cabinet above it. Pull the plug straight out to disconnect it from the power source.
Do not yank the cord or pull at an angle. Handle it gently to avoid damage to the cord or outlet.
Check For Additional Wiring
Look behind the microwave for any extra wires. Some models have hardwired connections inside the cabinet or wall. These need to be disconnected carefully.
If you find hardwired cables, turn off the circuit breaker before touching them. Use a voltage tester to confirm no electricity flows. Once safe, unscrew the wire nuts and separate the wires.
Keep track of all wires and connectors. This helps if you plan to install a new microwave later.
Remove Venting Components
Removing the venting components is a key step in uninstalling an over the range microwave. These parts connect your microwave to the kitchen’s ventilation system. Proper removal ensures no damage to the vents or your walls. Follow the steps carefully to detach all venting pieces safely and cleanly.
Detach External Vent Covers
Locate the vent covers on the outside of your home or kitchen. These covers protect the vent openings from debris and weather. Use a screwdriver to remove the screws holding the vent cover in place. Gently pull the cover away from the wall. Set the cover aside in a safe place. Check for any caulking or paint sealing the edges. If needed, carefully cut through these with a utility knife before pulling the cover.
Remove Vent Ducts
Inside the kitchen, find the vent ducts connected to your microwave. These ducts carry air from the microwave to the outside or a recirculation filter. Unscrew or unclip any fasteners securing the ducts. Carefully pull the duct away from the microwave and the vent opening. Be gentle to avoid bending or damaging the ductwork. If the ducts are sealed with tape or caulk, cut through the seal with a utility knife. Remove the ducts completely and clean any leftover debris.
Dispose Or Store The Microwave
After uninstalling your over-the-range microwave, decide whether to dispose or store it. Proper handling protects the environment and keeps your space safe. You can follow simple tips to dispose of the microwave safely or explore ways to reuse or store it for future use.
Safe Disposal Tips
Microwaves contain parts that can harm the environment. Take them to a local recycling center or hazardous waste facility. Do not throw the microwave in regular trash. Remove the microwave’s cord and any batteries before disposal. Check with your city for special disposal rules. Some stores offer take-back programs for old appliances. Always handle the microwave carefully to avoid injury.
Options For Reuse Or Storage
Consider donating the microwave if it still works. Charity shops or community centers might accept it. You can sell it online or give it to a friend. For storage, clean the microwave thoroughly before placing it in a dry area. Cover it with a cloth or plastic to protect from dust. Label the box clearly to find it easily later. Proper storage helps keep the microwave in good condition.

Credit: www.wikihow.com
Troubleshooting Common Issues
Uninstalling an over the range microwave can come with a few challenges. Common issues may slow down the process or cause frustration. Knowing how to handle these problems saves time and effort. Below are some frequent obstacles and tips to fix them.
Stuck Screws Or Bolts
Sometimes screws or bolts refuse to budge. Use a penetrating oil to loosen rust or grime. Let it sit for 10 to 15 minutes before trying again. Use the correct screwdriver or socket to avoid stripping. Apply firm, steady pressure rather than quick, sharp turns.
Microwave Too Heavy To Lift
Over the range microwaves are often heavy and bulky. Have a helper hold one side while you manage the other. Use a sturdy step stool or ladder for better balance. Lift with your legs, not your back, to avoid injury. Move slowly and carefully to prevent dropping.
Hidden Wiring Or Clips
Wiring and clips may be hidden behind the microwave. Always unplug the microwave before starting. Look for wires connected to the power source or exhaust fan. Gently disconnect wiring harnesses or remove clips with a flat tool. Take photos of connections to help with reinstallation.

Credit: www.youtube.com
Frequently Asked Questions
How To Detach An Over-the-range Microwave?
Support the microwave front, remove mounting bolts under the cabinet, lean it forward, unplug the cord, then lift it off the wall bracket.
What Holds An Over-the-range Microwave In Place?
An over-the-range microwave stays secure using a mounting bracket attached to wall studs. Bolts fix it to the cabinet above. A rear wall plate supports the microwave’s weight, ensuring stability and safety over the stovetop.
How To Uninstall A Microwave From A Wall?
Turn off power and unplug the microwave. Remove mounting bolts from the cabinet. Tilt the microwave forward, unhook it from the wall bracket, and carefully lift it off.
Conclusion
Uninstalling an over-the-range microwave is simple with the right steps. Always turn off power to stay safe. Support the microwave while removing bolts to prevent accidents. Carefully unplug and lift the unit from the wall bracket. Take your time and follow instructions closely.
This process saves money and prepares you for a new microwave. Now, you can enjoy a safer, cleaner kitchen space.