How to Set a Panasonic Microwave Clock: Easy Step-by-Step Guide
Setting the clock on your Panasonic microwave might seem like a small task, but having the right time displayed makes a big difference in your kitchen routine. Whether you want to keep track of cooking times or simply have the correct clock ready at a glance, knowing how to set your microwave’s clock is essential.
If you’ve ever felt frustrated trying to figure it out or found the buttons confusing, this guide is made just for you. In the next few minutes, you’ll learn the simple steps to set your Panasonic microwave clock quickly and correctly—no guesswork needed.
Keep reading, and you’ll have your microwave showing the exact time in no time!
Locate Clock Button
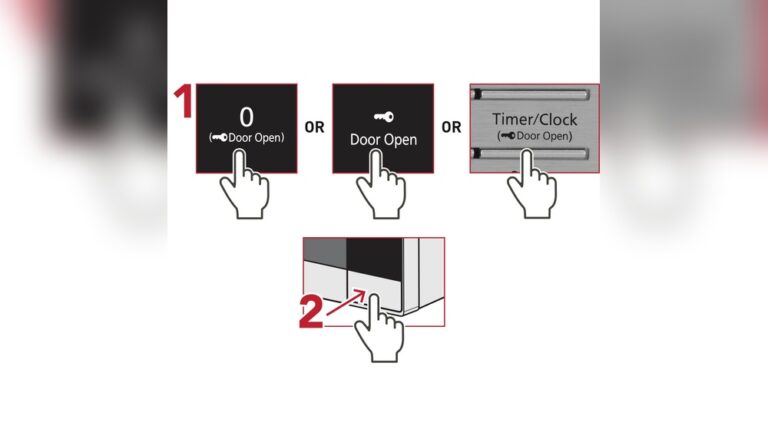
Finding the clock button is the first step to set the time on your Panasonic microwave. It controls the clock settings and starts the process. The button might have different labels depending on the microwave model. Knowing where it is helps you set the time quickly and easily.
Find Clock Or Timer/clock Label
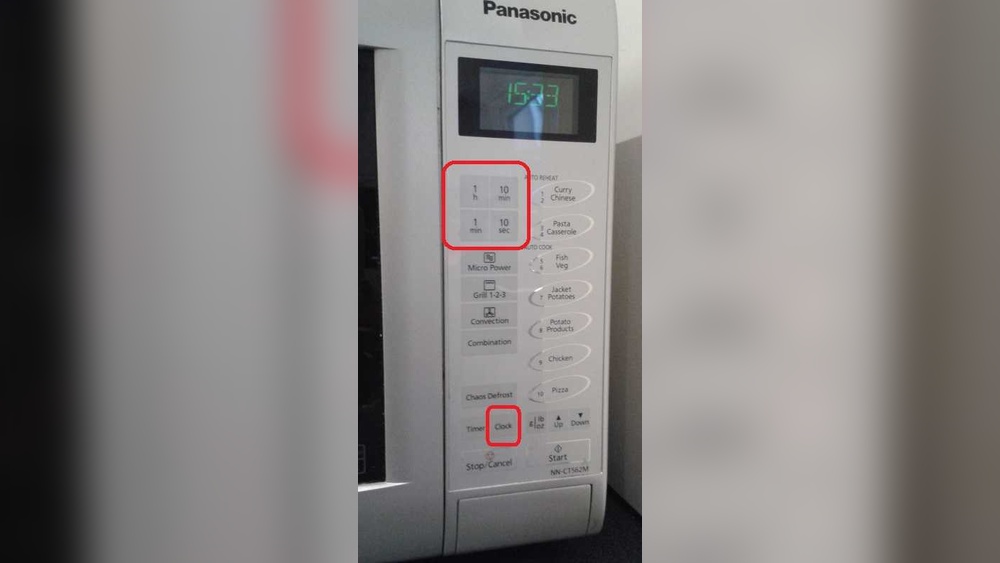
Look closely at the control panel for a button labeled “Clock.” Some models show “Timer/Clock” instead. This button is usually near the number pad or the display screen. The label is clear and easy to read. It may be a small or large button. Pressing this button activates the clock setting mode.
Identify Number Pad Or Dial
Check if your microwave has a number pad or a dial to enter the time. Most Panasonic microwaves use a number pad with digits 0-9. Others might have a rotating dial instead. The dial turns left or right to adjust numbers. Use the number pad or dial to set the correct hour and minutes after pressing the clock button twice.

Credit: www.youtube.com
Activate Clock Setting
Activating the clock setting on your Panasonic microwave is the first step to display the correct time. This process prepares the microwave to accept the new time input. The microwave’s display will signal when it is ready for you to enter the time.
The clock setting mode is simple to access. It involves pressing a specific button twice and watching for a visual cue on the screen. This cue tells you the microwave is waiting for the time to be set.
Press Clock Button Twice
Locate the button labeled “Clock” or “Timer/Clock” on the control panel. Press this button two times quickly. This action puts the microwave into clock setting mode. You will see the display change, indicating the clock is ready for adjustment.
Pressing the button twice prevents accidental changes to the clock. It ensures you want to set or change the time. This step is important before moving to the next.
Watch For Blinking Colon
After pressing the clock button twice, look at the display closely. A blinking colon (:) will appear between the numbers. This blinking colon shows the microwave is in clock setting mode.
The blinking colon is a clear sign to start entering the correct time. It lets you know the microwave is waiting for your input. Once the time is set, you can confirm and save it.
Set Time With Number Pad
Setting the time on your Panasonic microwave is easy with the number pad. This method lets you quickly input the exact time. Follow simple steps to get the clock right. The blinking colon on the display shows you are in time-setting mode. Use the number pad to enter the current time. Confirm the time to finish setting the clock.
Enter Correct Time Digits
Press the “Clock” or “Timer/Clock” button twice. The colon on the display will blink. Use the number pad to type the current time. For example, for 3:45, press 3, then 4, then 5. Make sure you enter the correct digits in order. Double-check the numbers before moving on. Press the “Clock” button again to save the time.
Switch Between Am And Pm If Needed
Some Panasonic microwaves require selecting AM or PM. After entering the time, look for the AM/PM indicator. Use the number pad or a specific button to toggle between AM and PM. Choose the correct setting based on the current time. If your microwave does not show AM/PM, it uses 24-hour format. Confirm your choice by pressing the “Clock” button once more.
Set Time With Dial
Setting the time on a Panasonic microwave with a dial is simple and quick. This method lets you adjust the clock easily without using a number pad. After activating the clock setting mode, you use the dial to set the hour and minutes. Fine tuning is possible with the +/- buttons to get the exact time.
Turn Dial To Adjust Time
First, press the “Clock” or “Timer/Clock” button twice. The colon on the display will start blinking. This shows the microwave is ready for time setting. Now, turn the dial slowly to change the hour. Keep turning until the correct hour appears on the screen. After setting the hour, press the dial or wait for the display to switch to minutes. Then, turn the dial again to set the minutes. This step lets you move through numbers smoothly and quickly.
Use +/- Buttons For Fine Tuning
Once the rough time is set with the dial, use the +/- buttons for small changes. These buttons help adjust the time by one minute at a time. Press + to increase minutes or – to decrease minutes. This makes sure the clock shows the exact time. After setting the correct time, press the “Clock” or “Timer/Clock” button once to save it. Your microwave clock is now ready to use and shows the right time.
Confirm Time Setting
Confirming the time setting on your Panasonic microwave is essential to ensure the clock shows the correct time. This step finalizes the setting process and makes the clock start running normally. The microwave uses a simple method to confirm the time, which involves pressing the clock button again and observing the blinking colon on the display.
Press Clock Button Again
After entering the correct time, press the clock button once more. This action tells the microwave that you have finished setting the time. The display will stop accepting new input and prepare to show the current time. Pressing the clock button again locks in your setting.
Stop Blinking Colon
The blinking colon between the hour and minutes shows the clock is in setting mode. When you press the clock button again, the colon stops blinking. This change means the microwave has saved the time. The clock now runs normally and displays the set time continuously.
Credit: help.na.panasonic.com
Tips For Different Models
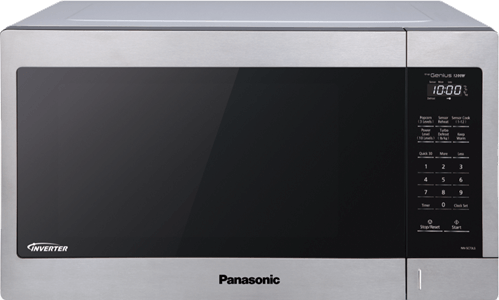
Different Panasonic microwave models use various control styles. These styles affect how you set the clock. Knowing your model type helps set the time quickly and correctly. The two main types are microwaves with touch pads and those with mechanical dials. Follow the tips below for each model type.
Microwaves With Touch Pads
Locate the button labeled “Clock” or “Timer/Clock” on the touch pad. Press this button twice. The colon on the display will start blinking. Enter the current time using the number keys. For example, press 1, 2, 3 for 1:23. Press the “Clock” button once more to save the time. The blinking colon will stop, confirming the clock is set.
Be sure to use the correct format, usually 12-hour, without AM or PM buttons. Check the manual if unsure. Avoid pressing other buttons during the process to prevent errors.
Microwaves With Mechanical Dials
Find the “Clock” or “Timer/Clock” button on the control panel. Press this button twice to enter clock setting mode. The colon on the display will blink. Turn the mechanical dial to change the time. Rotate clockwise or counterclockwise to set hours and minutes. Once the correct time shows, press the “Clock” button again to confirm.
Mechanical dials require gentle turning. Avoid forcing the dial to prevent damage. Setting the time with dials takes a few seconds longer but is straightforward. If unsure, consult the user manual for your specific model.
Troubleshooting Clock Issues
Setting the clock on your Panasonic microwave should be simple. Sometimes, the clock may not respond or reset unexpectedly. These common issues can cause frustration. Knowing how to troubleshoot helps you fix problems quickly. Keep your microwave clock accurate for better cooking results.
Clock Not Responding
If the clock does not respond to button presses, check the microwave’s control panel. Dirt or grease can block the buttons. Clean the panel gently with a soft cloth. Avoid using too much water or harsh chemicals.
Try pressing the “Clock” or “Timer/Clock” button twice. If the colon does not blink, the microwave might need a reset. Unplug the microwave for 30 seconds, then plug it back in. This can clear minor electronic glitches.
If the clock still does not respond, your microwave may have a faulty control board. Contact Panasonic customer support for further help. Avoid opening the microwave yourself as it can be dangerous.
Time Reset After Power Outage
Power outages can reset the clock on your Panasonic microwave. This happens because the microwave does not have a backup power source for the clock. After power returns, the display may show 12:00 or no time at all.
Reset the clock by pressing the “Clock” button twice. Enter the correct time using the number pad or dial. Press the “Clock” button again to save the time. This will restore the correct time on the display.
To avoid frequent resets, consider using a power surge protector. It helps protect your microwave from sudden power changes. Keeping the clock set correctly ensures your microwave timer works as expected.

Credit: www.youtube.com
Frequently Asked Questions
How Do I Change The Clock On My Panasonic Microwave?
Press the “Clock” or “Timer/Clock” button twice until the colon blinks. Enter the correct time using the number pad or dial. Press the button again to confirm and stop the blinking. Your Panasonic microwave clock is now set.
How Do I Set The Time On A Panasonic?
Press the “Clock” or “Timer/Clock” button twice until the colon blinks. Enter the correct time using the number pad or dial. Press the button again to confirm and stop the blinking.
How To Set The Clock On A Panasonic Nn Sb658s Microwave?
Press the “Clock” or “Timer/Clock” button twice until the colon blinks. Enter the time using the number pad or dial. Press the button again to confirm and stop blinking. The clock is now set.
Conclusion
Setting the clock on your Panasonic microwave is quick and simple. Just follow the steps carefully, and the time will display correctly. A blinking colon signals the clock is ready to be set. Use either the number pad or dial to enter the right time.
Confirm by pressing the clock button again. Now, your microwave shows the exact time, helping you cook with ease. Keeping the clock accurate means no more guessing during your cooking. Try it today and enjoy the convenience it brings to your kitchen.