How to Replace an Over the Range Microwave: Easy Step-by-Step Guide
Replacing your over-the-range microwave might sound tricky, but with the right steps, you can do it yourself and save time and money. Whether your old microwave stopped working or you want to upgrade to a newer model, this guide will walk you through the process in simple, easy-to-follow steps.
You’ll learn how to safely remove the old unit, find the right spots to secure the new one, and handle the electrical and venting connections without stress. Ready to take control of your kitchen upgrade? Keep reading, and you’ll have your new microwave installed confidently before you know it.
Credit: www.youtube.com
Tools And Materials Needed
Replacing an over-the-range microwave requires specific tools and materials. Having everything ready makes the job smoother and safer. This section covers the essentials you need before starting the project.
Essential Tools
You will need a drill with screwdriver bits to remove and install screws. A stud finder helps locate wall studs for secure mounting. A tape measure ensures correct placement and alignment. A level keeps the microwave straight. Wire strippers and electrical tape are needed for electrical connections. Lastly, a utility knife can help cut any necessary materials.
Safety Equipment
Safety glasses protect your eyes from dust and debris. Work gloves safeguard your hands from sharp edges. A dust mask prevents inhaling particles. Use a sturdy ladder or step stool for reaching high places. Make sure the area is well-lit to avoid accidents. Never skip these safety items to prevent injuries.
Helper Assistance
Microwaves are heavy and bulky. Having a helper makes lifting and positioning easier. A second set of hands reduces the risk of dropping the appliance. Your helper can hold the microwave while you secure it. Teamwork saves time and prevents strain or injury. Plan to have someone assist you during installation.
Preparing For Removal
Preparing to remove an over the range microwave is the first important step. Proper preparation ensures safety and makes the process smoother. It helps avoid damage to your kitchen and injury to yourself. Follow these key steps carefully before starting the removal.
Turning Off Power
Safety starts with cutting off the power supply. Locate the circuit breaker for the microwave and switch it off. Double-check by trying to turn on the microwave. No power means it is safe to proceed. This step prevents electric shocks during removal.
Clearing The Area
Clear the space under and around the microwave. Remove any items on the stove and nearby countertops. Clear the floor to have enough room to work. A clean area reduces accidents and allows easy movement. It also protects your belongings from dust and damage.
Locating Studs And Fasteners
Find the wall studs behind the microwave. Use a stud finder or tap the wall to locate them. The microwave is usually secured to these studs for support. Identify all screws and bolts holding the microwave in place. Knowing their locations helps during safe removal and reinstallation.
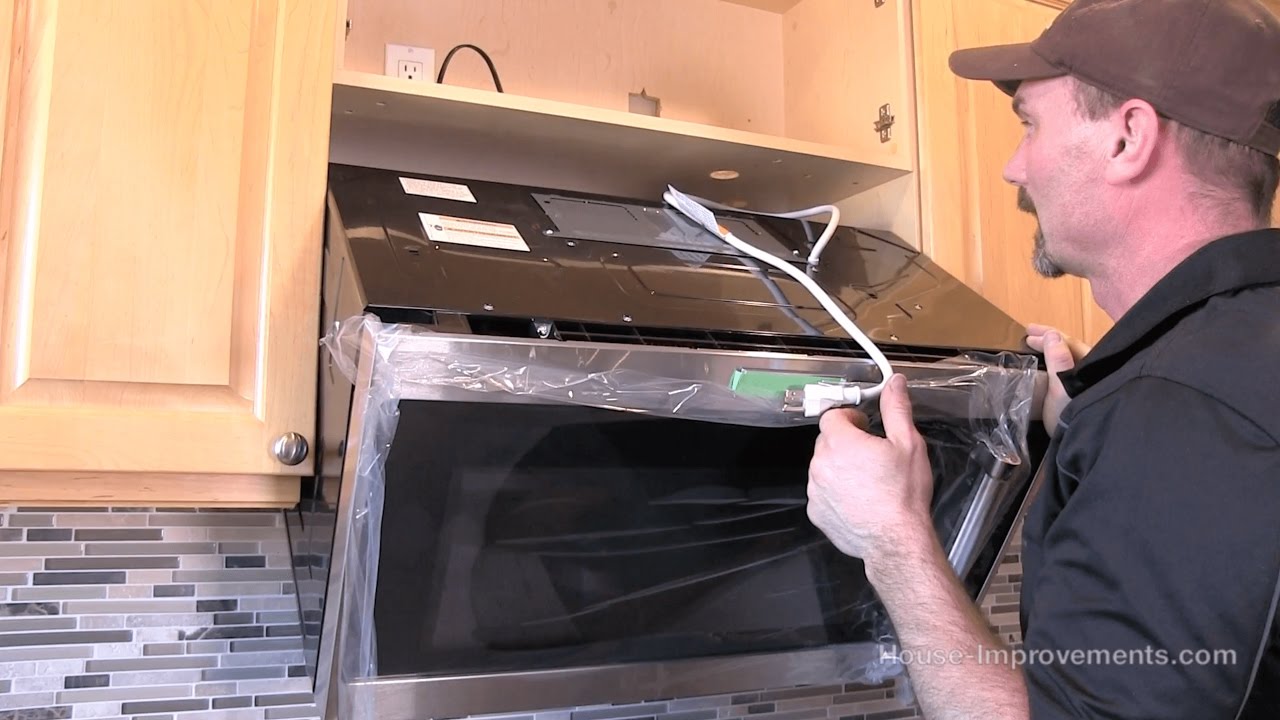
Removing The Old Microwave
Removing the old over-the-range microwave is the first step in the replacement process. This task requires care to avoid damage to your kitchen or injury. Proper preparation and safety measures will make removal easier and safer.
Detaching Screws And Brackets
Locate the screws that hold the microwave in place. These are usually found on the top or inside the cabinet above the microwave. Use a screwdriver to remove all mounting screws carefully. Keep the screws and brackets for later use or disposal. The microwave may be attached to a mounting plate on the wall. Gently unhook the appliance from this plate after removing the screws.
Handling The Appliance Safely
The microwave is heavy and bulky. Ask for help to hold and remove it safely. Lift with your legs, not your back, to avoid injury. Avoid sudden movements to prevent dropping the microwave. Place the appliance on a sturdy surface once removed. Clear the area to make space for the new microwave installation.
Disconnecting Electrical And Vent Connections
Before starting, ensure the microwave is unplugged or the power is turned off at the breaker. Carefully disconnect the power cord from the outlet. Some models may have a hardwired connection requiring extra caution. Locate the vent duct connected to the microwave. Detach the vent by loosening screws or clips holding it in place. Seal or cover the vent opening to prevent debris from entering your kitchen.
Assessing Installation Space
Assessing the installation space is the first step to replace an over the range microwave. It ensures the new microwave fits well and works properly. Careful measurement and checking the vent are important. This helps avoid problems during installation.
Take your time to understand the space available. It will save effort and money later on. Let’s explore what to check before buying your new microwave.
Checking Vent Compatibility
Over the range microwaves need proper venting for safety and performance. Check if your current vent connects to outside or recirculates air inside. Find out the vent type and size. Your new microwave must match the existing vent setup.
Look for vent location and duct size behind the microwave. Note the vent direction: top, rear, or bottom. This prevents needing extra ductwork or adapters.
Measuring Cabinet And Wall Space
Measure the width, height, and depth of the cabinet opening. Use a tape measure for accuracy. Write down these numbers. Compare them with the new microwave’s dimensions. Make sure there is space for the microwave and ventilation.
Check the wall behind for studs or obstacles. Microwave mounts need strong support. Also, check if the cabinet above can hold the microwave weight.
Addressing Potential Modifications
Sometimes the space needs changes for the new microwave. You might need to adjust the cabinet or wall. Vent ducts may require resizing or rerouting. Electrical outlets may need updating to match the microwave’s power needs.
Plan these changes before starting installation. This avoids delays and extra costs. Small modifications can make the new microwave fit perfectly and work safely.
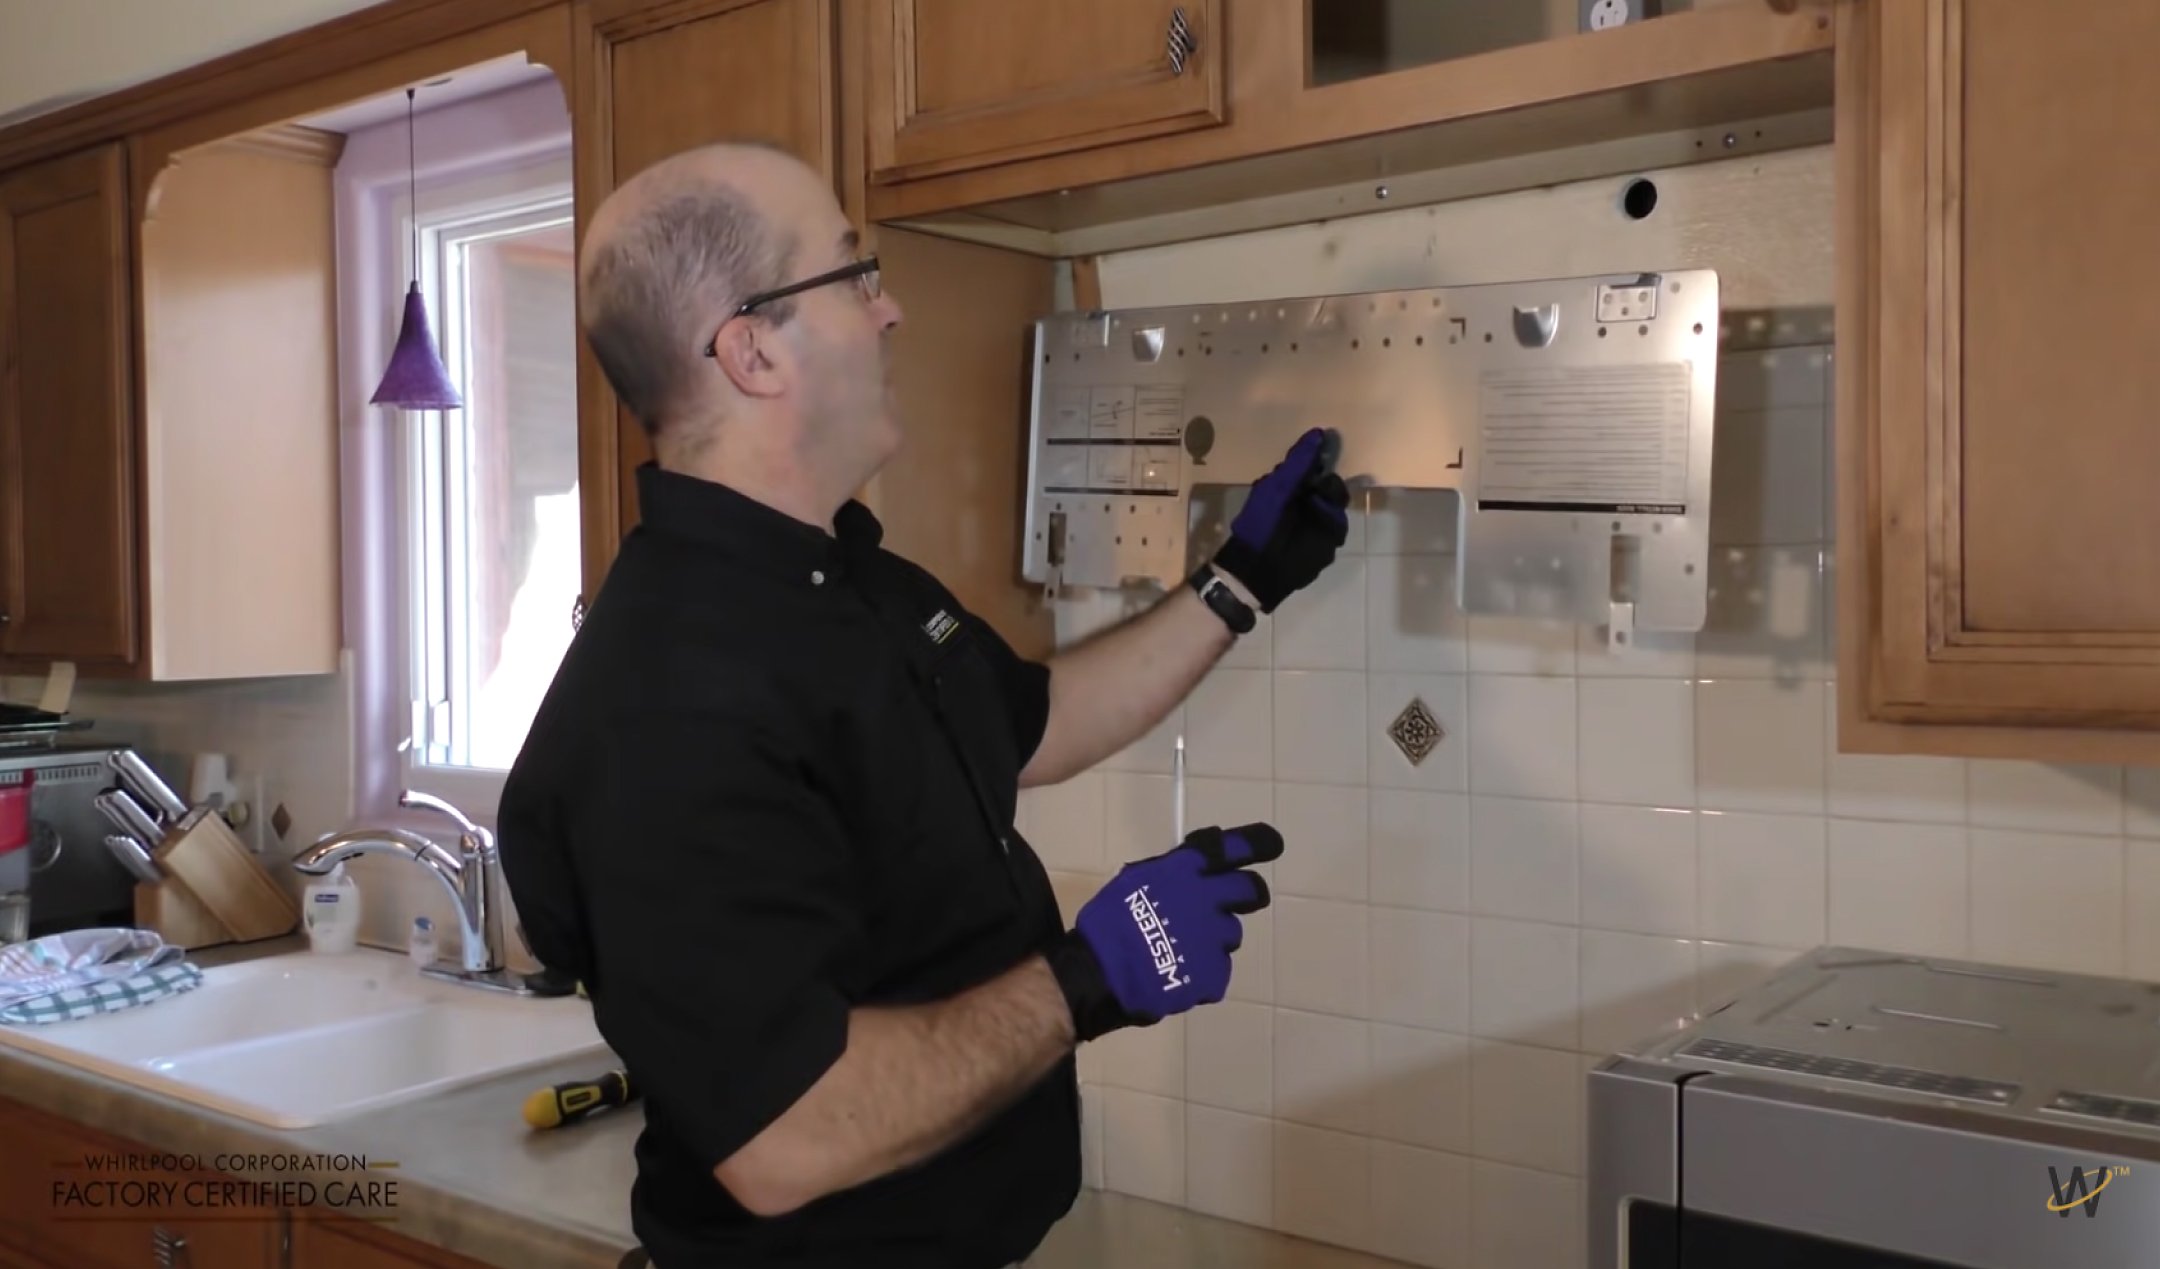
Installing The Mounting Bracket
Installing the mounting bracket is a crucial step in replacing an over-the-range microwave. This bracket holds the microwave securely in place above the stove. Proper installation ensures safety and stability. Take your time with this process for the best results.
Using The Template For Placement
Most microwaves come with a paper template. This template shows where to drill holes for the bracket. Tape it to the wall at the right height. Use a level to keep it straight. Mark the drill points clearly on the wall.
Anchoring To Studs And Walls
Studs provide strong support for the mounting bracket. Use a stud finder to locate them behind the wall. Drill pilot holes into the studs at marked points. Screw the bracket into these holes tightly. Avoid attaching the bracket only to drywall. It will not hold the microwave’s weight safely.
Using Toggle Bolts When Necessary
Sometimes studs do not align with the template holes. Use toggle bolts to anchor into drywall securely. Drill holes slightly bigger than the toggle bolts. Insert the toggle and tighten the screws slowly. The toggle will expand behind the wall for strong support. This method works well when studs are not available.
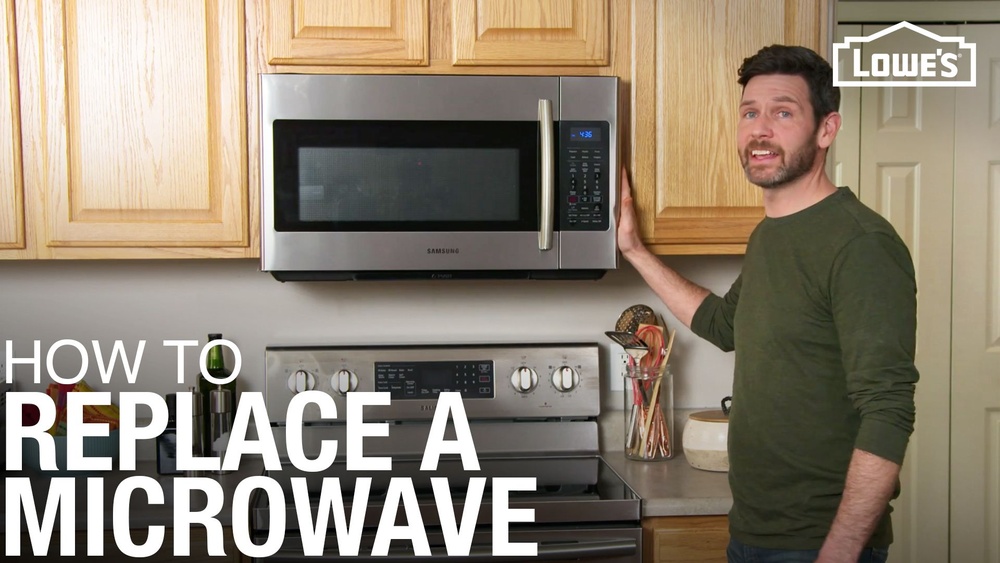
Credit: www.whirlpool.com
Mounting The New Microwave
Mounting the new over-the-range microwave correctly is crucial for safety and function. This step involves carefully lifting, positioning, and securing the microwave to your kitchen structure. You must also connect the electrical and vent systems properly to ensure the appliance works well.
Lifting And Positioning
Start by having a helper assist you with lifting the microwave. These units are heavy and bulky. Hold the microwave firmly and lift it to the mounting area. Align the back of the microwave with the mounting bracket or screws on the wall. Make sure the unit sits level and flush against the wall.
Securing To Upper Cabinets
Once positioned, fasten the microwave to the upper cabinets using the supplied screws. Locate the mounting holes on the top of the microwave. Drive the screws securely into the cabinet base to support the microwave’s weight. Check that the microwave does not wobble or shift after securing.
Connecting Electrical And Vent Systems
Connect the microwave’s power cord to the existing outlet. Ensure the outlet matches the microwave’s voltage requirements. Next, attach the vent system if your microwave has external venting. Secure the ductwork to the microwave’s vent outlet and the kitchen exhaust vent. This connection helps remove cooking fumes efficiently.
Testing And Final Adjustments
After installing your over-the-range microwave, testing and making final adjustments is essential. This step ensures the appliance works correctly and safely. Testing lets you catch any issues before regular use. It also confirms the installation is secure and functional.
Powering On And Testing Functions
Start by plugging in the microwave and turning on the power. Check the display panel to see if it lights up. Test basic functions like cooking, defrosting, and timer settings. Listen for unusual sounds or vibrations. Make sure the microwave heats food evenly. Test the interior light and door latch for proper operation.
Checking Vent Operation
Most over-the-range microwaves have built-in vents. Turn on the vent fan at different speed settings. Feel for airflow at the vent outlet. The fan should run quietly without rattling noises. Check if the vent light turns on and off correctly. Proper venting removes smoke and steam while cooking. Confirm the vent connects well to the existing ductwork.
Ensuring Stability And Safety
Check the microwave’s mounting brackets and screws. The unit should feel stable and not move when pushed gently. Verify there are no gaps between the microwave and the wall or cabinet. Ensure the microwave door closes firmly and seals tightly. Keep the area around the microwave clear of obstructions. Confirm electrical cords are secure and not pinched or damaged.
Troubleshooting Common Issues
Replacing an over the range microwave can present a few common issues. Identifying and solving these problems makes the installation smoother. This section covers key troubleshooting tips to help you manage typical challenges.
Dealing With Non-standard Cabinets
Many kitchens have cabinets that don’t match standard sizes. This can cause gaps or misalignment when installing the microwave. Measure the space carefully before buying a new unit. Custom trim or filler pieces may be needed to cover gaps. Use a level to ensure the microwave sits straight. Secure the microwave to the wall and cabinet firmly to avoid wobbling.
Handling Electrical Wiring Challenges
Over the range microwaves need a dedicated electrical outlet nearby. Older kitchens may lack proper wiring or have outdated circuits. Check the existing power supply before installation. If the outlet is missing or unsafe, hire a licensed electrician. Avoid using extension cords or adapters. Ensure the wiring can handle the microwave’s power load to prevent electrical hazards.
Adjusting For Venting Differences
Microwave vents vary by model and kitchen setup. Some microwaves vent out through the wall, others recirculate air with charcoal filters. Identify your kitchen’s venting style before replacing the microwave. New units may not line up with existing ducts, requiring ductwork adjustments. Use flexible vent pipes if rigid ducts don’t fit well. Proper venting prevents smoke and odors from building up in your kitchen.

Credit: www.premiumhomesource.com
Frequently Asked Questions
Is Replacing An Over The Range Microwave Hard?
Replacing an over-the-range microwave is moderately easy with existing wiring and venting. It requires lifting, securing to studs, and careful handling. Complex electrical or ductwork changes need professional help. Always turn off power and use a stud finder for safe installation.
Is It Worth Repairing An Over The Range Microwave?
Repairing an over-the-range microwave is worth it if the cost is less than replacement. Consider age, damage, and repair price.
Do All Over The Range Microwaves Fit?
Not all over-the-range microwaves fit every space. Check your cabinet size, vent type, and mounting bracket compatibility before buying.
Conclusion
Replacing an over-the-range microwave can be straightforward with the right steps. Prepare your tools and ask for help when lifting the microwave. Always secure the unit to wall studs and cabinets for safety. Check the vent and electrical connections before final installation.
Taking your time prevents mistakes and keeps the process smooth. Following these tips ensures a successful replacement and a functional kitchen appliance. Enjoy your upgraded microwave and the convenience it brings.