How to Remove Ge Microwave Over the Range: Easy Step-by-Step Guide
If you’ve ever faced the challenge of removing your GE microwave over the range, you know it’s not as simple as just pulling it off the wall. These appliances are securely mounted, and taking one down requires some careful steps to avoid damage to your kitchen or injury to yourself.
Whether you’re upgrading to a new model or just need to fix something behind it, knowing exactly how to remove your GE over-the-range microwave can save you time, hassle, and frustration. In this guide, you’ll get clear, easy-to-follow instructions that put you in control, so you can confidently tackle the job and get your microwave down safely and smoothly.
Keep reading—you’re about to make what seems complicated feel surprisingly simple.

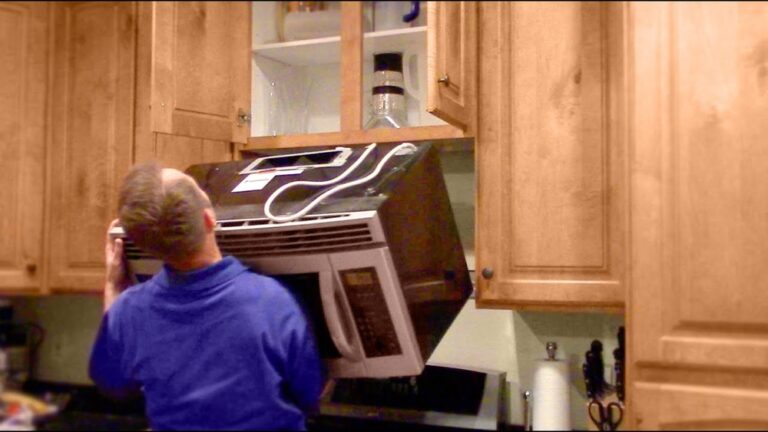
Credit: www.youtube.com
Tools And Materials
Removing a GE microwave over the range requires specific tools and materials. Having everything ready makes the process easier and safer. Gather all necessary items before starting to avoid interruptions.
Essential Tools
You will need a drill with screwdriver bits to remove screws quickly. A socket wrench set helps with bolts securing the microwave. A putty knife can help to loosen any seal or paint around edges. A stud finder locates wall studs for safe handling. A step ladder ensures you reach the microwave comfortably. Keep a flashlight nearby to see in dark spaces above the stove.
Safety Gear
Wear safety goggles to protect your eyes from dust and debris. Use work gloves to prevent cuts and improve grip. A dust mask keeps you safe from particles released during removal. Consider wearing closed-toe shoes for foot protection. Ensure your clothing fits well to avoid getting caught on any parts.
Prepare The Microwave
Preparing your GE microwave for removal is the first key step. This ensures safety and ease during the process. Follow these steps carefully to get started.
Proper preparation helps avoid damage to your microwave and surrounding areas.
Disconnect Power
Locate the microwave’s power source. Unplug the microwave from the electrical outlet. If the plug is hard to reach, turn off the circuit breaker. This stops any electrical current flowing to the microwave. Never attempt removal while the microwave is still powered. This step protects you from electric shocks.
Clear Surrounding Area
Remove any items near the microwave. Clear the countertop and stovetop below. This gives you enough space to work safely. Also, take down any decorations or small appliances nearby. Keeping the area clear prevents accidents and damage during removal.
Access Mounting Hardware
Accessing the mounting hardware is the first step to remove your GE microwave over the range. This step allows you to find and undo the bolts holding the microwave in place. Proper access ensures a smooth and safe removal process.
Most over-the-range microwaves are secured with bolts that connect to the cabinet above. Opening this cabinet gives you a clear view and space to work on these fasteners.
Open Cabinet Above Microwave
Start by opening the cabinet directly above the microwave. This cabinet floor hides the bolts securing the microwave. Use a flashlight if the space is dark. Clear any items inside to avoid accidents. Opening this cabinet creates enough room to reach the mounting bolts safely.
Locate Bolts And Screws
Look for three large bolts near the cabinet floor’s front edge. These bolts pass through the cabinet and into the microwave. They hold the microwave firmly in place. Use a socket wrench or screwdriver to remove them. Keep these bolts safe if you plan to reinstall the microwave later.

Credit: www.wikihow.com
Remove Mounting Bolts
Removing the mounting bolts is a key step in taking down your GE over-the-range microwave. These bolts hold the microwave firmly in place under the cabinet. Properly removing them ensures the microwave can be safely taken off without damage or injury.
Take your time and follow the right order for unscrewing the bolts. Support the microwave front to keep it stable while you work. This step helps avoid dropping or tipping the microwave during removal.
Support Microwave Front
Before unscrewing any bolts, hold the microwave’s front edge firmly. Use one hand or ask someone to help you support the weight. The microwave is heavy and can fall suddenly if not held securely.
Make sure the microwave is steady. This prevents damage to your stove or countertop. Also, it protects you from injury by stopping the microwave from slipping or falling.
Unscrew Bolts
Locate the mounting bolts near the microwave’s front edge under the cabinet. These bolts usually go through the cabinet floor. Use a screwdriver or a drill with the right bit to remove them.
Turn each bolt counterclockwise until it comes out completely. Keep the bolts in a safe place for later use or disposal. Once all bolts are removed, you can carefully lean the microwave forward and detach it from the wall bracket.
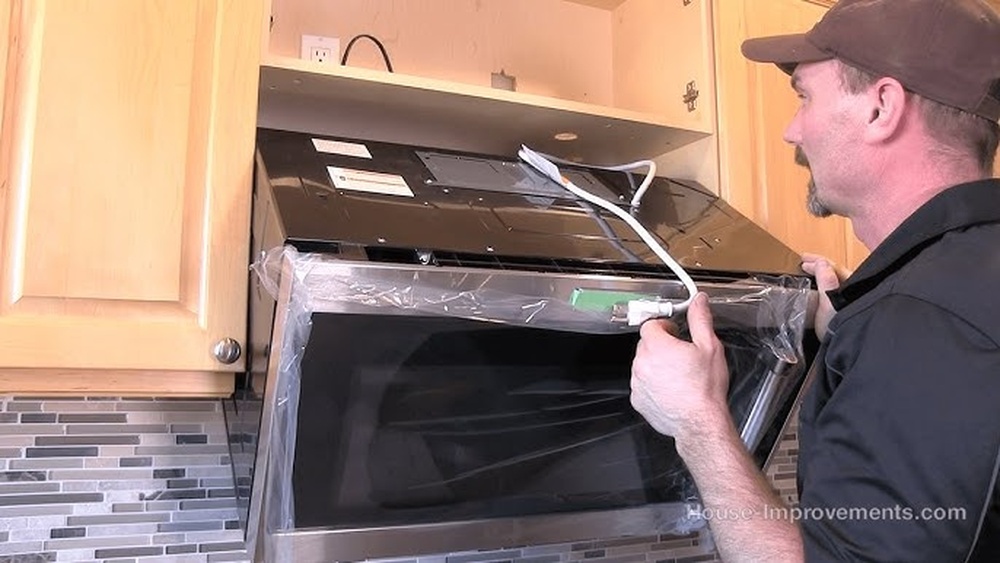
Detach Microwave From Wall
Detaching the GE microwave from the wall is a key step in removal. It requires care and the right technique. The microwave is secured to a mounting bracket on the wall. This bracket holds the weight and keeps the microwave stable above your stove.
Start by supporting the front of the microwave. This prevents it from falling or tilting suddenly. Then, follow the steps to safely detach it from the wall plate.
Tilt Microwave Forward
After removing the mounting screws, gently tilt the microwave forward. This action releases the bottom hooks from the wall bracket. Keep holding the microwave firmly to avoid dropping it.
Tilt just enough to free the bottom from the bracket. Avoid pushing the microwave too far forward. This step makes the back easier to lift off the wall plate.
Lift Back Off Wall Plate
Once tilted, lift the back of the microwave upward. The back tabs will slide out from the wall plate slots. Use steady hands to lift the microwave clear of the bracket.
Make sure the microwave is fully detached before moving it away. This method protects your walls and prevents damage to the appliance. With the microwave free, you can place it safely aside for further work.

Credit: www.wikihow.com
Disconnect Additional Connections
Disconnecting additional connections is a crucial step in removing your GE microwave over the range. This step ensures safety and prepares the microwave for easy removal. Handle all connections carefully to avoid damage or electrical hazards.
Unplug Power Cord
Locate the power cord behind the microwave. Gently pull the plug from the outlet. Avoid pulling the cord itself to prevent damage. If the cord is hard to reach, use a flashlight to see better. Make sure the microwave is completely unplugged before moving on.
Remove Venting Components
Check if your microwave has venting parts attached. These parts connect the microwave to your home’s ventilation system. Unscrew or unclip the vent cover carefully. Keep the screws safe for later use. Detach the vent pipe from the microwave gently. This step frees the microwave from the wall and makes removal easier.
Handle Microwave Removal
Removing a GE over-the-range microwave requires careful handling. This step ensures safety and protects the microwave and surrounding area. Follow each instruction slowly and with control. Avoid rushing to prevent damage or injury.
Support the microwave firmly before detaching it from the wall and cabinet. This will keep it steady and prevent it from falling. Proper handling will make the removal process smooth and safe.
Carefully Lower Microwave
Start by loosening the mounting screws that hold the microwave in place. Hold the front of the microwave to keep it steady. Slowly tilt it forward to release the back hooks from the wall bracket. Gently lower the microwave down. Keep it balanced and avoid sudden movements. Place it on a soft surface to avoid scratches.
Use Assistance If Needed
The microwave can be heavy and awkward to handle alone. Ask a friend or family member to help hold the microwave. Two people can support the weight better and reduce risk of dropping it. Communicate clearly to coordinate your movements. This teamwork makes the removal safer and easier.
Post-removal Steps
After removing your GE microwave over the range, some important steps follow. These post-removal tasks prepare your kitchen for the next appliance or repair work. Taking time now avoids issues later. The first step is to check the mounting bracket. Then, clean the installation area thoroughly. Both steps ensure safety and a neat appearance.
Inspect Mounting Bracket
Look closely at the mounting bracket left on the wall. Check for any damage or rust. A strong bracket keeps your microwave secure. If it shows wear, consider replacing it before installing a new microwave. Confirm the bracket is firmly attached to the wall studs. Loose or weak brackets can cause accidents. Tighten all screws and bolts. Use a level to ensure the bracket is straight. This guarantees proper microwave alignment later.
Clean Installation Area
Remove dust, grease, and debris from the wall and cabinet surface. Use a mild cleaner and a soft cloth to avoid damage. Clean the area under the cabinet and the wall plate. Dirt buildup can prevent the new microwave from fitting properly. Check the electrical outlet and vent openings too. Clear any blockages to maintain good airflow and safety. A clean installation area helps your new microwave work efficiently and look great.
Tips For Replacement
Replacing your GE microwave over the range requires careful preparation.
Following simple tips helps ensure a smooth and safe replacement process.
Focus on compatibility and mounting setup before installing the new unit.
Check Compatibility
Verify the new microwave fits your kitchen space perfectly.
Measure width, height, and depth of the old unit and cabinet space.
Confirm electrical requirements match your kitchen’s power supply.
Check if the venting system works with the new microwave model.
Using compatible units prevents installation problems and poor performance.
Prepare Mounting Bracket
Inspect the existing mounting bracket for damage or wear.
Decide if you can reuse it or if a new bracket is needed.
Secure the bracket to wall studs for strong support.
Use a stud finder to locate studs behind the wall.
Ensure the bracket is level to avoid a crooked microwave.
Tighten all screws firmly to hold the microwave safely in place.
Frequently Asked Questions
How To Detach An Over-the-range Microwave?
Support the microwave front, unscrew the bolts securing it to the cabinet, then tilt it forward. Unplug and lift the back off the wall bracket to remove.
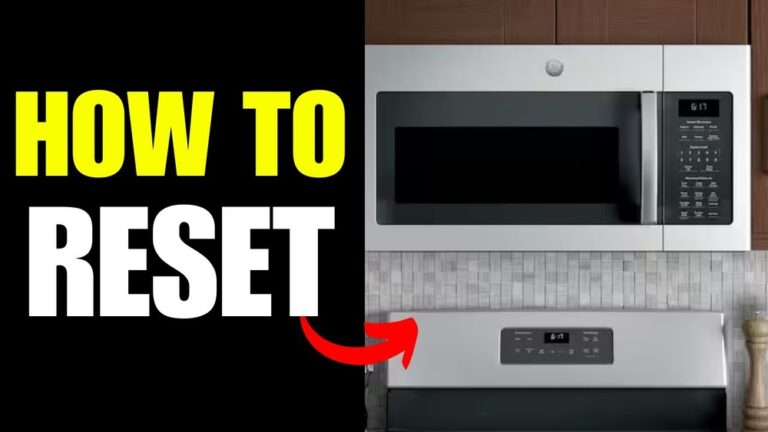
How To Unlock A Ge Over-the-range Microwave?
To unlock a GE over-the-range microwave, press and hold the “Clear/Off” or “Stop/Reset” button for about 3 seconds. The control lock icon will disappear, indicating the microwave is unlocked and ready to use.
What Holds An Over-the-range Microwave In Place?
An over-the-range microwave stays secure with a metal mounting bracket attached to wall studs. Bolts fasten it to the cabinet above. This setup supports the microwave’s weight and keeps it stable above the stove.
Conclusion
Removing a GE microwave over the range is simpler than it seems. Start by supporting the microwave’s front while unscrewing bolts. Then, tilt it forward carefully to unplug and detach from the wall bracket. Take your time to avoid damage or injury.
Following these steps helps ensure a smooth removal process. Now, you can easily replace or clean your microwave space. Stay safe and use the right tools for best results.