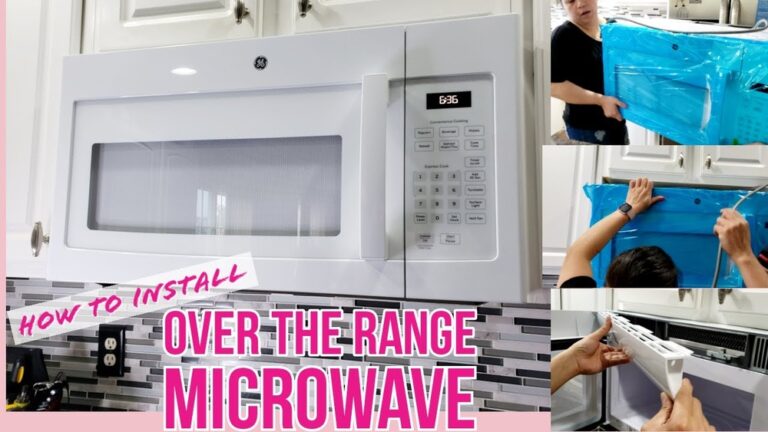
How to Install Ge Microwave Over the Range: Easy Step-by-Step Guide
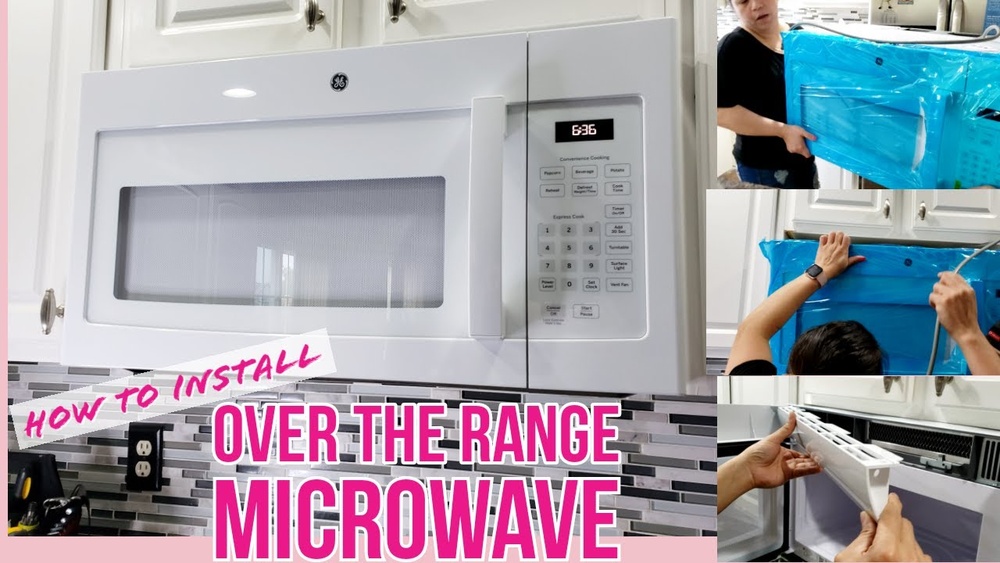
Thinking about installing your GE microwave over the range but worried it might be complicated? You’re not alone.
Many homeowners hesitate because they imagine a tough, technical job. The truth is, with the right steps and tools, you can do this yourself and save both time and money. This guide will take you through each simple step, making sure your microwave is safely and securely mounted above your stove.
By the end, you’ll enjoy more kitchen space and the convenience of a perfectly installed GE microwave. Ready to transform your kitchen? Let’s get started!
Prepare For Installation
Preparing for the installation of your GE microwave over the range is a crucial first step. Proper preparation ensures a smooth and safe installation process. This phase helps you avoid common mistakes and saves time.
Focus on gathering the right tools, inspecting the microwave and its parts, and clearing the installation area. Each task sets the foundation for a successful setup.
Gather Necessary Tools
Collect all tools before starting. You will need a drill, screwdriver, measuring tape, level, stud finder, and pencil. Having these tools ready prevents interruptions during installation. Check if your microwave package includes any special hardware or tools.
Inspect Microwave And Parts
Open the microwave box carefully. Check the microwave for any visible damage. Confirm all parts listed in the manual are present. Missing or damaged parts can delay installation. Keep the manual close for reference during assembly.
Clear Installation Area
Remove items from the cabinet above the stove. Clean the wall and surrounding area to ensure a smooth mount. Make sure the area is well-lit and free of obstacles. Clearing space improves safety and access during installation.
Locate Wall Studs
Locating wall studs is a crucial step when installing a GE microwave over the range. Studs provide the necessary support for the microwave’s weight. Without securing the unit to studs, the microwave could fall, causing damage or injury. Follow these simple steps to find and mark the studs accurately before mounting.
Use Stud Finder
Begin by using a stud finder to detect the wooden studs behind your wall. Move the stud finder slowly across the wall above the stove area. The device will beep or light up when it finds a stud. Mark each stud location carefully.
Mark Stud Positions
After finding each stud, use a pencil to mark their exact positions on the wall. Make multiple marks at different heights to ensure accuracy. These marks will guide where to place the mounting bracket. Double-check the marks before drilling holes.
Determine Mounting Height
Measure the height where the microwave will sit above the stove. The standard height is usually between 13 and 18 inches from the cooktop. Mark this height on the wall aligned with the stud marks. This ensures the microwave will be at a safe and convenient level.
Install Mounting Bracket
Installing the mounting bracket is a critical step for your GE microwave over the range. It holds the microwave securely above the stove. Proper installation prevents accidents and ensures the microwave stays stable during use.
Follow these steps carefully. Use the right tools and make sure the bracket is aligned with the wall studs. This will give the best support for your microwave.
Align Bracket With Studs
Use a stud finder to locate the wall studs behind your kitchen wall. Mark the stud locations clearly with a pencil. Position the mounting bracket on the wall, aligning its screw holes with the studs. This alignment is crucial for strong support.
Mark Screw Holes
Hold the bracket firmly in place. Use a pencil to mark the exact spots for the screw holes on the wall. Double-check the marks to ensure they line up with the studs. Accurate marking makes the installation easier and safer.
Secure Bracket Firmly
Drill pilot holes at the marked points to prevent wood splitting. Use heavy-duty screws to attach the bracket to the wall. Tighten each screw firmly but avoid over-tightening. The bracket must be secure and stable before hanging the microwave.
Prepare Cabinet For Microwave
Preparing the cabinet for your GE microwave installation is a key step. It ensures the microwave fits securely and functions well. This stage involves marking screw points, drilling pilot holes, and clearing space inside the cabinet. Taking time here makes the rest of the installation easier and safer.
Mark Upper Cabinet Screw Points
Start by holding the microwave mounting bracket against the upper cabinet. Use a pencil to mark the screw points on the cabinet bottom. These marks show where you will attach the bracket. Make sure the marks are level and aligned with the microwave’s design.
Drill Pilot Holes If Needed
Check the cabinet material to decide if pilot holes are necessary. For hardwood or thick cabinets, drill small pilot holes at the marked points. Pilot holes help screws go in straight and prevent wood from splitting. Use a drill bit slightly smaller than the screw diameter.
Clear Cabinet Space
Remove any items from inside the cabinet above the stove. Clear space gives you room to work and prevents damage. Also, check for any wires or pipes that could be in the way. A clean, open cabinet bottom is essential for safe and smooth installation.
Connect Electrical And Venting
Connecting the electrical and venting systems is a key step in installing your GE microwave over the range. Proper connection ensures safety and efficient operation. This section breaks down the process into simple tasks. Follow these steps carefully to complete the setup.
Check Power Source
Start by confirming the power source matches the microwave’s requirements. Most GE microwaves need a 120-volt, 60 Hz outlet. Ensure the outlet is grounded and easily accessible behind the microwave. Avoid using extension cords or adapters. Turn off power at the circuit breaker before making any connections. This prevents electrical shock and damage.
Configure Venting Options
Identify your venting type. GE microwaves support two main options: recirculating and external venting. Recirculating vents filter air and release it back into the kitchen. External vents push air outside through a duct. Choose the setup that fits your kitchen layout. Remove or install vent covers according to your choice. Proper venting keeps your kitchen smoke-free and fresh.
Attach Exhaust Components
Attach the exhaust components securely to the microwave and vent system. Use screws and clamps supplied with your microwave. Connect the vent duct to the exhaust outlet tightly. Seal any gaps with foil tape to prevent leaks. Check that the exhaust fan operates smoothly. A well-attached exhaust system improves air quality and microwave performance.

Credit: www.youtube.com
Mount The Microwave
Mounting the GE microwave over the range is a key step in the installation process. It requires careful handling and precise alignment. This ensures the microwave fits securely and functions safely above your stove. Follow these clear steps to mount your microwave properly and avoid common mistakes.
Lift Microwave Into Place
First, get help to lift the microwave. The unit can be heavy and awkward to hold alone. Hold the microwave firmly and raise it to the mounting bracket on the wall. Align the microwave’s back slots with the bracket’s hooks. Keep the microwave level as you lift it into place.
Hook Onto Mounting Bracket
Once the microwave is aligned, carefully hook it onto the mounting bracket. The slots on the microwave should slide over the bracket hooks easily. Check that the microwave rests securely on the bracket without gaps. This step prevents the microwave from falling forward or slipping off.
Secure Microwave To Cabinet
Next, secure the microwave to the cabinet above. Use the screws provided to fasten the microwave’s top into the cabinet base. Tighten the screws firmly but do not overtighten. This step locks the microwave in place, providing extra support and stability.
Test Microwave Functions
Testing your GE microwave’s functions after installation is essential. This step ensures everything works safely and correctly. Pay close attention to power, fan, and lighting. Proper testing helps avoid future issues and improves your cooking experience.
Plug In And Power On
First, plug the microwave into a grounded outlet. Make sure the outlet matches the microwave’s voltage requirements. Press the power button to turn the microwave on. Check that the display lights up and shows the correct time or welcome message. If the microwave does not turn on, confirm the outlet has power by testing with another device.
Test Exhaust Fan
Turn on the exhaust fan to check its operation. The fan should run smoothly without unusual noises. Test all fan speed settings to confirm they work. The fan helps remove smoke and odors while cooking. If the fan is weak or noisy, check the vent connection and fan blades for blockages or damage.
Check Lighting And Operation
Turn on the microwave light inside the cooking cavity. The light should be bright and steady. Test the microwave’s basic cooking functions by heating a cup of water for one minute. The microwave should heat evenly and stop at the set time. Listen for normal sounds during operation. If the light flickers or the microwave stops unexpectedly, inspect the bulb and control panel.

Credit: www.cowboymaloneys.com
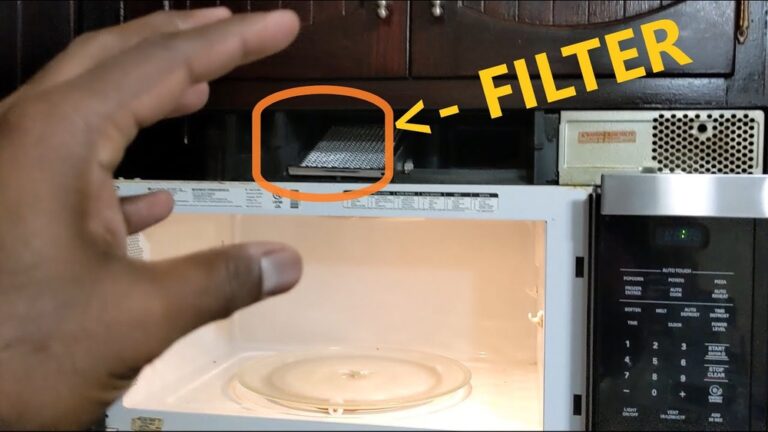
Install Grease Filters
Installing grease filters is an important step in setting up your GE microwave over the range. These filters trap grease and smoke, keeping your kitchen air cleaner. Proper installation ensures the microwave works efficiently and safely.
Locate Filter Slots
Start by finding the filter slots inside the microwave. They are usually at the top or the back of the microwave cavity. Check the user manual if you have trouble locating them.
Insert Filters Correctly
Hold the grease filter with the mesh side facing out. Slide it into the slot gently. Make sure it fits snugly without forcing it. Correct placement helps trap grease effectively.
Secure Filters In Place
Once the filter is inserted, secure it using the clips or latches provided. These hold the filter firmly during microwave use. Double-check to avoid any loose fitting or rattling.
Final Adjustments
After mounting your GE microwave over the range, some final steps ensure safety and functionality. These steps help secure the microwave firmly and give a clean finish to your installation. Follow these simple checks to complete the process.
Check Alignment And Stability
Look at the microwave from different angles. Make sure it sits straight and level above the stove. Gently push the microwave to test its stability. It should not wobble or move easily. If you notice any tilt or looseness, adjust the mounting bracket or screws to fix it.
Tighten All Screws
Go over every screw holding the microwave and bracket. Use a screwdriver to make sure each one is tight. Loose screws can cause the microwave to shift or fall. Double-check the screws inside the microwave cabinet and those fixing the bracket to the wall. Firm screws keep the microwave secure and safe.
Clean Up Installation Area
Remove dust, dirt, and packaging materials around the microwave. Wipe down the microwave’s surface and control panel with a soft cloth. Clear the countertop and stove area of tools and debris. A clean space prevents damage and gives a neat look to your kitchen.

Credit: manuals.plus
Frequently Asked Questions
Can I Install An Over The Range Microwave Myself?
Yes, you can install an over-the-range microwave yourself. Follow the manual, use proper tools, and securely mount the bracket to wall studs. Ensure electrical connections meet safety standards for best results.
Do All Ge Over The Range Microwaves Mount The Same?
No, GE over-the-range microwaves do not all mount the same. Use the mounting bracket included with your specific model for proper installation.
Do All Over The Range Microwaves Have The Same Mounting Holes?
Not all over-the-range microwaves have the same mounting holes. Use the mounting bracket included with your specific model for proper installation.
Conclusion
Installing a GE microwave over the range saves kitchen space and adds convenience. Follow each step carefully to ensure a secure fit. Use the mounting bracket that comes with your model for best results. Double-check electrical connections for safety before use.
Taking your time helps avoid mistakes and ensures the microwave works well. A properly installed microwave improves cooking efficiency and kitchen flow. Enjoy your new setup with confidence and ease.