How to Install a Whirlpool Over the Range Microwave: Easy Guide
Thinking about upgrading your kitchen with a Whirlpool over-the-range microwave? Installing one yourself might sound tricky, but with the right steps and a little help, you can get it done confidently and safely.
This guide walks you through everything you need—from prepping your space to mounting the microwave securely. You’ll learn how to handle the heavy lifting, set up proper ventilation, and make sure all electrical connections are safe. By the end, you’ll not only save money but also enjoy the satisfaction of a job well done.
Ready to transform your kitchen? Let’s dive into how to install your Whirlpool over-the-range microwave step by step.
Credit: www.whirlpool.com
Preparation Steps
Preparing to install your Whirlpool over-the-range microwave ensures a smooth process. Proper preparation avoids errors and safety risks. Follow these key steps before starting the installation.
Gather Tools And Materials
Collect all necessary tools and materials first. You will need a drill, stud finder, level, tape measure, and screwdriver. Safety gear like gloves and protective eyewear is important. Keep the microwave’s installation manual close for reference. Having everything ready saves time during installation.
Measure Space And Microwave
Measure the space above your range carefully. Check the width, height, and depth to confirm the microwave fits well. Compare these with your microwave’s dimensions. Accurate measurements prevent fitting problems and help avoid damage. Mark the wall where the microwave will mount.
Enlist Helper For Lifting
Over-the-range microwaves are heavy and bulky. Ask a helper to assist with lifting and positioning. Two people reduce the risk of dropping or injuring themselves. A helper also makes aligning the microwave to the mounting bracket easier. Plan for teamwork to handle the unit safely.
Turn Off Power Supply
Safety is critical. Locate the circuit breaker for your kitchen and switch off power to the microwave area. Confirm no electricity runs to the outlet or wiring you will work on. Turning off power prevents shocks and accidents during installation. Use a voltage tester if unsure.
Credit: www.whirlpool.com
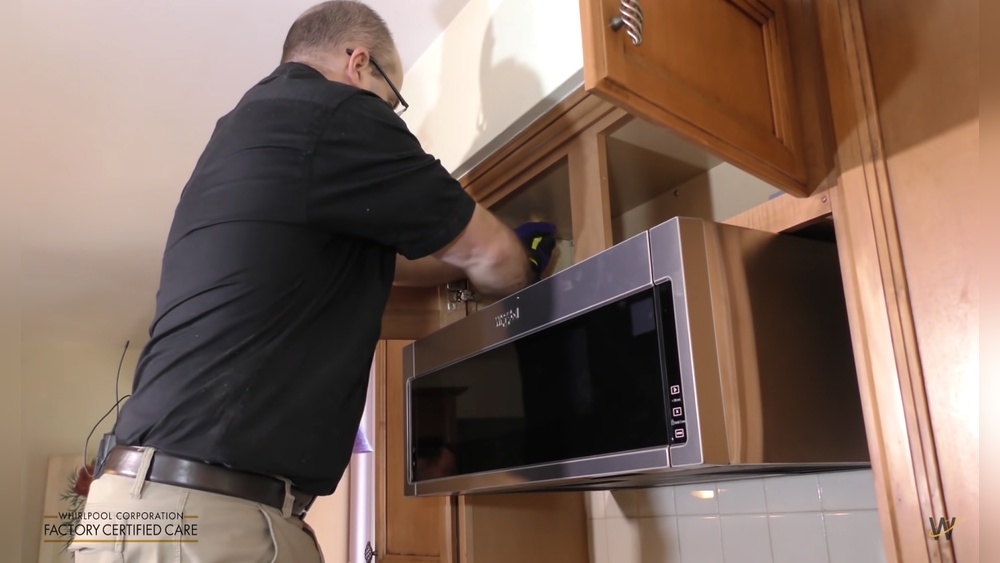
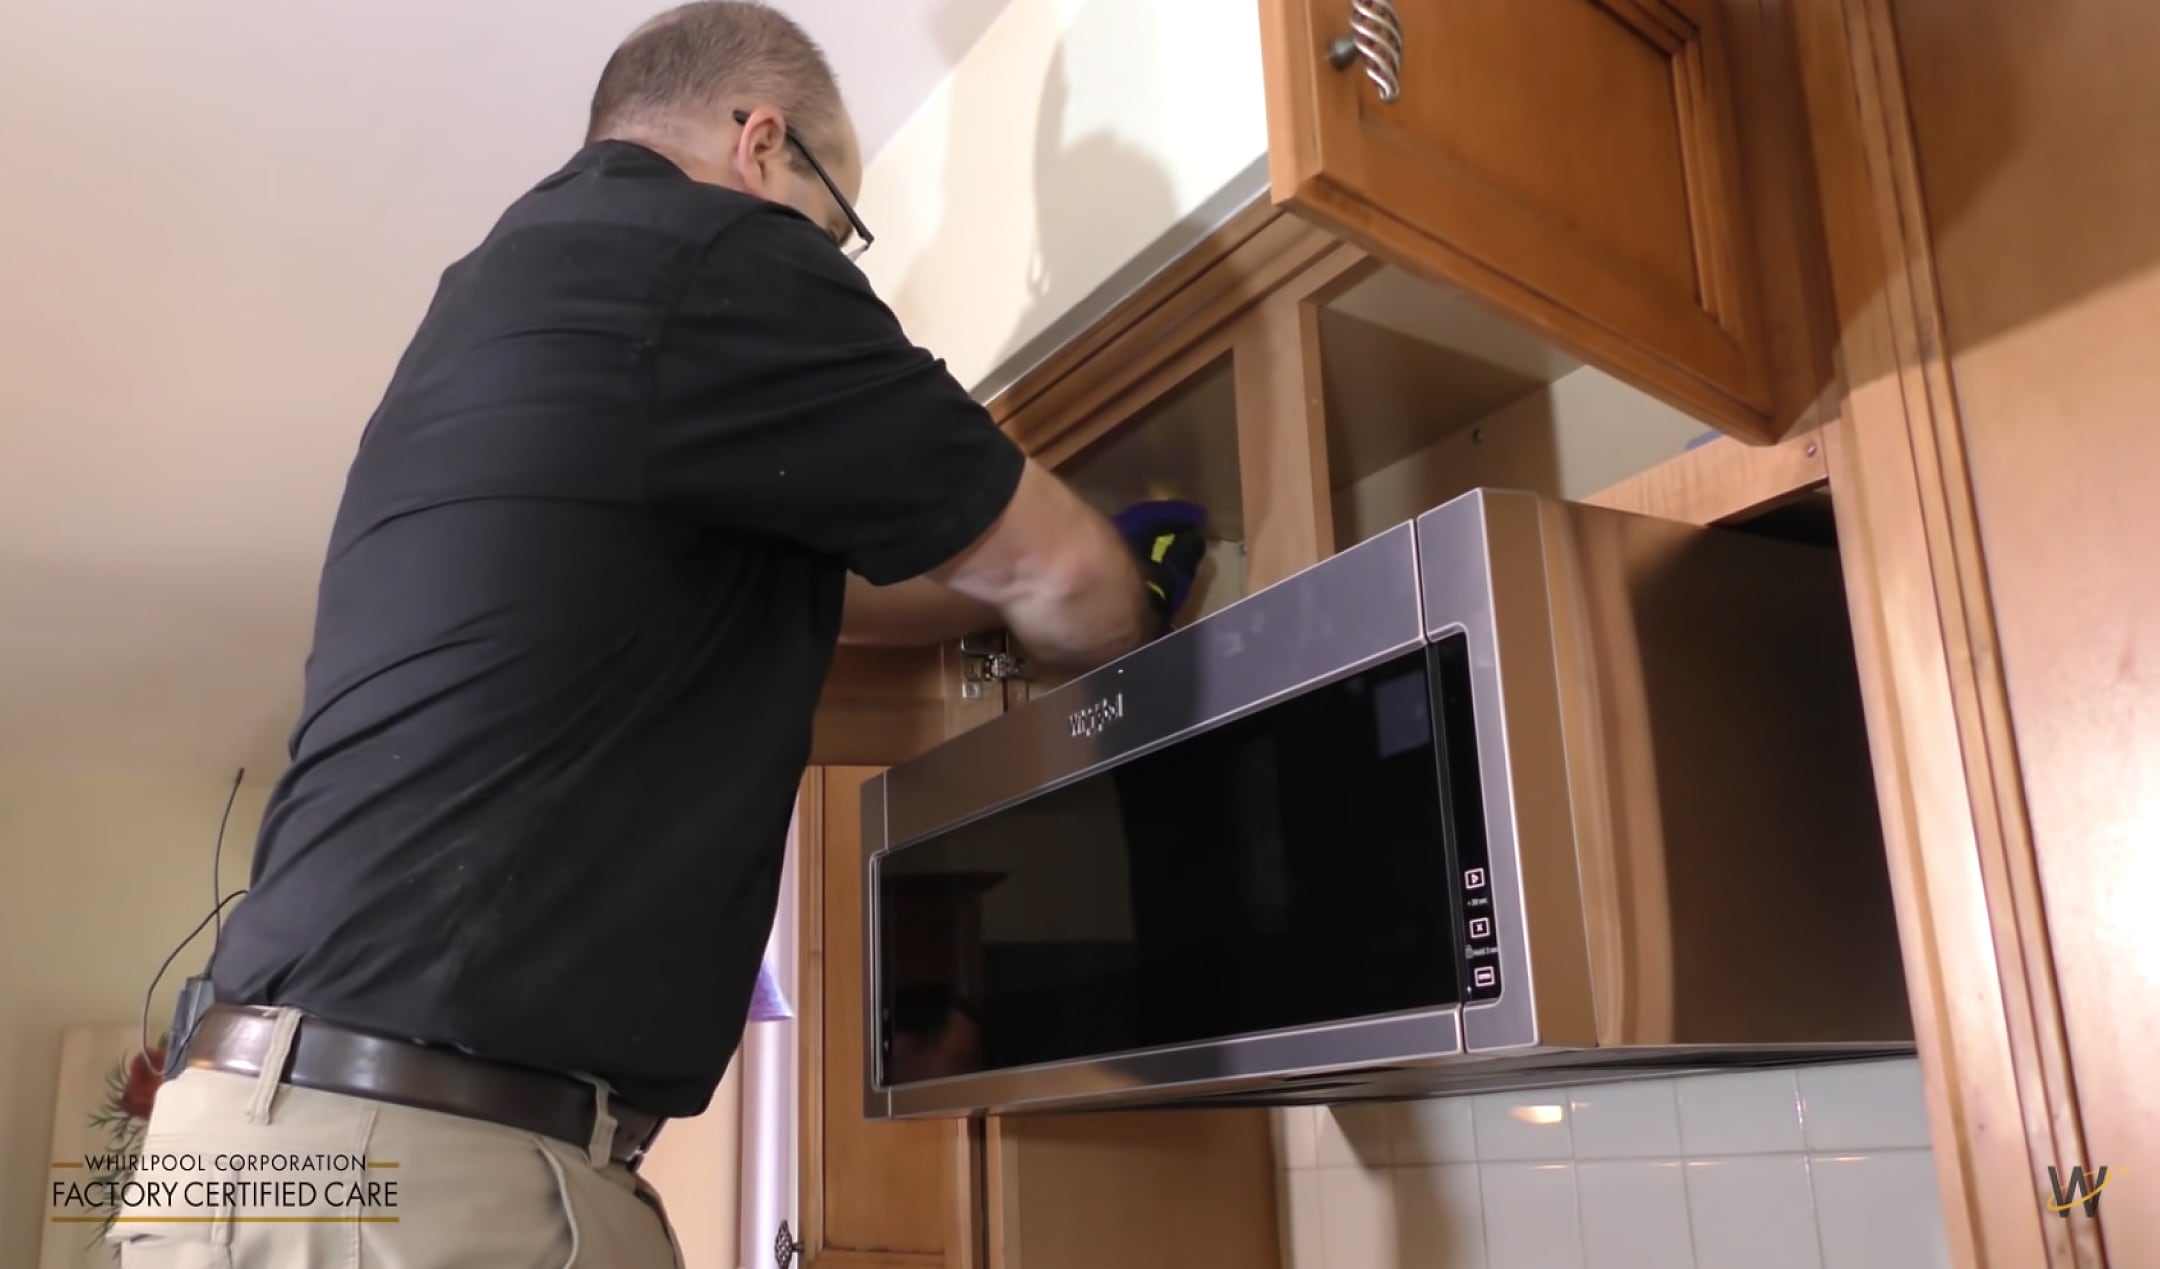
Removing Old Microwave
Removing the old microwave is the first step in installing your new Whirlpool over the range microwave. This process requires safety and care to avoid damage or injury. Follow these clear steps to detach the old unit smoothly.
Unplug And Detach Power
Start by unplugging the microwave from the power outlet. If the microwave is hardwired, turn off the breaker that controls its power. Make sure there is no electricity running to the appliance before you proceed. Safety first.
Unscrew Mounting Hardware
Locate the screws holding the microwave to the cabinet and wall bracket. Use a screwdriver to remove these screws carefully. Keep the screws safe if you plan to reuse them. Support the microwave as you remove the last screws to prevent it from falling.
Carefully Remove Unit
With the mounting screws removed, gently pull the microwave away from the wall. Have an assistant help you lift the unit down. Place it on a soft surface like a towel to avoid scratches. Check the area for any leftover mounting parts or debris.
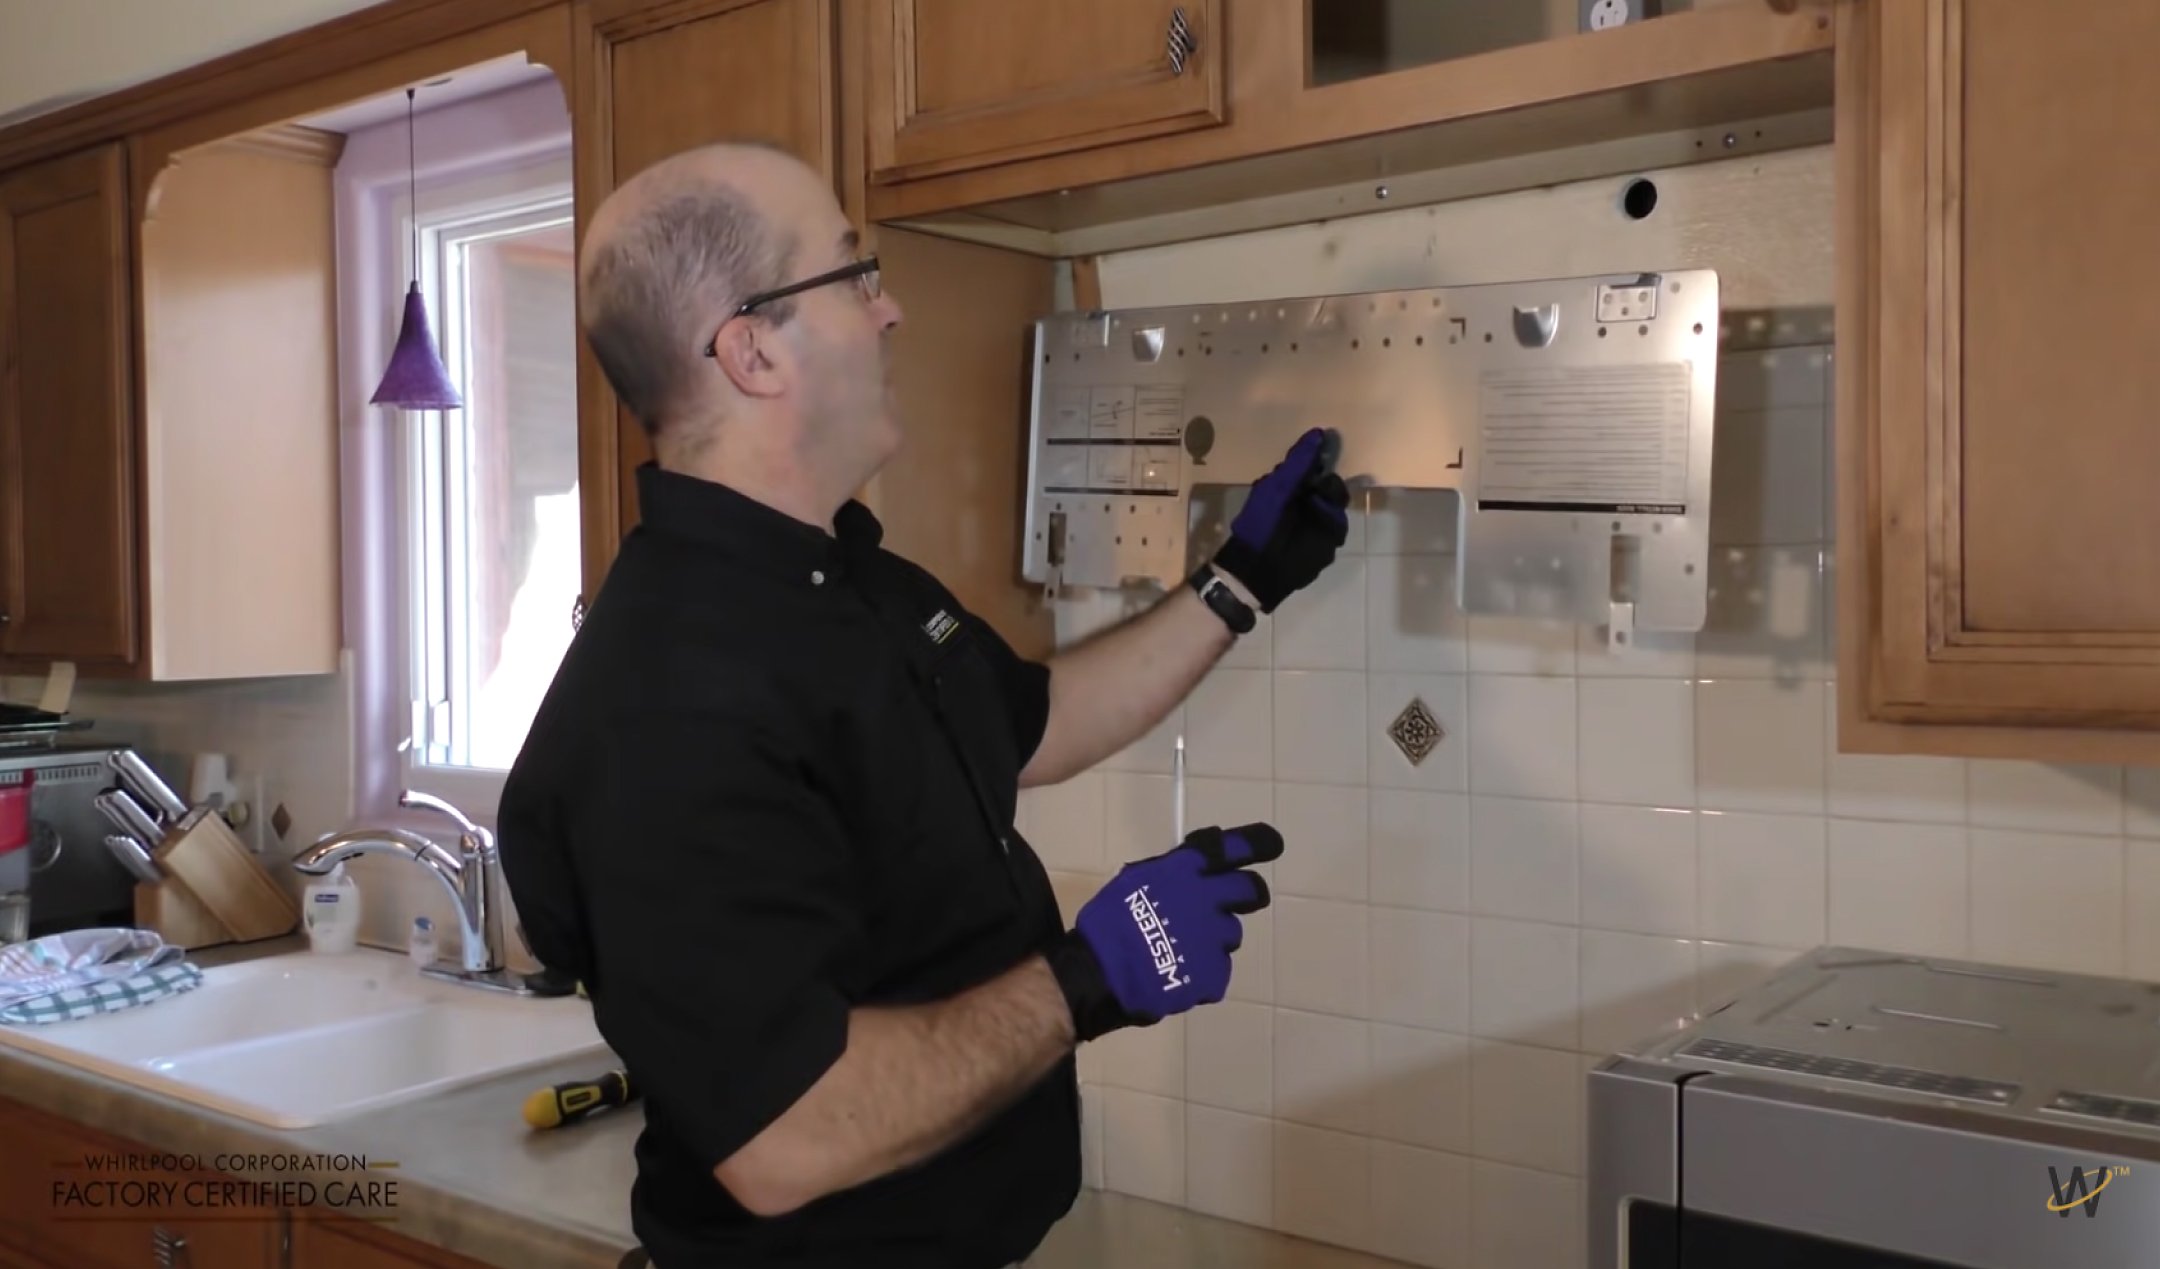
Installing Wall Bracket
Knowing when to call a professional saves time and avoids risks during microwave installation. Some tasks require special skills, tools, or knowledge. These challenges might be too tough for most homeowners. Hiring an expert ensures the job is safe and done right the first time.
Electrical Wiring Concerns
Working with electrical wiring can be dangerous without experience. A professional knows local codes and safety rules. They can handle wiring changes or upgrades needed for your microwave. Incorrect wiring may cause shorts or fires. Leave electrical tasks to licensed electricians.
Complex Venting Modifications
Some over-the-range microwaves need venting to the outside. Modifying or installing vents requires cutting and sealing walls or ceilings. Professionals have the tools and skills to do this properly. Poor venting leads to moisture, odors, or poor microwave performance. Experts ensure your vent system works well and meets building codes.
Lack Of Proper Tools Or Assistance
Installing a Whirlpool microwave needs specific tools like a drill, stud finder, and level. It also requires two people for lifting and mounting the heavy appliance. Without the right tools or help, the process can be unsafe or cause damage. Hiring a pro provides the right equipment and extra hands to finish the job smoothly.

Credit: www.whirlpool.com
Preparing New Microwave
Helpful resources make installing your Whirlpool over the range microwave easier. They provide clear directions and useful tips. Use these to avoid mistakes and save time. Learn from experts and other users who share their experiences.
Instructional Videos
Step-by-step videos show the full installation process. Watch how to remove the old microwave safely. See how to mount the bracket on the wall. Follow the correct way to attach the new microwave. Visual guides help reduce confusion and errors.
Manufacturer Guides
Whirlpool provides detailed manuals with every microwave. These guides include safety warnings and tool lists. They explain each step clearly and simply. Use the template included for precise drilling. The guides cover electrical and ventilation setup too.
Online Community Tips
Forums and social media groups share real user advice. Find tips on handling tricky parts of installation. Learn about common problems and how to fix them. Ask questions and get quick answers from experienced installers. These communities offer practical help beyond manuals.
Frequently Asked Questions
Can I Install An Over The Range Microwave By Myself?
Yes, you can install an over-the-range microwave yourself. Get help for lifting, use proper tools, mount brackets into studs, and follow safety steps. Turn off power, remove the old unit, install the bracket, secure the microwave, and test it.
Do Whirlpool Over The Range Microwaves Come With Mounting Brackets?
Yes, Whirlpool over-the-range microwaves include mounting brackets for wall installation. Always use the provided brackets for secure fitting.
What Holds An Over The Range Microwave In Place?
An over-the-range microwave stays secure by mounting a wall bracket into studs. The microwave hooks onto this bracket and attaches to the cabinet above with screws. This combination of wall and cabinet support holds the microwave firmly in place.
Conclusion
Installing a Whirlpool over-the-range microwave is simple with clear steps. Remember to always turn off power before starting. Use the right tools and get help lifting the microwave safely. Secure the mounting bracket firmly to wall studs for stability. Follow the venting instructions carefully for best performance.
Taking your time ensures a safe and proper installation. Enjoy the convenience your new microwave adds to your kitchen.