How to Fix Microwave Handle: Easy Steps for Quick Repair
Is your microwave handle broken or loose? Don’t let this small problem stop you from using your microwave every day.
You can fix it yourself quickly and save money on repairs or replacements. Whether the handle snapped off or just feels wobbly, this guide will walk you through simple steps to get it back in shape. You’ll learn how to use common tools and adhesives, or replace the handle entirely if needed.
By the end of this article, you’ll feel confident tackling the repair on your own and making your microwave look and work like new again. Keep reading to discover the easy, effective fixes for your microwave handle.

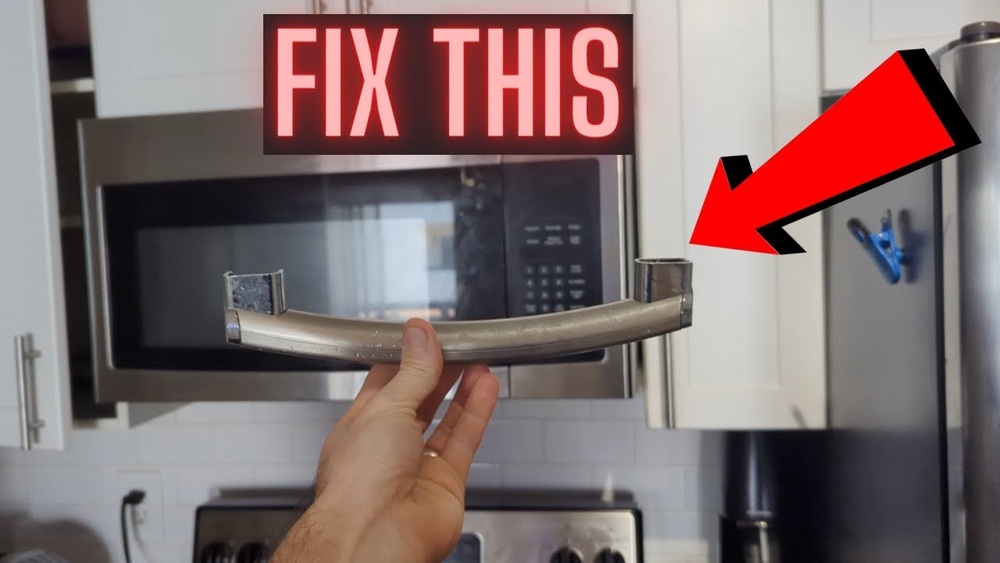
Credit: www.youtube.com
Tools And Materials Needed
Before fixing a microwave handle, gather the right tools and materials. This preparation saves time and ensures a smooth repair process. Use quality items for a strong, lasting fix. Below are the essential tools and materials needed for the job.
Basic Hand Tools
A screwdriver set is vital. Phillips and flathead screwdrivers help remove screws. A small wrench or pliers may be needed to loosen nuts. These tools allow access to the handle and door parts.
Adhesives And Repair Materials
Strong epoxy or two-part plastic adhesive works best for bonding broken handle parts. Choose one that dries clear and is heat resistant. This ensures a neat and durable repair.
Cleaning Supplies
Clean surfaces before applying glue. Use rubbing alcohol and a clean cloth to remove dirt and grease. This helps the adhesive stick better and hold longer.
Clamps Or Tape
Clamps or strong tape keep the handle firmly in place while glue sets. This prevents movement and creates a secure bond. Use what fits your repair setup best.
Replacement Handle (optional)
If the handle is badly damaged, buy a new one made for your microwave model. This ensures proper fit and function. Follow the manufacturer’s instructions for replacement.
Safety First
Fixing a microwave handle requires caution. Safety protects you from harm and keeps the appliance intact.
Always unplug the microwave before starting any repair. This stops electrical shocks and injuries.
Wear gloves to protect your hands from sharp edges and broken parts.
Work in a well-lit area to see clearly and avoid mistakes.
Unplug The Microwave
Unplugging the microwave cuts off all power. Never try to fix it while it is plugged in.
This simple step prevents electric shocks and serious injuries. Safety must come first.
Use Protective Gear
Gloves protect your hands from cuts and burns. Safety glasses shield your eyes from small debris.
Using protective gear keeps you safe during the repair process. Do not skip this step.
Handle Broken Parts Carefully
Broken handles can have sharp edges. Handle these pieces with care to avoid cuts.
Dispose of damaged parts safely to prevent accidents later on.
Follow Manufacturer’s Instructions
Check the microwave’s manual for specific safety tips. Follow recommended repair steps closely.
This helps avoid damage and keeps the microwave working well after the fix.
Cleaning Broken Surfaces
Cleaning broken surfaces is a key step to fix a microwave handle properly. Dirt, grease, and dust can stop adhesives from sticking well. Thorough cleaning helps the glue bond tightly and last longer.
Start by removing loose pieces or debris from the broken parts. Use a soft brush or cloth to clear away dust. A clean surface ensures better contact between the handle and the microwave.
Gather Cleaning Supplies
Use rubbing alcohol or mild detergent for cleaning. Avoid harsh chemicals that may damage plastic surfaces. Prepare cotton swabs, soft cloths, and a small brush for detailed cleaning.
Clean The Broken Edges
Dip a cotton swab in rubbing alcohol. Gently rub the broken edges to remove grease and dirt. Allow the surfaces to dry completely before applying adhesive. Dry surfaces help glue set faster and stronger.
Remove Old Adhesive Residue
Check for leftover glue from previous repairs. Scrape off residue carefully with a plastic scraper. Clean the area again with rubbing alcohol to remove sticky bits. This step prevents weak bonds and failed repairs.
Final Inspection Before Gluing
Look closely at both broken surfaces. Ensure no dust, moisture, or grease remains. The surfaces should feel dry and clean. Proper cleaning leads to a durable microwave handle repair.
Using Epoxy For Simple Breaks
Using epoxy for simple breaks is an effective way to fix a microwave handle. Epoxy creates a strong bond between broken parts. It works well on plastic and metal surfaces often found in microwave handles. This method saves money and time compared to replacing the entire handle. Follow the steps carefully to ensure a durable repair.
Choosing The Right Adhesive
Select an epoxy designed for plastic or metal. Two-part epoxies offer the best strength. Avoid super glue as it may not hold under stress. Check product labels to confirm microwave safety and heat resistance. A slow-setting epoxy allows better positioning before it hardens.
Applying Epoxy Correctly
Start by cleaning the broken surfaces with rubbing alcohol. Remove all dirt and grease for a strong bond. Mix the two epoxy parts as instructed on the package. Apply a thin, even layer to both broken edges. Press the handle parts together firmly, aligning them precisely.
Clamping And Curing Time
Use a clamp or heavy object to hold the parts in place. Keep steady pressure during the curing process. Let the epoxy cure for at least 24 hours. Avoid moving or using the handle before it fully sets. Proper curing ensures a lasting and safe repair.
Removing The Old Handle
Removing the old microwave handle is the first step to a proper repair. It requires careful actions to avoid damage to the door or the microwave itself. Follow these steps to safely detach the handle before installing a new one.
Each microwave model may vary slightly, but the general process remains similar. Prepare your tools and workspace before starting.
Unplugging The Microwave
Always unplug the microwave before doing any repairs. This stops electrical hazards and protects you from shocks. Make sure the microwave is completely disconnected from power. Safety first.
Accessing Door Trim And Screws
Open the microwave door gently. Look for the door trim or seal around the handle. This trim often hides the screws holding the handle. Carefully peel or lift the trim to expose these screws. Use a flat tool if needed to avoid damage.
Unscrewing The Handle
Use a screwdriver to remove all screws securing the handle. Keep the screws in a safe place for reassembly. Once screws are out, gently pull the handle away from the door. If it feels stuck, check for hidden screws or clips. Removing the old handle clears the way for a new one.
Credit: www.reddit.com
Installing The New Handle
Installing the new microwave handle is a straightforward task that restores your appliance’s functionality and appearance. Take your time to position the handle correctly before securing it. Proper installation ensures the handle stays firm and lasts long.
Aligning And Pre-screwing
Start by aligning the new handle with the holes on the microwave door. Check that it sits flush against the surface. Use a screwdriver to pre-screw the screws lightly. This step helps prevent misalignment and makes final tightening easier.
Securing Handle Without Overtightening
Once the handle is aligned, tighten the screws firmly but gently. Avoid overtightening to prevent cracking the handle or stripping the screws. A snug fit is enough to hold the handle securely in place. Test the handle by pulling it gently to confirm it is stable.
Reassembling The Door
Reassembling the microwave door is an important step after fixing or replacing the handle. Proper reassembly ensures the door closes tightly and the microwave operates safely. Take your time to align parts carefully before securing them back in place.
Aligning The Door Components
Start by positioning the inner door panel correctly. Make sure the handle fits snugly in its place. Check that all clips and hooks align with their slots. Misalignment can cause the door to not close properly.
Securing The Handle And Screws
Insert the screws that hold the handle and door panel firmly. Use a screwdriver that fits well to avoid stripping screws. Tighten screws evenly but do not over-tighten. Over-tightening can crack plastic parts.
Reattaching The Door Seal
Place the door seal or trim back carefully around the edges. The seal prevents heat and microwaves from escaping. Press the seal evenly to avoid gaps. A damaged seal may need replacement for safety.
Testing The Door Function
Close the door gently and check if it latches securely. Open and close the door several times to confirm smooth movement. The handle should feel sturdy and not wiggle. Proper function ensures safe microwave use.

Credit: www.reddit.com
Testing The Repair
Testing the repair is a key step after fixing a microwave handle. It ensures the handle is secure and safe to use. This step helps avoid future accidents or damage to the microwave.
Take your time to check the repair carefully. This process confirms the handle will last and work well.
Check The Handle Stability
Hold the microwave door and gently pull the handle. It should feel firm without any wiggle. If the handle moves, the repair might need reinforcement. A stable handle means the adhesive or screws are holding well.
Open And Close The Door
Use the handle to open and close the microwave door several times. The movement should be smooth and easy. Watch for any signs of looseness or cracking. This test shows if the handle can handle everyday use.
Inspect The Adhesive Or Screws
Look closely at the repaired area. Ensure the adhesive is fully dry or the screws are tight. No gaps or cracks should be visible. Proper bonding or fastening keeps the handle strong and durable.
Perform A Safety Check
Make sure no sharp edges or glue residue remain. These can cause injury or damage clothes. Clean the area if needed. A safe repair protects you and your microwave.
Tips For Long-lasting Fixes
Fixing a microwave handle is easy with the right tips for a long-lasting repair. Small mistakes can cause the handle to break again. Follow these simple guidelines to make your fix strong and durable.
Taking time to prepare and use quality materials ensures the repair lasts. Proper care after fixing the handle helps keep it intact for a long time.
Clean The Surfaces Thoroughly
Remove all dirt, grease, and old glue from the broken parts. Use rubbing alcohol or warm soapy water. Clean surfaces help glue stick better and make the fix stronger.
Use The Right Adhesive
Choose a strong epoxy or two-part adhesive made for plastic. These types bond tightly and resist heat and daily use. Avoid weak glues that can fail quickly.
Clamp The Handle Firmly
Hold the handle and door parts together with a clamp or heavy object. Keep them still while the glue dries. This step stops parts from moving and improves bonding.
Allow Full Curing Time
Let the adhesive cure for at least 24 hours. Do not use the microwave before then. Rushing this process can cause the handle to break again.
Check For Loose Screws
Inspect and tighten any screws holding the handle. Loose screws cause wobbling and stress on the glued parts. Secure screws keep the handle steady.
Avoid Excessive Force
Open and close the microwave door gently. Avoid pulling the handle hard or fast. Gentle use reduces strain and helps the repair last longer.
Frequently Asked Questions
How Do You Repair A Microwave Door Handle?
Clean broken surfaces thoroughly. Apply strong epoxy or two-part adhesive to both handle and door. Press handle firmly and clamp it. Let adhesive cure overnight. For replacement, unplug microwave, remove door trim, unscrew old handle, and attach new one securely.
Can I Use Gorilla Glue On A Microwave Handle?
Yes, you can replace just a microwave handle. Unplug the microwave, remove the door trim, unscrew the old handle, and install a new one. Alternatively, repair minor breaks using strong epoxy, clean surfaces, apply adhesive, and clamp until fully cured.
Can You Replace Just A Microwave Handle?
Clean the broken surfaces thoroughly. Apply strong epoxy or plastic adhesive to both handle and door. Press firmly and clamp until dry. For replacement, unplug microwave, remove door trim, unscrew old handle, and install the new one securely.
Conclusion
Fixing a microwave handle is easier than it seems. Start by cleaning the broken parts well. Use a strong epoxy or adhesive to join the pieces. Hold them tightly until the glue dries fully. For a full replacement, unplug the microwave first.
Remove screws carefully to take off the old handle. Attach the new handle firmly in place. Taking these steps saves money and extends your microwave’s life. Small repairs keep your kitchen running smoothly. Try these tips to fix your microwave handle today.