How to Fix Broken Microwave Handle: Easy DIY Repair Tips
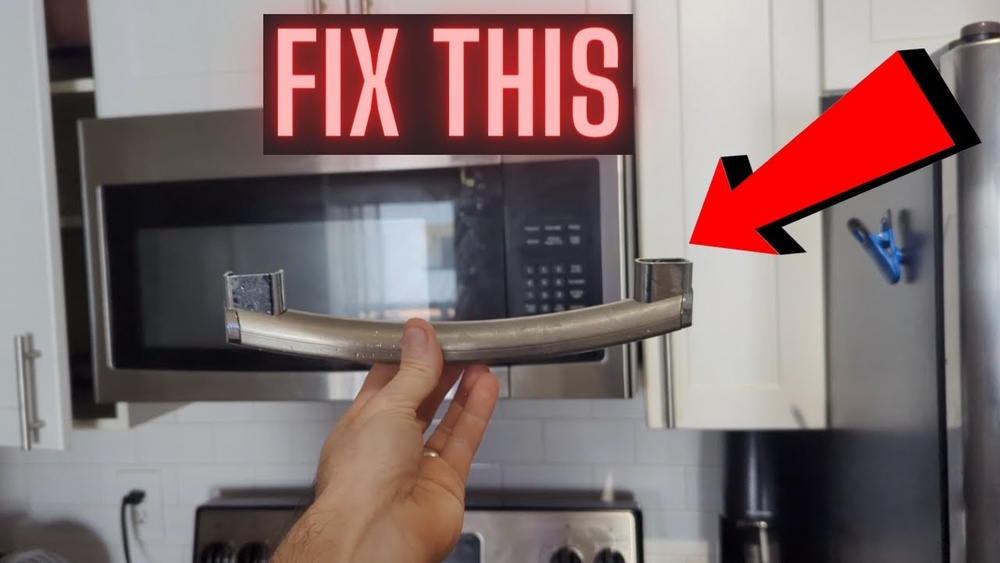
Is your microwave handle broken or loose, making it hard to open the door? You’re not alone, and the good news is you don’t have to live with it or rush to buy a new microwave.
Fixing a broken microwave handle can be easier than you think, even if you’re not a DIY expert. With a few simple steps and the right tools, you can restore your microwave’s handle to full function quickly and safely. In this guide, you’ll learn exactly how to repair or replace your microwave handle, save money, and get your kitchen running smoothly again.
Keep reading, and you’ll be surprised at how straightforward this fix can be!

Credit: www.reddit.com
Tools And Materials Needed
Fixing a broken microwave handle requires a few simple tools and materials. Having the right items ready makes the repair easier and faster. You do not need many tools, but each one plays an important role. This section lists the essential tools and materials for the job.
Basic Tools
A screwdriver set is necessary to remove screws from the microwave door. Choose both Phillips and flathead screwdrivers for different screw types. A small wrench or pliers may help loosen tight screws or bolts. A flashlight can be useful to see inside small or dark areas.
Replacement Parts
The most important material is the replacement handle. Make sure to get the exact model designed for your microwave brand and model number. Some handles come with mounting screws included. Check if you need to buy screws separately.
Adhesives And Fillers
Strong glue or epoxy can fix minor cracks or breaks in the handle. Use plastic-specific adhesives for a lasting hold. For small gaps or chips, plastic filler can restore the shape before gluing. Avoid using weak or general-purpose glue.
Safety Equipment
Wear safety gloves to protect your hands from sharp edges or broken plastic. Safety glasses are helpful to guard your eyes when removing screws or handling broken parts. Always unplug the microwave before starting any repair work.
Safety Precautions
Always unplug the microwave before starting any repair to avoid electric shock. Handle parts carefully to prevent injury or damage. Work in a clean, dry area and use proper tools for safe fixing.
Unplug The Microwave
Always unplug the microwave before starting any repairs. This stops electric shocks and accidents. Never work on the microwave while it is plugged in. Safety first.
Use Protective Gloves
Wear gloves to protect your hands from sharp edges. Microwave doors can have metal parts that may cut you. Gloves also keep your hands clean from dust and grease.
Work In A Clear Area
Keep your workspace tidy and well-lit. Clear space helps avoid losing small screws or parts. Good light makes it easier to see what you are doing.
Handle Parts Gently
Plastic clips and screws can break easily. Use gentle force when removing or attaching parts. Breaking clips may cause more damage and cost more to fix.
Do Not Use Excessive Tools
Use the right tools for the job. Avoid using too much force or wrong tools. This prevents damage to the microwave and injury to yourself.
Identifying The Handle Type
Identifying the handle type is the first step to fix a broken microwave handle. Different microwaves have different handle styles. Knowing your handle type helps you choose the right repair method. It also makes finding replacement parts easier.
Handles can be made from various materials. They may attach differently to the microwave door. Some are held by screws, while others snap on. Understanding these details saves time and effort.
Plastic Vs. Metal Handles
Plastic handles are common in many microwaves. They are lightweight but can crack or break easily. Metal handles are stronger and last longer. They may be heavier and harder to replace.
Attachment Methods
Microwave handles attach to the door in different ways. Some use screws that you can see on the inside of the door. Others use hidden clips or fasteners. Check your microwave door carefully to find these.
Removable Vs. Fixed Handles
Removable handles come off without damage. They usually have screws or clips. Fixed handles are part of the door frame. These require more care and sometimes special tools to fix.
Credit: www.reddit.com
Removing The Microwave Door Panel
Removing the microwave door panel is the first step in fixing a broken handle. This process gives access to the screws holding the handle in place. Careful removal of the panel prevents damage to the door and internal parts. Follow each step slowly to keep the microwave intact and safe to use later.
Locating Screws And Clips
Open the microwave door fully. Look along the edges for visible screws. These screws usually hold the door panel tightly. Some microwaves also use plastic clips to secure the panel. Gently feel around the door frame to find hidden clips. Keep a small container ready to keep screws safe. Knowing the exact screw and clip locations helps avoid damage.
Careful Disassembly Techniques
Start by unscrewing all visible screws using a proper screwdriver. Use gentle force to avoid stripping the screws. If clips hold the panel, gently pry them with a plastic tool or flathead screwdriver. Avoid using metal tools directly on plastic parts to prevent cracks. Slowly lift the panel away from the door. Keep track of how the panel fits to make reassembly easier.
Fixing A Loose Handle
A loose microwave handle can cause inconvenience and may lead to further damage. Fixing it early helps maintain your microwave’s safety and functionality. The process often involves tightening the mounting screws that secure the handle to the door.
Simple tools like a screwdriver are enough to tighten these screws. This quick fix usually restores stability to the handle without replacing it.
Tightening Mounting Screws
Start by opening the microwave door fully. Locate the screws holding the handle in place. These screws are often hidden behind a plastic cover or inside the door frame.
Use a suitable screwdriver to turn the screws clockwise. Tighten them until the handle feels secure but still moves slightly for safety. Check the handle by gently pulling it to ensure it no longer wiggles.
Avoiding Overtightening Damage
Do not tighten the screws too much. Excessive force can crack the plastic handle or strip the screw holes. This damage may make the handle harder to fix later.
Stop tightening once the handle feels firm. Test the door’s operation after tightening. If the handle still feels loose, consider replacing the screws or the handle itself.
Replacing The Broken Handle
Replacing the broken handle on your microwave restores its functionality and appearance. The process involves three key steps: finding the correct replacement, removing the old handle, and installing the new one. Each step requires care to avoid damage and ensure a secure fit. Follow these clear instructions to complete the task safely and effectively.
Finding The Correct Replacement
Locate your microwave’s model number. It is usually inside the door or on the back of the unit. Use this number to search for the exact handle replacement. Buying the correct part ensures proper fit and function. Check online stores or the manufacturer’s website for options. Avoid generic handles that may not match your microwave’s design.
Removing The Old Handle
Unplug the microwave before starting any work. Open the microwave door fully to access the screws. Remove screws holding the door panel with a screwdriver. Carefully take off the panel to expose the handle screws. Unscrew the handle mounting screws slowly. Gently pull off the broken handle without forcing it. Keep screws safe for reinstallation.
Installing The New Handle
Position the new handle in place on the door. Align the screw holes with the handle’s mounting points. Insert and tighten the screws by hand to avoid stripping. Use a screwdriver to secure screws firmly but not too tight. Reattach the door panel carefully and screw it back in. Test the handle by opening and closing the door smoothly.
Temporary Repair Options
Temporary repair options can help you use your microwave until you get a permanent fix. These quick solutions save time and money. They also prevent further damage to the handle or door. Choose a method that fits your tools and skills. Some fixes need only household items. Others require special glue or moldable putty.
Using Epoxy Or Sugru
Epoxy and Sugru are strong adhesives that work well on plastic handles. Epoxy comes as two parts that you mix together. It creates a tough bond once dry. Sugru is a moldable glue that feels like clay. It sticks firmly and hardens in a few hours.
Clean the broken surfaces before applying these adhesives. Press the parts tightly and hold for a few minutes. Let the glue cure fully for the best strength. These options hold well for daily use. They also fill gaps and cracks, making the handle easier to grip.
When To Use Glue Instead Of Replacement
Use glue if the break is clean and the pieces fit well. Small cracks or splits respond best to adhesive repair. Avoid glue if the handle is badly damaged or missing pieces. Temporary glue fixes work if you need a quick solution. They are not as strong as new handles.
Glue is ideal for saving a handle until you get a replacement. It keeps the microwave usable without extra cost. Check the repair often to avoid sudden handle failure. For safety, never force the door open or closed when the handle is weak.
Testing The Repair
Testing the repair is an important step after fixing your microwave handle. It ensures the handle is secure and works well. This step helps avoid further damage or safety issues. Take your time to check the handle properly.
Check The Handle’s Stability
Hold the handle and gently pull it. It should feel firm and not wiggle. Test it by opening and closing the microwave door slowly. If the handle moves or feels loose, tighten the screws again.
Open And Close The Door Fully
Open the microwave door all the way. Close it carefully to see if the handle holds well. The door should open and close smoothly without resistance. Watch for any cracks or stress on the handle.
Test Multiple Times
Repeat opening and closing the door several times. This will confirm the handle stays secure during regular use. Look for any signs of weakness or looseness that may appear after repeated use.
Inspect For Proper Alignment
Check if the handle aligns well with the door frame. It should not be crooked or off-center. Proper alignment helps the door seal tightly and prevents heat loss.
Ensure No Damage Occurs
Observe the repaired area for any new cracks or damage. Stop using the microwave if you see any issues. A broken handle can cause safety risks and should be fixed again if needed.
Maintenance Tips For Longevity
Proper care extends the life of your microwave handle. Small habits prevent breaks and looseness. Consistent maintenance keeps the handle strong and safe to use.
Follow these easy tips to maintain your microwave handle. They help avoid damage and costly repairs.
Keep The Handle Clean
Wipe the handle regularly with a damp cloth. Remove grease and dirt to prevent buildup. Avoid harsh chemicals that can weaken plastic or paint. Use mild soap and water for cleaning.
Check And Tighten Screws
Loose screws cause the handle to wobble or break. Inspect screws every few months. Use a screwdriver to tighten any loose ones. Do not overtighten to avoid cracking the plastic.
Avoid Slamming The Door
Close the microwave door gently. Slamming puts stress on the handle and door frame. Teaching family members to be gentle helps a lot. This practice reduces wear and tear over time.
Do Not Hang Heavy Items
Never hang bags or heavy objects on the handle. It causes strain and can crack the handle. Use the handle only for opening and closing the door.
Inspect For Early Damage
Look for small cracks or loose parts on the handle. Early detection helps fix issues quickly. Replace or repair parts before the damage worsens. This saves money and prevents bigger problems later.

Credit: www.youtube.com
When To Call A Professional
Knowing when to call a professional is key to fixing a broken microwave handle safely. Some problems need more than a simple DIY fix. A professional can ensure the repair is done right. This saves time and prevents further damage.
Microwave handles connect to the door, which affects safety. If the door does not close properly, it may cause microwave leakage. A faulty handle might seem small but can lead to bigger risks.
Signs The Handle Damage Is Severe
Cracks near the mounting points often mean the door is weak. Loose parts or missing screws make the handle unstable. If the handle moves when you open or close the door, it needs expert help.
Electrical Or Internal Damage
If the handle break is linked to internal wiring or buttons, avoid fixing it yourself. Microwaves contain high-voltage parts that can cause shocks. A professional knows how to handle these safely.
Tools And Skills Required
Replacing a microwave handle requires special tools and knowledge. Some handles have clips or screws hidden inside panels. Professionals have the right tools and experience to avoid damaging the microwave.
Warranty And Safety Concerns
Repairing the handle yourself might void the warranty. Professionals can fix the handle without risking your coverage. Safety standards must be met to ensure the microwave works properly after repair.
Time And Convenience
If you do not have time or confidence, calling a professional saves effort. They can diagnose and fix the issue faster. This avoids repeated attempts that may worsen the problem.
Frequently Asked Questions
How Do You Repair A Microwave Door Handle?
Unplug the microwave and remove the inner door panel by unscrewing screws. Access and tighten the handle screws securely. Avoid overtightening to prevent damage. Replace the handle if broken, using the correct model part. Reassemble carefully, ensuring clips snap back properly.
Test the handle function before use.
Are Microwave Handles Replaceable?
Yes, microwave handles are replaceable. Unplug the microwave, remove the door trim carefully, unscrew the old handle, and install the correct replacement. Handle clips are fragile, so work gently. Ensure the new handle matches your microwave model for a proper fit and function.
Can I Use Gorilla Glue On A Microwave Handle?
Gorilla Glue can bond a microwave handle temporarily, but it may not withstand heat or moisture. For durability, replace the handle instead.
How Much Does It Cost To Fix A Microwave Handle?
Fixing a microwave handle typically costs between $20 and $50 for parts and DIY labor. Professional repairs may cost $50 to $100. Prices vary by model and repair complexity. Buying the correct replacement handle ensures a proper fix.
Conclusion
Fixing a broken microwave handle can save you money and hassle. Follow the steps carefully to avoid damage. Always unplug the microwave before starting repairs. Use the right replacement part for your model. Take your time removing and reinstalling screws and clips.
A secure handle makes your microwave safe and easy to use again. If unsure, seek help from a professional. Small fixes keep appliances working longer. You can do it with patience and simple tools.