How to Clean Microwave Vent Filter: Easy Steps for Sparkling Results
Your microwave vent filter works hard to keep your kitchen air fresh and your cooking safe. But over time, grease and grime build up, making your microwave less efficient and even causing unpleasant odors.
If you’ve been wondering how to clean your microwave vent filter quickly and effectively, you’re in the right place. In this guide, you’ll learn simple, step-by-step tips to get your filter sparkling clean without any hassle. Keep reading to discover how a clean vent filter can improve your kitchen’s air quality and extend your microwave’s life.
Microwave Vent Filter Types
Microwave vent filters play an important role in keeping your kitchen air clean. They trap grease, smoke, and odors produced during cooking. Different types of filters serve various functions. Knowing these types helps in proper cleaning and maintenance. This section explains the main microwave vent filter types.
Grease Filters
Grease filters capture oily particles from cooking fumes. They are usually made of metal mesh or aluminum. These filters stop grease from clogging the microwave vent. Grease filters need regular cleaning to work well. They can be washed with warm, soapy water or placed in a dishwasher.
Charcoal Filters
Charcoal filters remove smoke and odors from the air. They use activated carbon to absorb smells and harmful gases. Unlike grease filters, charcoal filters cannot be washed. They lose their effectiveness over time and need replacement. These filters are common in microwave vents without external exhaust.
Reusable Vs Disposable
Reusable filters can be cleaned and used again many times. Grease filters often fall into this category. Disposable filters are meant for single use or limited time. Charcoal filters usually come as disposable units. Choosing the right type depends on your microwave model and usage. Regular care extends the life of reusable filters and keeps your kitchen fresh.
Credit: www.reddit.com
Tools And Materials Needed
Before starting to clean your microwave vent filter, gather the right tools and materials. This preparation makes the process easier and more effective. Using the correct items ensures a thorough clean without damage.
Below are the essential cleaning solutions, scrubbing tools, and drying equipment you need for this task.
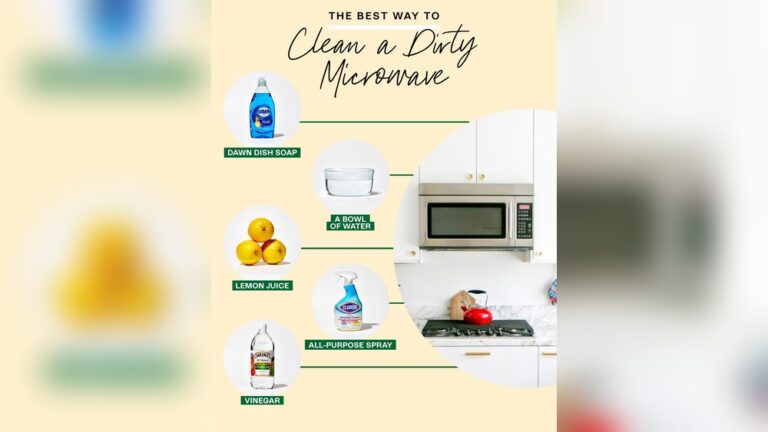
Cleaning Solutions
Choose a mild dish soap to remove grease and dirt. Warm water helps break down grime quickly. White vinegar is a natural cleaner that cuts through grease well. Baking soda works as a gentle abrasive to lift stuck-on residue. Avoid harsh chemicals that can damage the filter.
Scrubbing Tools
Use a soft sponge or cloth to avoid scratching the filter. A soft-bristle brush helps reach tight corners and crevices. For tough spots, a non-abrasive scrubbing pad works best. Avoid steel wool or metal brushes that can damage the mesh.
Drying Equipment
Have a clean towel ready to pat the filter dry. Air drying on a rack or clean surface prevents moisture buildup. Make sure the filter is completely dry before reinstalling to avoid mold growth. A well-ventilated area speeds up drying time.
Removing The Filter
Removing the microwave vent filter is the first step in cleaning it properly. The filter collects grease and particles during cooking. Taking it out carefully prevents damage and makes cleaning easier. Below are simple steps to find and remove your microwave’s vent filter safely.
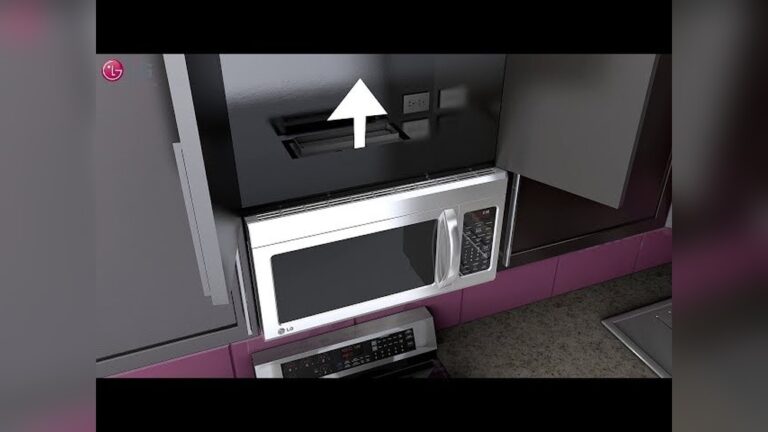
Locating The Filter
Most microwave vent filters are under the unit or behind a grille. Look beneath the microwave for a removable panel. Some filters slide out, while others may clip in place. Check your microwave manual for exact location. Knowing where to find it saves time and effort.
Safe Removal Tips
Turn off the microwave and unplug it before starting. Use both hands to avoid dropping the filter. Avoid using sharp tools that can damage the filter or microwave. If the filter is stuck, gently wiggle it free. Keep the filter flat to prevent bending or breaking.
:max_bytes(150000):strip_icc()/SPR-how-to-how-to-clean-a-microwave-filter-7565609-hero-01-de0ebc1318074aa2a919d63651e222c4.jpg)
Credit: www.thespruce.com
Cleaning Methods
Cleaning your microwave vent filter keeps it working well and removes trapped grease. Different methods help break down dirt and grime without damaging the filter. Choose the best option based on your filter type and how dirty it is. Here are three simple ways to clean your microwave vent filter effectively.
Soaking In Hot Soapy Water
Fill a large basin with hot water and add a few drops of dish soap. Stir the water to create suds. Place the vent filter in the soapy water and let it soak for 15 to 30 minutes. The warm water softens grease and food particles. After soaking, use a soft brush to scrub away any remaining dirt. Rinse the filter well under warm running water. Let it dry completely before reinstalling it.
Using Vinegar And Baking Soda
Sprinkle baking soda over the surface of the filter. Pour white vinegar slowly on top. The mixture will fizz and help lift stubborn grease. Let the filter sit with the mixture for 10 to 15 minutes. Use a soft brush to scrub the filter gently. Rinse thoroughly with warm water to remove all residue. Dry the filter fully before placing it back.
Dishwasher Cleaning Option
Check if your microwave vent filter is dishwasher safe. Place the filter in the dishwasher’s top rack. Use a normal wash cycle with your regular detergent. The dishwasher’s heat and water pressure clean the filter well. After the cycle finishes, take the filter out and let it air dry. Avoid putting non-dishwasher-safe filters in the dishwasher as it may damage them.
Scrubbing And Rinsing
Cleaning the microwave vent filter involves scrubbing and rinsing to remove grease and dirt. Proper cleaning keeps the filter working well and prevents smoke or odors. Use gentle scrubbing and thorough rinsing for the best results.
Gentle Scrubbing Techniques
Start by soaking the filter in warm water with mild dish soap. Let it sit for 10 to 15 minutes to loosen grease. Use a soft brush or sponge to scrub the filter gently. Avoid harsh scrubbing to prevent damage. Focus on areas with heavy buildup. Rinse the brush often to keep it clean. Keep scrubbing until the filter looks cleaner and feels less greasy.
Thorough Rinsing Steps
Rinse the filter under warm running water. Make sure to remove all soap and dirt. Hold the filter at different angles to flush out trapped grease. Check the filter for any remaining residue. Repeat rinsing if needed until the water runs clear. Shake off excess water and let the filter air dry completely before reinstalling.
Drying And Reinstallation
Drying and reinstalling the microwave vent filter is a vital step after cleaning. Proper drying prevents moisture buildup that can cause odors or damage. Reinstallation ensures the filter functions well and keeps your microwave vent working efficiently.
Air Drying Tips
Place the filter on a clean, dry towel in a well-ventilated area. Avoid direct sunlight to prevent warping or damage. Let it dry naturally for several hours until completely moisture-free. Do not use a hairdryer or heat source to speed drying. Moisture trapped in the filter can cause mold or rust.
Reattaching The Filter Properly
Align the filter with the slots or clips in the microwave vent. Gently press it into place without forcing or bending. Check that the filter sits flush and does not move. Secure any latches or screws to hold it firmly. A well-installed filter improves airflow and keeps grease from entering the vent system.
When To Replace Filters
Knowing when to replace your microwave vent filter is important. A clean filter helps your microwave work well and keeps your kitchen air fresh. Filters trap grease, smoke, and odors. Over time, they get clogged and less effective. Replacing them on time keeps your microwave safe and efficient.
Check your filter regularly. Signs of damage or heavy dirt mean it is time to change the filter. Different filters have different lifespans. Some need cleaning, while others need full replacement. Keep your kitchen healthy and your microwave running smoothly by staying on top of filter care.
Signs Of Wear And Tear
Look for visible damage on the filter. Cracks, holes, or tears mean the filter cannot trap grease well. If grease builds up and does not come off with cleaning, replacement is needed. A persistent bad smell from the microwave vent also shows the filter is worn out. Filters that are darkened or brittle should be replaced right away to avoid smoke and fire risks.
Charcoal Filter Replacement
Charcoal filters absorb odors but lose power over time. They cannot be cleaned like metal filters. Replace charcoal filters every 3 to 6 months depending on use. Check the manufacturer’s instructions for exact timing. New charcoal filters ensure your kitchen smells fresh and keep cooking smells from spreading. Regular replacement prevents buildup that can reduce microwave efficiency.

Credit: www.youtube.com
Preventing Future Buildup
Preventing future buildup on your microwave vent filter is essential for maintaining its efficiency. A clean filter improves airflow and reduces odors. It also extends the life of your microwave’s ventilation system. Simple habits can keep the filter in good condition for a long time.
Regular Cleaning Schedule
Set a regular time to clean the vent filter. Cleaning it every one to two months works well for most kitchens. This helps stop grease and dust from piling up. Mark it on your calendar or set a reminder on your phone. Consistency keeps the filter working at its best.
Avoiding Excessive Grease
Use a vent hood or open a window when cooking greasy foods. This reduces the amount of grease that reaches the microwave filter. Wipe spills and splatters on the stove and microwave quickly. Less grease buildup means easier cleaning and better air quality. Simple actions protect your filter and kitchen.
Frequently Asked Questions
How To Clean Microwave Vent Fan Filter?
Remove the microwave vent fan filter carefully. Soak it in hot, soapy water with a mild detergent. Scrub gently with a soft brush. Rinse thoroughly under warm water. Let it air dry completely before reinstalling. Avoid harsh chemicals to protect the filter’s quality.
Clean regularly for best performance.
Can You Wash And Reuse Microwave Filters?
Yes, you can wash and reuse microwave grease filters. Clean them with warm soapy water or a mild detergent. Avoid washing charcoal filters; replace them when dirty. Always dry filters completely before reinstalling to maintain efficiency and safety.
How Do You Clean A Vent Filter?
Remove the vent filter carefully. Soak it in hot water with dish soap. Scrub gently to remove grease. Rinse thoroughly with hot water. Let it air dry completely before reinstalling. Replace charcoal filters if not reusable.
How To Clean Inside Microwave Vents?
Remove the microwave vent filter carefully. Soak it in hot water with dish soap. Scrub gently using a soft brush. Rinse thoroughly and air dry completely before reinstalling. Avoid harsh chemicals to protect the filter and microwave. Clean vents regularly for optimal performance.
Conclusion
Cleaning your microwave vent filter keeps your kitchen fresh and safe. Regular cleaning stops grease buildup and smoke odors. Use warm water, mild soap, and a soft brush for best results. Let the filter dry completely before reinstalling it. A clean filter helps your microwave work better and last longer.
Make this simple task part of your kitchen routine. Small effort, big difference.