How to Clean Microwave Filters: Quick, Easy, and Effective Tips
If your microwave smells funny or isn’t working as efficiently, the culprit might be dirty filters. You might not realize it, but your microwave’s filters trap grease, smoke, and food particles every time you cook.
Over time, these filters get clogged and make your microwave less effective. But don’t worry—cleaning your microwave filters is easier than you think, and it can save you money and keep your kitchen fresh. In this guide, you’ll learn simple, step-by-step tips to clean those filters quickly and safely.
Ready to make your microwave work like new again? Let’s dive in!
:max_bytes(150000):strip_icc()/SPR-how-to-how-to-clean-a-microwave-filter-7565609-step-05-34e2ebc12910401f93587af4b492a014.jpg)
Credit: www.thespruce.com
Microwave Filter Types
Microwave filters help keep your kitchen air clean and free from cooking odors and grease. Different microwave models use different filter types. Knowing the filter type helps in proper cleaning and maintenance. Two common types are grease filters and charcoal filters. Each type has a unique function and cleaning method.
Grease Filters
Grease filters catch oil and food particles released during cooking. They are usually made of metal mesh or aluminum. These filters prevent grease from entering the microwave’s vent system. Cleaning grease filters is simple. Remove the filter and soak it in warm, soapy water. Use a soft brush to remove stuck grease. Rinse and dry the filter before placing it back. Some grease filters are dishwasher safe. Check your microwave manual before using the dishwasher.
Charcoal Filters
Charcoal filters absorb odors and smoke from cooking. They contain activated charcoal that traps smells. These filters are common in microwaves without external vents. Unlike grease filters, charcoal filters cannot be washed. They lose effectiveness over time and need replacement. Check the filter’s condition regularly. Replace the charcoal filter every 6 to 12 months, depending on use. Proper replacement keeps your kitchen smelling fresh and clean.
:strip_icc()/BHG-How-to-Clean-a-Microwave-Filter-and-Exterior-Step-02-8cd0ec4e83d54dc3948c145998a304d1.jpg)
Credit: www.bhg.com
Safety First
Safety is the top priority when cleaning microwave filters. Taking simple precautions prevents accidents and protects your appliance. Follow these easy steps to stay safe and clean effectively.
Unplugging The Microwave
Always unplug the microwave before starting any cleaning. This stops electricity from flowing and avoids shocks. Never clean filters while the microwave is plugged in. Removing the plug is the first and most important step.
Handling Filters Carefully
Microwave filters can be delicate and sharp at the edges. Hold them gently to avoid cuts or damage. Avoid bending or forcing the filters during removal or cleaning. Use soft cloths and gentle cleaners to keep filters safe and intact.
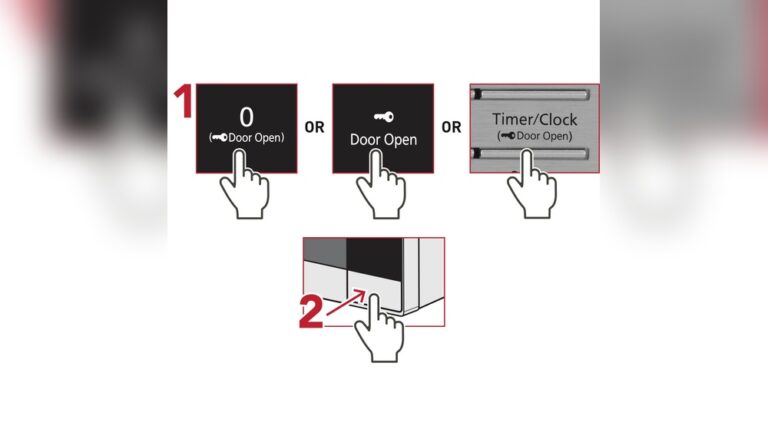
Removing Filters
Removing microwave filters is the first step in cleaning them effectively. Filters catch grease and food particles. Over time, they get clogged and reduce microwave efficiency. Proper removal ensures a thorough clean without damage.
Follow simple steps to locate and detach the filters safely. Always unplug the microwave before starting. This prevents any electrical hazards. Handle filters gently as some may be fragile or have clips.
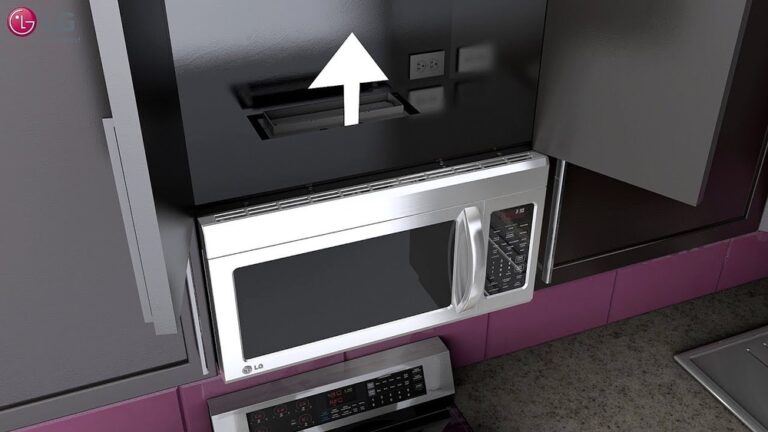
Locating The Filters
Filters are usually behind the vent cover. Check the top or bottom of the microwave. Sometimes, they are inside the microwave hood. Look for a grille or panel that can open or slide out. Refer to your microwave manual for exact filter locations.
Filters come in two types: grease and charcoal. Grease filters are metal and trap oil. Charcoal filters absorb odors and are often inside the microwave. Identifying the filter type helps in proper cleaning.
Detaching Filters
Most filters slide or pop out easily. Some are secured with screws or clips. Use a screwdriver if needed, but keep screws safe. Avoid forcing the filter out to prevent damage.
Hold the filter firmly and pull it gently. For clip-secured filters, press or lift clips to release. Place the removed filters on a clean surface. Clean filters immediately to avoid grease buildup hardening.
Cleaning Solutions
Choosing the right cleaning solution is key to removing grease and grime from microwave filters. Simple household ingredients work well and are safe for your filters. These solutions break down stubborn dirt without damaging the filter material. Here are three effective cleaning solutions to try.
Dish Soap And Hot Water
Start with a mild dish soap mixed in hot water. This basic solution cuts through light grease easily. Soak the filters in the mixture for 10 to 15 minutes. Then, gently scrub with a soft sponge or brush. Rinse thoroughly with clean water and let dry completely.
Baking Soda Boost
Add a quarter cup of baking soda to your dish soap and hot water mix. Baking soda increases the solution’s power against tough stains. Soak the filters longer, about 20 minutes, for better results. Scrub gently to avoid damaging the filter. Rinse well and air dry before reinstalling.
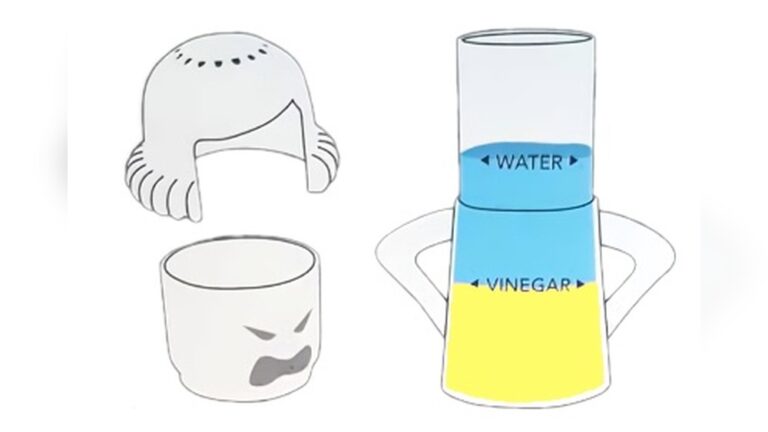
Vinegar Mixture
Mix equal parts white vinegar and hot water for a natural cleaner. Vinegar dissolves grease and neutralizes odors effectively. Soak the filters in this solution for 15 to 20 minutes. Use a soft brush to remove any remaining grime. Rinse with water and let the filters dry fully before use.
Cleaning Process
Cleaning microwave filters is essential to keep your appliance working efficiently. The process removes grease and food particles that block airflow. Regular cleaning prevents odors and extends filter life. Follow simple steps to restore your filters quickly and safely.
Soaking Filters
Start by removing the filters from the microwave. Fill a basin with hot water and add a few drops of dish soap. Submerge the filters fully and let them soak for 15 to 30 minutes. Soaking loosens grease and stuck-on debris. For tough grime, add a spoon of baking soda to the water.
Scrubbing Techniques
After soaking, scrub the filters gently to remove remaining dirt. Use a soft brush or sponge to reach all corners. Avoid harsh scrubbing that might damage the filter mesh. Focus on areas with thick grease buildup. Rinse thoroughly under warm running water to wash away soap and loosened grime.
Using Non-abrasive Tools
Choose non-abrasive cleaning tools to protect your filters. Soft sponges, nylon brushes, or microfiber cloths work best. Avoid steel wool or rough scrubbers that can tear or scratch the filter surface. Handle filters carefully to keep them intact. Dry filters completely before reinstalling to prevent mold growth.
Rinsing And Drying
Rinsing and drying microwave filters is a crucial step to keep them clean and effective. After scrubbing away grease and grime, proper rinsing removes all soap and dirt residues. Drying the filters completely prevents mold and damage. This section covers how to rinse well and the best drying methods.
Thorough Rinsing
Use warm running water to rinse the microwave filter carefully. Ensure all soap suds disappear from the filter surface. Hold the filter under the faucet and let water flow through any mesh or holes. Check for remaining dirt or grease spots and rinse again if needed. Avoid using high water pressure as it may damage delicate filters. A gentle rinse removes cleaning agents and loose debris effectively.
Air-drying Vs Towel Drying
Air-drying is the safest way to dry microwave filters. Place the filter on a clean rack or towel and let it dry naturally. This method stops fibers from tearing and avoids leaving lint on the filter. It may take several hours, but it protects filter quality.
Towel drying speeds up the process. Use a soft, lint-free cloth and gently pat the filter dry. Avoid rubbing, which might damage the filter material. Towel drying works well when you need to reinstall the filter quickly. Ensure the filter is fully dry before placing it back to prevent moisture buildup inside the microwave.
Reinstalling Filters
After thoroughly cleaning your microwave filters, reinstalling them correctly is important. Proper reinstallation ensures your microwave works efficiently and safely. Taking time to align and secure the filters prevents damage and maintains good airflow.
Aligning And Securing
First, locate the filter slots inside the microwave vent area. Hold the filter so the edges match the shape of the slot. Gently slide or press the filter into place. Avoid forcing it to prevent breaking the filter or microwave parts.
Once the filter is in position, secure it by fastening any clips, screws, or latches. These hold the filter tightly and stop it from moving during microwave use. Double-check that all fasteners are in place and firm.
Checking For Proper Fit
After securing the filter, inspect the fit carefully. Look for gaps between the filter and microwave frame. A snug fit prevents dust and grease from bypassing the filter.
Try gently pressing on the filter edges. It should not shift or loosen easily. If the filter moves, remove it and realign it before securing again. Proper fit keeps your microwave clean and running well.
:max_bytes(150000):strip_icc()/SPR-how-to-how-to-clean-a-microwave-filter-7565609-hero-01-de0ebc1318074aa2a919d63651e222c4.jpg)
Credit: www.thespruce.com
Dishwasher Cleaning Option
Using a dishwasher to clean microwave filters offers a convenient way to remove grease and dirt. It saves time and effort compared to hand scrubbing. Before placing filters in the dishwasher, it is important to check their suitability. Not all microwave filters can withstand dishwasher cleaning. Understanding the best practices helps keep filters in good condition and extends their life.
Suitability For Different Filters
Not all microwave filters are dishwasher safe. Metal grease filters usually handle dishwasher cleaning well. Charcoal or carbon filters should never go in the dishwasher. These filters absorb odors and moisture, which can damage their function. Always check the manufacturer’s instructions for your microwave model. Using the dishwasher on unsuitable filters may cause damage or reduce filter efficiency.
Best Practices
Place the filter securely on the dishwasher rack to avoid bending or breaking. Use a gentle or normal wash cycle with mild detergent. Avoid using high heat drying, which may warp the filter. After washing, let the filter dry completely before reinstalling. Inspect the filter for any damage or residue before placing it back. Regular dishwasher cleaning keeps metal filters free of grease buildup and working well.
When To Replace Filters
Knowing when to replace microwave filters helps keep your microwave working well. Filters trap grease, smoke, and odors. Over time, they get clogged and less effective. Replacing filters on time keeps your kitchen air clean and your microwave safe.
Signs Of Wear
Look for dark stains that don’t wash off. Filters that smell bad even after cleaning need replacing. If the filter feels brittle or falls apart, it is worn out. A filter that blocks airflow makes the microwave noisy or hot. These signs mean the filter cannot do its job well.
Manufacturer Recommendations
Check your microwave’s manual for filter replacement advice. Most makers suggest changing charcoal filters every six months. Grease filters may last longer but need regular cleaning. Follow the schedule to avoid damage and keep your microwave efficient. Using the right filter model also matters for safety and performance.
Tips For Maintaining Filters
Maintaining microwave filters keeps your appliance working well and your kitchen air fresh. Clean filters trap grease and odors better. Follow simple tips to extend filter life and boost microwave performance.
Regular Cleaning Schedule
Set a routine to clean microwave filters every one to two months. More frequent cleaning helps if you cook often or fry food. This prevents grease build-up and blockages. Mark your calendar or set reminders. Regular care stops tough grime and keeps filters fresh.
Avoiding Common Mistakes
Do not use harsh chemicals or abrasive tools on filters. They can damage the mesh or charcoal inside. Avoid soaking filters too long, as this may weaken parts. Always dry filters completely before reinstalling. Never run the microwave without filters in place. These errors reduce filter life and microwave safety.
Frequently Asked Questions
What Is The Best Way To Clean Microwave Filters?
Remove the microwave filter and soak it in hot water with dish soap. Scrub gently using a non-abrasive sponge. Rinse thoroughly and let it dry completely before reinstalling. For tough grease, add baking soda or vinegar to the solution.
Can You Clean And Reuse Microwave Filters?
Yes, you can clean and reuse microwave grease filters. Soak them in hot, soapy water, scrub gently, rinse, dry fully, then reinstall. Charcoal filters usually need replacement, not cleaning. Regular cleaning maintains efficiency and prevents odors.
How To Clean Greasy Microwave Vents?
Unplug the microwave and remove the vent cover or grease filters. Soak them in hot, soapy water with baking soda or vinegar. Scrub with a non-abrasive sponge, rinse well, and dry completely. Reinstall the filters securely after cleaning.
Can Microwave Filters Be Washed In The Dishwasher?
Microwave grease filters can usually go in the dishwasher’s top rack. Check your microwave’s manual first. Avoid washing charcoal filters in the dishwasher. Hand wash with warm soapy water and dry filters completely before reinstalling. Proper cleaning extends filter life and maintains microwave performance.
Conclusion
Cleaning microwave filters keeps your appliance working well and your kitchen fresh. Regular care removes grease and odors quickly and easily. Use simple household items like soap, baking soda, or vinegar for best results. Dry filters fully before putting them back to avoid damage.
A clean filter also improves air flow and microwave safety. Make filter cleaning part of your kitchen routine. Your microwave will last longer and perform better with little effort. Small steps bring big benefits in kitchen care.