How to Change Light Bulb on Ge Microwave: Easy Step-by-Step Guide
Is the light inside your GE microwave flickering or completely out? You might think replacing that tiny bulb is tricky or best left to a technician.
But here’s some good news: changing the light bulb in your GE microwave is simpler than you expect. With just a few easy steps, you can restore your microwave’s bright interior and cook with confidence again. In this guide, you’ll learn exactly how to safely and quickly replace your GE microwave’s light bulb—no special tools or skills needed.
Keep reading, and you’ll have your microwave shining bright in no time!
Safety Precautions
Changing the light bulb in your GE microwave requires careful attention. Safety precautions protect you from electric shocks and injury. Follow these simple steps to stay safe during the process.
Unplugging The Microwave
Always unplug the microwave before starting any work. This cuts off electricity and lowers shock risk. Do not rely on just turning off the microwave. Pull the plug from the wall socket completely.
Wait a few minutes to let the microwave cool down. Touching hot parts can cause burns. Ensure your hands are dry before handling the plug or any parts.
Handling Bulbs Safely
Use a cloth or gloves to handle the light bulb. Oils from your fingers can shorten bulb life or cause it to break. Hold the bulb gently but firmly to avoid dropping it.
Dispose of the old bulb carefully. Microwave bulbs may contain small amounts of hazardous material. Place the bulb in a box or wrap it in paper before throwing it away.

Credit: www.amazon.com
Identifying The Bulb Location
Finding the light bulb in your GE microwave is the first step to replacing it. The bulb is not always easy to spot. It may be hidden under the microwave or inside the cooking cavity. Knowing where to check saves time and effort. This section guides you through the common bulb locations on GE microwaves.
Checking Under The Microwave
Many GE microwaves have the light bulb located underneath. Look for a small vent or cover panel on the bottom. This cover often protects the bulb and allows light to shine through the vent. Use a flashlight to see if you can spot the bulb behind the cover. Sometimes, the cover is held by screws. Prepare a screwdriver if needed.
Inspecting Inside The Cavity
Open the microwave door and look inside the cooking area. Check the upper right or left corners near the top panel. The bulb may sit behind a small cover inside the cavity. This location helps light up the food while cooking. The bulb cover might be clipped or screwed in place. Handle it gently to avoid damage.
Locating The Light Cover
The light cover protects the bulb and spreads light evenly. It can be a plastic or glass panel. Look for this cover either inside the microwave or under it. The cover might have a small latch or screws securing it. Removing the cover carefully is important to reach the bulb. Always keep track of screws to avoid losing them.
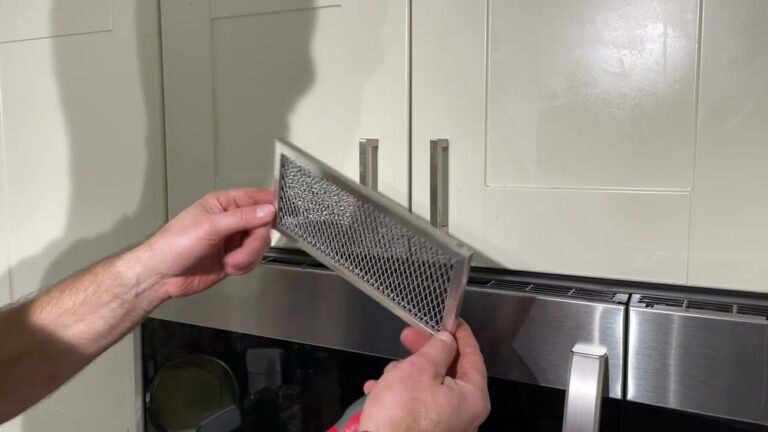
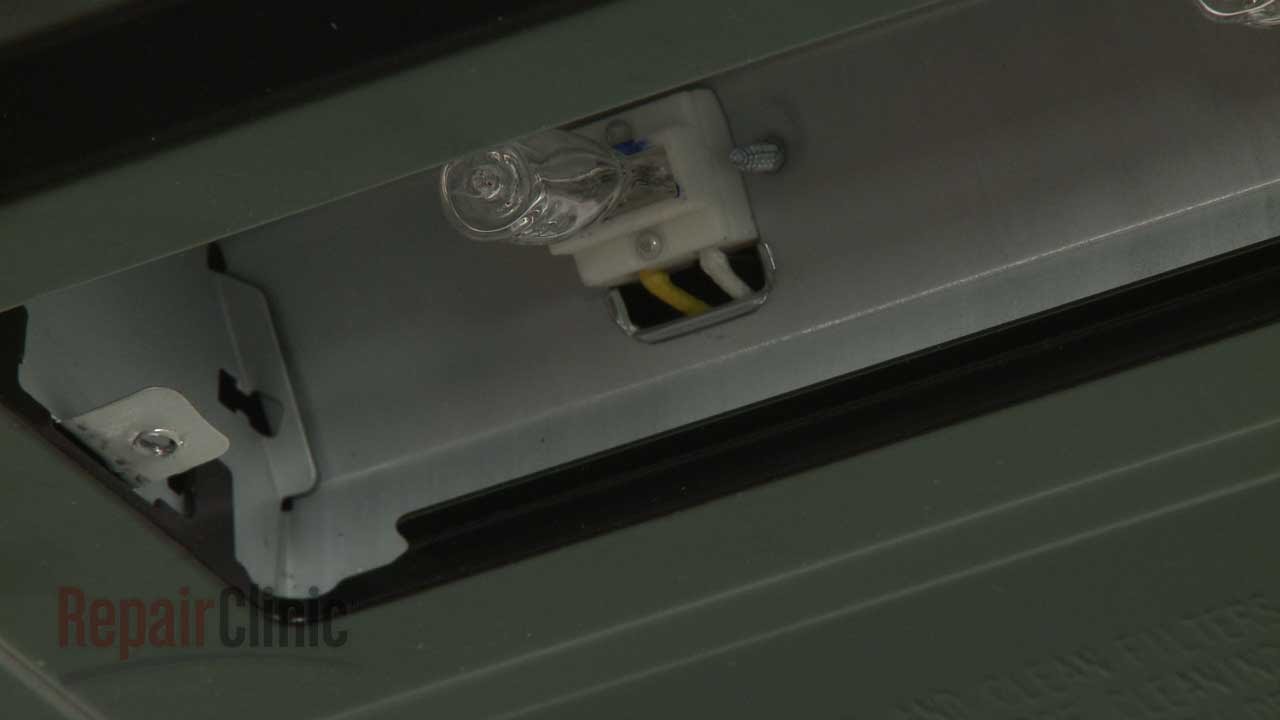
Removing The Light Cover
Removing the light cover on a GE microwave is the first step to changing the bulb. This cover protects the light bulb and keeps it secure. It may be held by a screw, clips, or hinges. Knowing how to remove it safely prevents damage and makes the bulb replacement easier.
Always unplug the microwave before starting. This prevents electrical shock and ensures safety. Handle the cover gently to avoid cracks or breaks.
Unscrewing The Retaining Screw
Look for a small screw holding the light cover in place. Use a screwdriver to turn the screw counterclockwise. Remove the screw carefully and keep it safe. Avoid using a power screwdriver; it may damage the screw or cover. Once the screw is out, the cover should lift off easily.
Releasing Clips Or Latches
Some GE microwave covers use clips or latches instead of screws. Check the edges of the cover for small tabs. Press or pull these tabs gently to release the cover. Do not force the cover off. It should come off smoothly once the clips are unlocked. This method keeps the cover secure but easy to remove.
Handling Hinged Covers
Hinged covers open like a small door. After loosening the screw or clips, the cover may stay attached by a hinge. Gently swing the cover open to access the bulb. Do not pull hard to avoid breaking the hinge. When finished, close the cover and secure it back in place.
Removing The Old Bulb
Removing the old bulb from your GE microwave is the first step in replacing it safely. This process requires care to avoid damage to the microwave or the bulb socket. Always ensure the microwave is unplugged before starting. Take your time to handle the bulb gently, as microwave bulbs can be fragile and hot.
Focus on the bulb itself and the cover that protects it. Removing the cover might involve unscrewing a small screw or gently releasing clips. Once the cover is off, you can access the old bulb for removal.
Unscrewing The Bulb
Hold the bulb firmly but gently. Turn the bulb counterclockwise to unscrew it from the socket. Avoid using excessive force to prevent breaking the bulb. If the bulb feels stuck, wiggle it slightly while turning. After it loosens, carefully pull it out from the socket.
Avoiding Finger Contact With Glass
Do not touch the glass part of the new or old bulb with your fingers. Oils from your skin can cause hot spots on the bulb, leading to early failure. Use a clean cloth or gloves to handle the bulb. This practice ensures the bulb lasts longer and performs well.
Choosing The Right Replacement Bulb
Choosing the right replacement bulb for your GE microwave is important for safety and proper function. The bulb must fit well and provide enough light without causing damage. Using the wrong bulb can lead to poor lighting or even harm the microwave. Follow simple steps to find the correct bulb type and wattage. Consider the bulb style that matches your microwave model. Also, decide between LED and incandescent bulbs based on your needs.
Checking Bulb Type And Wattage
Start by identifying the bulb type your microwave uses. Look inside the microwave or under the vent cover for the bulb. Check the old bulb for markings showing its type and wattage. GE microwaves often use 15-watt or 40-watt bulbs. Using a bulb with higher wattage can cause overheating. Always match the wattage exactly to avoid issues. The bulb’s shape and base size must also fit the socket properly.
Using Appliance-specific Bulbs
Choose bulbs made for appliances like microwaves. These bulbs handle heat and vibrations better than regular bulbs. Appliance bulbs last longer and are safer in microwave environments. Avoid using household bulbs, as they may burn out quickly. Find bulbs labeled for microwave or appliance use. This ensures compatibility and reduces risks of damage or fire. Appliance-specific bulbs also meet manufacturer safety standards.
Considering Led Vs Incandescent
Decide if you want LED or incandescent bulbs for your microwave. LED bulbs use less energy and last much longer. They produce less heat, which is safer for your appliance. Incandescent bulbs are cheaper but consume more power. They also have shorter lifespans and get hotter. LED bulbs offer better efficiency and durability. Check if your microwave supports LED bulbs before buying. Both types must fit the socket and match wattage needs.
Installing The New Bulb
Installing the new bulb in your GE microwave is a simple but important step. Proper installation ensures the light works correctly and lasts longer. Handle the bulb carefully to avoid damage.
Proper Bulb Insertion Techniques
Hold the new bulb by the base, not the glass. Oils from your fingers can shorten the bulb’s life. Align the bulb’s base with the socket inside the microwave. Gently push the bulb into place without forcing it. Make sure it fits snugly and securely in the socket. Avoid twisting too hard to prevent breaking the bulb or socket.
Securing The Light Cover
After the bulb is in place, put the light cover back on. Align the cover with the hinges or clips carefully. Press it firmly but gently to ensure it stays in place. Use a screwdriver to tighten any screws that hold the cover. Do not over-tighten to avoid cracking the cover. Check that the cover sits flush and does not wobble.
Testing The New Light
Testing the new light in your GE microwave is a crucial step. It ensures the bulb works correctly and your microwave light functions as expected. This process confirms the bulb installation is successful and safe before regular use.
After installing the new bulb, carefully check if it lights up. Testing helps catch any issues early. Follow the steps below to power on your microwave and troubleshoot common problems.
Plugging In And Powering On
First, plug the microwave back into the power outlet. Make sure the connection is secure and the socket works.
Next, open the microwave door. The light should turn on immediately. If the light stays off, try pressing the start button briefly. This action may also activate the bulb.
Observe the bulb for a few seconds. It should glow steadily without flickering or dimming. If the light works, the replacement is successful.
Troubleshooting Common Issues
If the light does not turn on, check the bulb’s fit inside the socket. It might be loose or not fully seated.
Inspect the bulb for any visible damage. A cracked or broken bulb will not light up.
Verify the bulb type matches your GE microwave’s specifications. Using the wrong wattage or type can cause failure.
Look for blown fuses or tripped circuit breakers in your home’s electrical panel. Reset them if needed.
If problems persist, the issue may be with the microwave’s wiring or the light socket. Consider professional help for these cases.
Credit: www.youtube.com
When To Seek Professional Help
Knowing when to call a professional can save time and avoid damage. Some microwave light bulb issues need expert care. Attempting repairs beyond your skill may harm the appliance or cause injury. Recognizing these situations helps keep your GE microwave safe and functional.
Complex Disassembly Needs
Some GE microwave models require removing many parts to reach the bulb. This process may involve handling delicate components or wiring. Incorrect disassembly can break parts or void warranties. Professionals have tools and knowledge to perform this safely and correctly. If your microwave’s design looks complicated, trust a technician to handle it.
Non-replaceable Led Lights
Many modern GE microwaves use built-in LED lights. These LEDs often cannot be replaced like traditional bulbs. Instead, the entire light panel or control board may need replacement. This task requires advanced skills and special parts. Trying to replace non-replaceable LEDs yourself may cause more damage. Let a professional diagnose and fix these issues for best results.

Credit: www.amazon.com
Frequently Asked Questions
How Do I Replace The Lightbulb In My Ge Microwave?
Unplug your GE microwave first. Locate and remove the light cover by unscrewing it. Carefully unscrew the old bulb and replace it with the same type and wattage. Avoid touching the new bulb’s glass. Secure the cover back and plug in the microwave.
How To Remove Microwave Light Cover?
Unplug the microwave first. Locate the light cover and remove its screw with a screwdriver. Gently open the hinged cover to access the bulb. Replace or clean as needed, then secure the cover back in place.
How Do You Remove The Lightbulb Cover On A Ge Oven?
Unplug the GE oven first. Locate the lightbulb cover inside the oven cavity. Twist or gently pry the cover off. Remove the bulb carefully. Replace with the correct bulb type and wattage. Reattach the cover securely before plugging the oven back in.
Conclusion
Changing the light bulb in your GE microwave is simple and quick. Always unplug the microwave before starting. Find the bulb cover, remove it carefully, and replace the old bulb with the right type. Avoid touching the new bulb’s glass to keep it safe.
After putting the cover back, plug the microwave in and test the light. Following these easy steps ensures your microwave light works well again. Keep your manual handy for model-specific tips. Bright and clear—now your microwave light is ready to shine!