How Do You Clean Sponges in the Microwave: Quick & Effective Tips
Your kitchen sponge works hard every day, soaking up messes and scrubbing dishes. But have you ever wondered how clean your sponge really is?
If you’re like most people, your sponge might be harboring more germs than you’d like to think. Luckily, there’s a quick and easy way to kill those bacteria without harsh chemicals—using your microwave! You’ll discover exactly how to clean sponges in the microwave safely and effectively.
Keep reading to learn simple steps that can help you maintain a fresh, germ-free sponge and keep your kitchen healthier.

Credit: www.whirlpool.com
Preparing Your Sponge
Preparing your sponge before microwaving is a key step. It helps ensure safety and better cleaning results. Proper preparation prevents accidents and maximizes the sponge’s ability to kill germs.
Check For Metal Components
Inspect your sponge carefully for any metal parts. Some sponges have scrubbing pads with metal fibers or small metal pieces. Metal can cause sparks and fires in the microwave. Remove any sponge with metal components before microwaving. Use only sponges made entirely of plastic or cellulose.
Wet The Sponge Thoroughly
Make sure the sponge is fully wet before microwaving. Water creates steam, which helps kill bacteria. A dry sponge can catch fire in the microwave. Run the sponge under water until it is soaked through. Squeeze out excess water so it is wet but not dripping. This step is crucial for effective sanitizing.
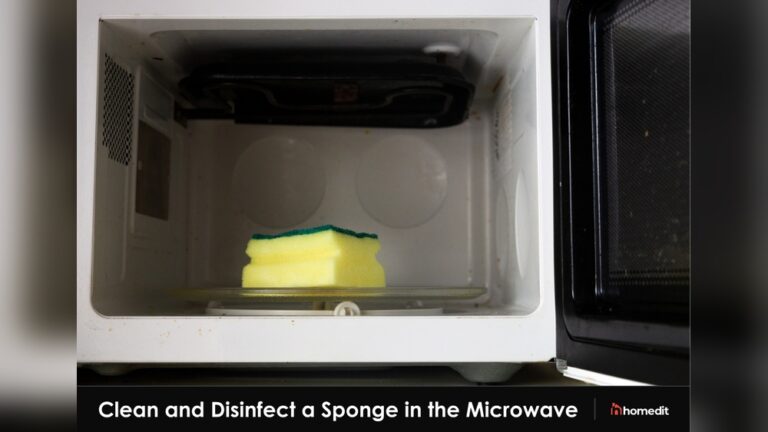
Microwaving Process
Cleaning a sponge in the microwave is a quick and effective method. The microwaving process kills most bacteria and germs living inside the sponge. This simple technique uses heat and steam to sanitize without harsh chemicals. Follow the steps carefully to ensure safety and best results.
Set Microwave Power And Time
First, set your microwave to high power. This setting generates the heat needed to kill bacteria. Microwave the wet sponge for one to two minutes. One minute may work for small sponges, while larger sponges need two minutes. Avoid overheating to prevent damage or fire hazards.
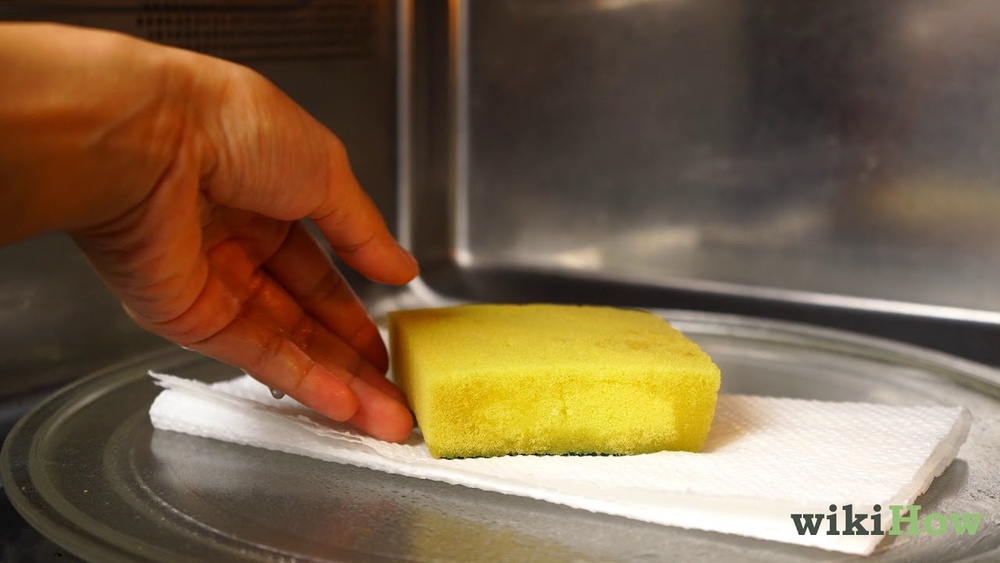
Safe Placement In Microwave
Place the wet sponge on a microwave-safe plate or bowl. Do not microwave the sponge dry. Ensure the sponge has no metal parts, which can cause sparks. Leave enough space around the sponge for steam to circulate. Stay nearby during the process to monitor safety.
Handling After Microwaving
Handling the sponge after microwaving is a crucial step in the cleaning process. The sponge becomes very hot and wet, which requires careful care. Proper handling helps avoid burns and maintains the sponge’s cleanliness. Follow these simple steps to handle your sponge safely and effectively after microwaving.
Use Protective Gear To Remove
Always use oven mitts or tongs to remove the sponge from the microwave. The sponge holds heat and can cause burns if touched with bare hands. Protective gear ensures your safety while handling the hot sponge. Never rush this step to avoid accidents.
Allow Sponge To Cool
Place the sponge on a heat-resistant surface and let it cool down naturally. Cooling reduces the risk of burns and helps the sponge dry slightly. Avoid squeezing or using the sponge immediately after microwaving. Waiting a few minutes makes it safer to handle.
Squeeze Out Excess Water
Once the sponge cools, gently squeeze out the extra water. Removing excess moisture helps the sponge dry faster and prevents bacteria growth. Do not twist or wring the sponge harshly to avoid damage. Proper drying keeps the sponge fresh and ready for use.
Frequency And Replacement Tips
Keeping your kitchen sponge clean is important for hygiene and food safety. Knowing how often to clean and when to replace your sponge helps maintain a healthy kitchen environment. Regular cleaning removes bacteria, while timely replacement prevents germs from building up.
How Often To Clean
Clean your sponge every day. Wet the sponge and microwave it on high for one to two minutes. This kills most bacteria and germs. Avoid microwaving dry sponges to prevent fire hazards. Daily cleaning keeps your sponge fresh and safer to use.
When To Replace Sponges
Replace your sponge every one to two weeks. Check for signs of wear like tears, bad smell, or color changes. A sponge that looks dirty or smells bad cannot be fully cleaned. Changing sponges regularly reduces the risk of bacteria spreading in your kitchen.
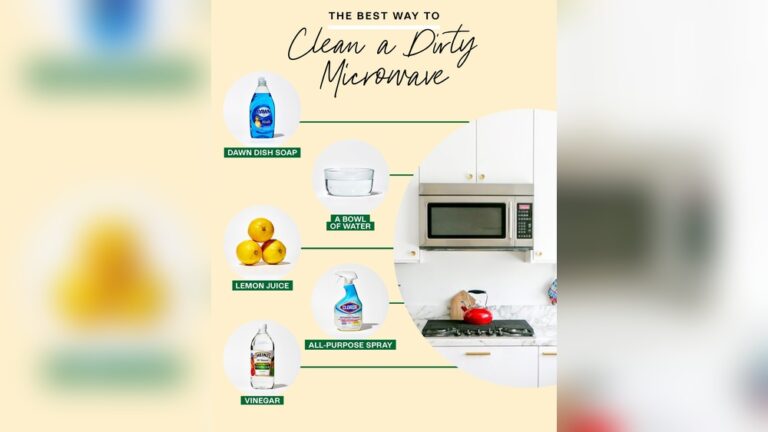
Alternative Cleaning Methods
Cleaning sponges in the microwave is popular, but there are other effective ways. Alternative cleaning methods can help keep your sponges fresh and bacteria-free. These techniques use common household items and simple steps. They offer good options if you prefer not to use a microwave or want a deeper clean.
Using Dishwasher
Place the sponge on the top rack of your dishwasher. Run a full cycle with the heated dry option. The heat and detergent work together to kill germs and remove dirt. This method is easy and uses appliances you already have. It also dries the sponge well, reducing moisture buildup.
Bleach Soaking Technique
Mix one part bleach with nine parts water in a bowl. Soak the sponge for five minutes in the solution. Rinse the sponge thoroughly with clean water afterward. Bleach kills most bacteria and viruses effectively. Use gloves to protect your skin and keep bleach away from children.

Credit: www.construction-manent.fr
Health Risks Of Dirty Sponges
Dirty sponges are a common source of germs in the kitchen. They trap food particles, moisture, and warm conditions. This creates a perfect environment for harmful bacteria to grow. Using a dirty sponge can spread germs to dishes, countertops, and hands. Understanding the health risks can help you keep your kitchen safer and cleaner.
Bacteria Growth Concerns
Sponges hold moisture and food bits that feed bacteria. Bacteria multiply quickly in these damp, warm spots. Some sponges can contain millions of bacteria per square inch. These include dangerous types like E. coli and Salmonella. Regular cleaning is necessary to reduce this bacterial load. Without cleaning, sponges become a breeding ground for germs.
Potential Illnesses
Dirty sponges can cause stomach pain, diarrhea, and vomiting. They spread bacteria that lead to food poisoning. Some bacteria can cause infections in wounds or cuts. Cross-contamination from sponges can infect other surfaces. Children, elderly, and those with weak immune systems are at higher risk. Cleaning your sponge lowers the chance of these illnesses.
Common Mistakes To Avoid
Cleaning sponges in the microwave is a quick way to kill germs. Many people try this method but make mistakes that reduce its effectiveness or cause damage. Avoiding these common errors helps keep your sponge clean and safe to use. Below are key mistakes to watch out for.
Microwaving Dry Sponges
Never microwave a dry sponge. A dry sponge can catch fire easily. Water in the sponge creates steam, which kills bacteria. Always soak the sponge thoroughly before microwaving. This keeps the sponge moist and safe.
Ignoring Metal Parts
Check your sponge for metal parts before microwaving. Metal can cause sparks and start a fire in the microwave. Remove sponges with scrubbers or metal fibers first. Only microwave sponges without any metal components. This prevents damage to your microwave and keeps you safe.

Credit: www.theguardian.com
Frequently Asked Questions
How Do I Sanitize A Sponge In The Microwave?
To sanitize a sponge in the microwave, first wet it thoroughly and ensure no metal parts. Microwave on high for 1-2 minutes. Use tongs to remove it carefully. Let it cool, then squeeze out excess water before reuse. Repeat daily for best results.
How Long Do You Put A Wet Sponge In The Microwave To Clean It?
Microwave a thoroughly wet sponge on high for 1 to 2 minutes to kill bacteria. Use tongs to remove and let it cool before handling.
How To Clean Dirty Dish Sponges?
Wet the sponge thoroughly, then microwave on high for 1-2 minutes to kill bacteria. Let it cool before use. Replace sponges every 1-2 weeks.
Can You Disinfect A Loofah In The Microwave?
Yes, you can disinfect a loofah in the microwave. Soak it in water first, then microwave on high for 1-2 minutes. Use tongs to remove it safely and let it cool before use. This method helps kill bacteria effectively.
Conclusion
Cleaning sponges in the microwave is quick and effective. Always wet the sponge before microwaving to create steam. Heat it on high for one to two minutes to kill germs. Use tongs or mitts to remove the hot sponge safely.
Let it cool and squeeze out extra water before use. Repeat this process regularly to keep your sponge fresh. Replace sponges every one to two weeks for best hygiene. This simple step helps reduce bacteria and keeps your kitchen cleaner.