How to Install an LG Over the Range Microwave: Easy Step-by-Step Guide
Thinking about installing your LG over-the-range microwave yourself? You’re in the right place.
Installing this appliance can save you money and give you a real sense of accomplishment. But it’s not just about screwing it in—you need to know the right steps to ensure safety and proper function. In this guide, you’ll discover exactly how to prepare, mount, and connect your microwave with clear, easy-to-follow instructions.
By the end, you’ll feel confident and ready to enjoy your new microwave without waiting for a technician. Let’s dive in and make your kitchen upgrade smooth and hassle-free.
Credit: www.youtube.com
Tools And Materials
Gathering the right tools and materials is key to installing your LG over-the-range microwave safely and correctly. Having everything ready helps the process go smoothly and saves time. This section covers the essential items you need before starting the installation.
Essential Tools
- Power drill with drill bits for making holes
- Phillips and flathead screwdrivers to tighten screws
- Stud finder to locate wall studs for secure mounting
- Level to ensure the microwave hangs straight
- Tape measure to check distances and clearances
- Pencil for marking drill points on the wall
- Utility knife to open packaging and trim materials
Mounting Hardware
- Mounting bracket designed for your LG microwave model
- Screws and anchors included with the microwave
- Metal support plate to hold the microwave’s weight
- Template sheet to mark exact drill holes
- Venting components if your microwave requires external venting
Safety Equipment
- Safety glasses to protect your eyes from dust and debris
- Work gloves to protect your hands during lifting and drilling
- Mask to avoid inhaling dust or insulation particles
- Non-slip shoes to keep steady on kitchen floors
- Assistant to help lift and hold the microwave safely

Credit: www.lg.com
Preparation Steps
Before installing your LG over-the-range microwave, proper preparation is essential. Taking the right steps ensures safety and a smooth installation. Prepare your space, tools, and helpers carefully.
Measure Space And Check Electrical
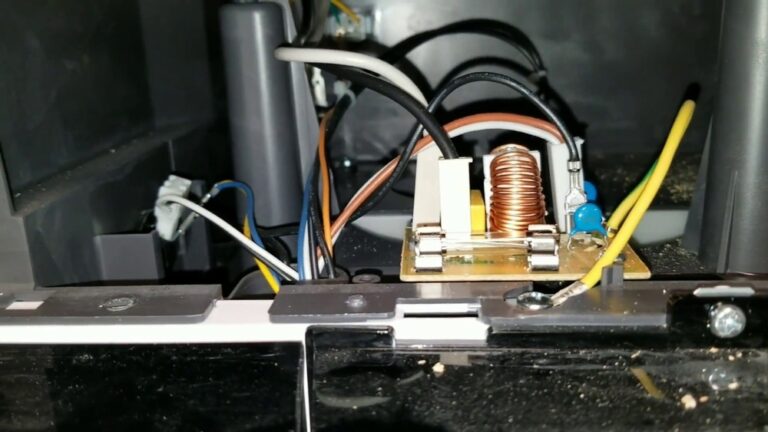
Measure the area where the microwave will go. Ensure it fits well between cabinets. Check the electrical outlet to confirm it meets microwave requirements. The outlet should be grounded and near the installation spot.
Gather Helpers
The microwave is heavy and awkward to hold alone. Ask someone to help you lift and position it. Working with a helper reduces the risk of damage or injury. Plan for teamwork before starting.
Protect Cooktop
Place a towel or cloth on your cooktop. This protects it from scratches and dents. Tools or parts might fall during installation. A protective layer keeps your range safe and clean.
Turn Off Power
Switch off the power to the microwave at the circuit breaker. This step is crucial for safety. Avoid electric shocks by confirming no power flows to the outlet. Use a tester if you have one to be sure.
Removing Old Microwave
Removing the old microwave is the first step before installing your new LG over-the-range unit. This process ensures a safe and smooth transition. Take your time and follow each step carefully. Safety is the top priority since microwaves are heavy and connected to electrical outlets.
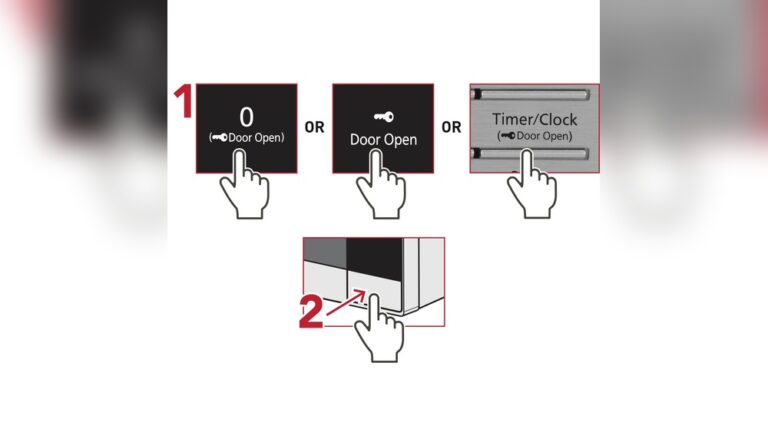
Unplug And Unscrew
Start by unplugging the microwave from the power outlet. This cuts off electricity and prevents shocks. Next, use a screwdriver to remove the screws holding the microwave to the cabinet and wall. Keep these screws in a safe place in case you need them later.
Make sure to check for any additional brackets or fasteners. Removing all screws allows the microwave to come free from its mounting.
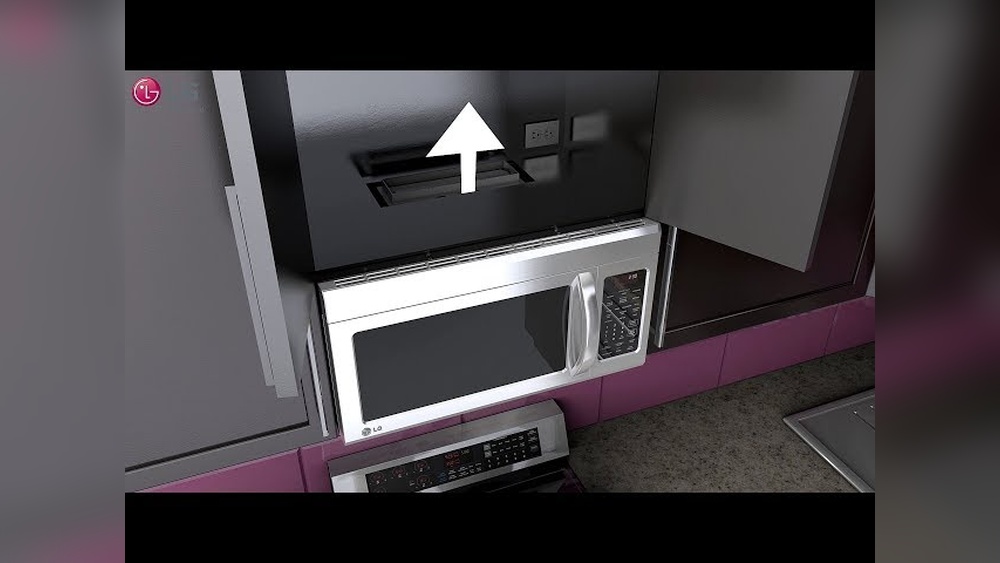
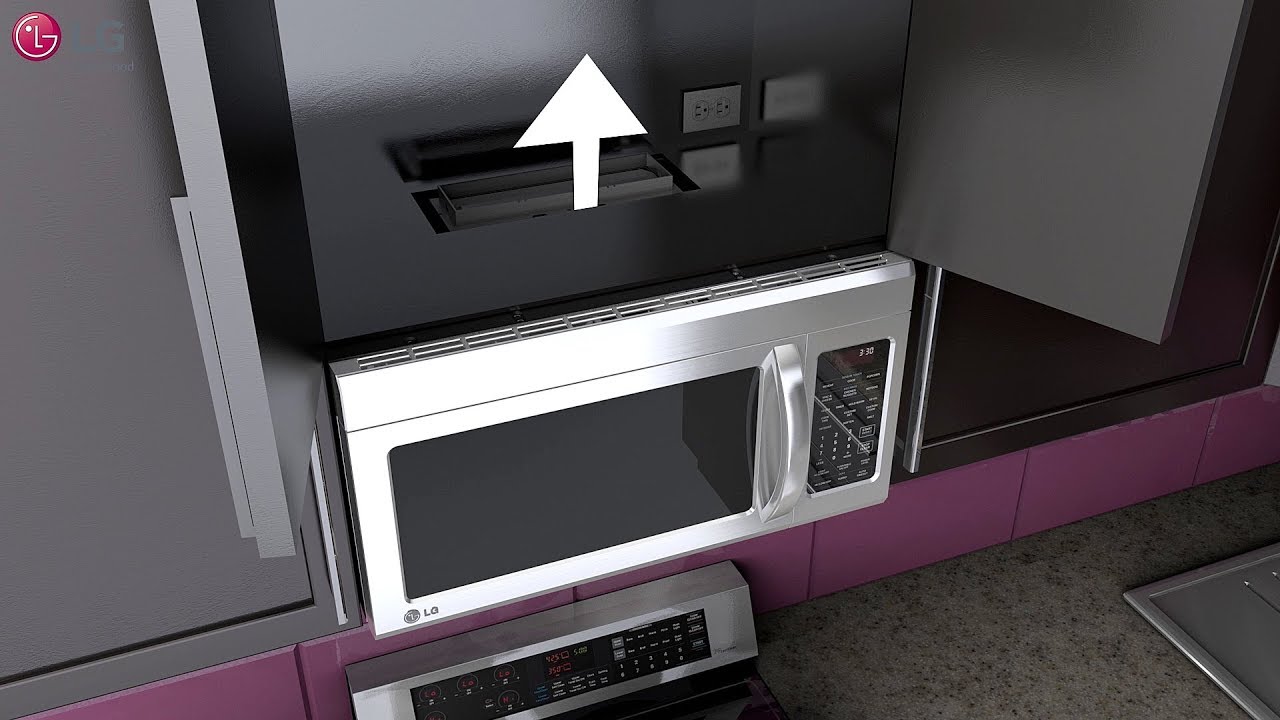
Support And Remove Unit
Microwaves are heavy and awkward to handle alone. Have a helper support the microwave from below. Hold the unit firmly to avoid dropping it. Slowly slide the microwave off the mounting bracket.
Lower the microwave carefully and set it aside. Inspect the area for any damage or leftover hardware. This clears the space for your new LG microwave installation.
Installing Mounting Bracket
Installing the mounting bracket is a crucial step for securing your LG over-the-range microwave safely. This bracket holds the microwave firmly against the wall and supports its weight above your stove. Proper installation ensures stability and prevents accidents.
Follow these steps carefully to mount the bracket correctly. Take your time to measure and align everything perfectly. A well-installed bracket makes the rest of the installation easier and safer.
Use Template To Mark Holes
Start by using the mounting template that comes with your microwave. Tape it to the wall at the desired height above your range. Make sure the template is level before marking the holes. Use a pencil to mark each hole location clearly. These marks guide where you will drill.
Locate Wall Studs
Use a stud finder to find the wall studs behind the marks. Studs provide strong support for the microwave bracket. Mark the stud centers with a pencil. If possible, align the bracket holes with these studs. Avoid drywall alone, as it won’t hold the microwave securely.
Drill Pilot Holes
Choose a drill bit slightly smaller than the mounting screws. Drill pilot holes at the marked locations. These holes make it easier to insert screws and reduce wall damage. Drill straight and steady. Check that the holes match the stud marks and template.
Attach And Level Bracket
Position the mounting bracket over the pilot holes. Insert screws into the holes and tighten them with a drill or screwdriver. Do not overtighten to avoid stripping the wall or bracket. Use a level to check the bracket’s alignment. Adjust screws as needed to keep it perfectly horizontal.
Adjusting Vent System
Adjusting the vent system is a key step during your LG over-the-range microwave installation. Proper venting ensures smoke, steam, and odors leave your kitchen efficiently. The vent setup depends on your kitchen’s layout and the microwave model.
There are two main venting options: external venting and recirculating venting. Each requires a different setup method. Choose the one that fits your kitchen’s design and ventilation needs.
External Vent Setup
External venting moves air outside your home. Start by connecting the microwave vent to your existing ductwork. Use the duct adapter that comes with your microwave. Secure it tightly with metal tape to avoid leaks.
Check the duct size matches the microwave outlet. Adjust the duct length to fit without bends or kinks. Smooth airflow reduces noise and improves venting performance.
Install the vent cover outside your home. Seal around the vent cap to prevent air or water leaks. Test the vent by running the microwave fan on high. Air should flow freely outside.
Recirculating Vent Setup
Recirculating vents clean air before sending it back into the kitchen. This setup uses charcoal filters inside the microwave. Remove external duct connections if present.
Install the charcoal filter as per your microwave’s manual. This filter traps odors and grease. Replace the filter regularly for best performance.
Recirculating vents work well in kitchens without outside wall access. They keep your kitchen air fresh without complex ductwork. Run the microwave fan to check air circulation.
Hanging New Microwave
Hanging the new LG over the range microwave is a crucial step. It requires careful handling to avoid damage or injury. Follow these clear instructions to position your microwave safely and securely.
Having a helper is important due to the microwave’s size and weight. Proper placement ensures the unit works well and looks great in your kitchen.
Lift With Helper
Ask a friend or family member to help lift the microwave. Hold it firmly from the sides. Keep your backs straight and lift together. Avoid twisting your body while lifting. This prevents accidents and damage to the appliance.
Route Power Cord
Before hanging, plan the power cord’s path. Make sure it reaches the outlet without stretching. Tuck the cord behind the microwave neatly. Avoid pinching or bending the cord sharply. This protects the cord and ensures safe operation.
Use Wood Blocks If Needed
Place wood blocks on your countertop if the microwave needs support. These blocks keep the microwave steady during installation. They prevent the appliance from slipping or falling. Remove the blocks only after the microwave is fully secured on the wall bracket.
Securing Microwave
Securing the LG over-the-range microwave is a crucial step. It ensures the microwave stays firmly in place and operates safely. This process involves attaching the microwave to the cabinet above and checking its stability. Proper securing prevents any movement or accidents during use.
Attach Screws To Cabinet
Locate the pre-drilled holes in the microwave’s mounting plate. Align these holes with the underside of the cabinet. Use the screws provided in the installation kit. Tighten the screws firmly but avoid over-tightening. This step holds the microwave securely to the cabinet, supporting its weight.
Ensure Stability
After attaching the screws, check the microwave for any movement. Gently try to wiggle the unit to test its stability. If it shifts, tighten the screws more or check the mounting plate alignment. The microwave should feel solid and steady. Confirming stability ensures safe daily use without risk of falling or damage.
Final Checks
After completing the installation steps, performing final checks is essential. These checks confirm the microwave is safely and correctly installed. They help avoid issues and ensure the unit works perfectly.
Restore Power
Turn the circuit breaker back on to restore power to the microwave. Check the microwave’s display panel for lights or sounds. This indicates the unit is receiving electricity and is ready to use.
Ensure no breakers trip or wires spark. If any electrical issues occur, turn off the power immediately. Review your wiring and connections before trying again.
Test Microwave Function
Place a microwave-safe container with water inside. Set the microwave to run for one minute. Observe if it heats the water evenly and the turntable spins smoothly.
Listen for unusual noises or vibrations. Confirm the exhaust fan and light work if your model includes them. Testing all functions ensures your microwave operates safely and efficiently.
Credit: help.samsclub.com
Frequently Asked Questions
Can I Install An Over The Range Microwave Myself?
Yes, you can install an over-the-range microwave yourself. It requires two people, proper tools, and following manufacturer instructions. Ensure electrical and venting needs are met for safe, secure installation.
What Holds An Over The Range Microwave In Place?
An over-the-range microwave stays in place using a wall-mounted bracket and screws into the cabinet above. Studs provide secure support. The bracket holds the microwave’s weight, while screws fasten it firmly to prevent movement during use.
Do I Need An Electrician To Install An Over The Range Microwave?
An electrician is recommended for installing an over-the-range microwave to ensure proper wiring and safety. DIY installation suits those with electrical skills.
Conclusion
Installing an LG over-the-range microwave can be done with patience and care. Follow each step to ensure the microwave fits securely and works well. Always check that the power is off before starting. Having a helper makes lifting and positioning easier and safer.
Use the right tools and measure carefully to avoid mistakes. With proper installation, your microwave will serve you reliably for years. Enjoy the convenience and extra space your new microwave adds to your kitchen.