How to Install a Ge Over the Range Microwave Oven: Step-by-Step Guide
Are you ready to upgrade your kitchen with a sleek GE over-the-range microwave oven? Installing it yourself might seem tricky, but with the right steps, tools, and a little help, you can do it safely and confidently.
This guide will walk you through each part of the process—from preparing your space and gathering tools to mounting and testing your new microwave. By following these clear, easy-to-understand instructions, you’ll save time and money while giving your kitchen a fresh, modern look.
Keep reading, and you’ll be enjoying your new microwave in no time!
Preparation Steps
Proper preparation makes installing your GE over-the-range microwave easier and safer. Take time to prepare well before starting the installation. These steps help avoid mistakes and save time.
Check Measurements
Measure the space above your range carefully. Ensure the microwave fits the width, height, and depth. Also, check the distance from the cooktop to the bottom of the cabinet. This spacing must follow the microwave’s guidelines for safe use.
Confirm Electrical Requirements
Verify the electrical outlet meets the microwave’s power needs. Most models require a dedicated 120-volt, 15- or 20-amp circuit. Check if the existing outlet is properly grounded. This step prevents electrical problems after installation.
Gather Tools And Materials
Collect all tools before starting. You will need a drill, screwdriver, level, stud finder, and tape measure. Also, have safety glasses and gloves ready. Keep the microwave’s mounting hardware and installation manual nearby.
Plan For A Helper
The microwave is heavy and bulky. Arrange for a second person to help lift and hold it in place. This teamwork lowers the risk of injury and damage. Two people make the process smoother and faster.
Protect Your Range
Cover your cooktop with a towel or drop cloth. This layer protects the surface from scratches and dents. Tools or screws can accidentally fall during installation. A soft cover keeps your range safe.
Turn Off Power
Switch off the power to the microwave circuit at the breaker box. This step prevents electric shocks while working. Confirm the power is off by testing the outlet with a voltage tester. Safety first.
Removing The Old Microwave
Removing the old microwave is the first step to install your new GE over the range microwave oven. This process requires care and caution. The microwave is heavy and mounted high above the range. You will need a helper to make the removal safe and easy. Follow the steps below to unplug and remove the old unit properly.
Unplug And Unscrew
First, disconnect the microwave from power. Locate the power cord and unplug it from the electrical outlet. Do not skip this step to avoid electric shock.
Next, find the screws that hold the microwave to the wall or cabinet. These are usually on the top or inside the cabinet above the microwave. Use a screwdriver to remove all screws carefully. Keep them safe as you may need them later.
Support And Remove Unit
Ask your helper to support the microwave from underneath. The unit is heavy and can fall if not held securely. With the help supporting the weight, gently lift the microwave from the mounting bracket.
Slide the microwave off the bracket and lower it slowly. Set it down on a protected surface to avoid damage. Check the wall area and clean any dust or debris before proceeding with the new installation.
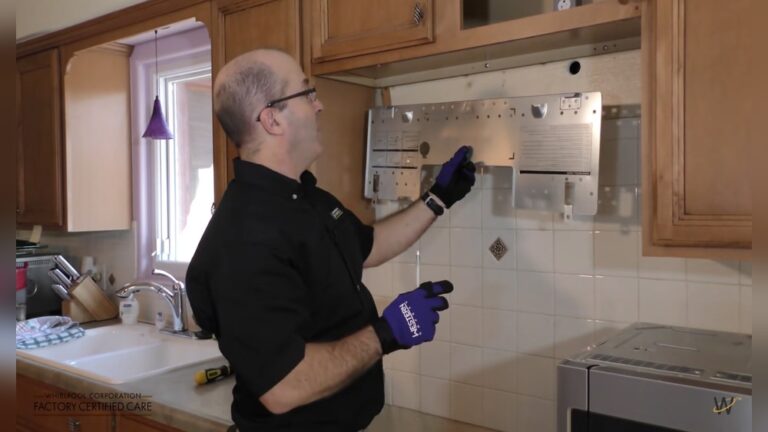
Mounting Bracket Installation
Installing the mounting bracket is a key step for securing your GE over-the-range microwave. The bracket holds the microwave firmly in place above your stove. Proper installation ensures safety and stability. Follow these steps carefully for the best results.
Use Template For Marking
Start by removing the mounting bracket template from the microwave package. Tape the template to the wall at the height you want the microwave. Make sure it is centered over the stove. Use a pencil to mark the holes where you will drill. Double-check the marks before moving on.
Locate Wall Studs
Use a stud finder to locate the wall studs behind the marked area. Mark the stud locations clearly on the wall. The mounting bracket must attach to studs for strong support. Avoid drilling into drywall alone. Studs provide the strength needed to hold the microwave’s weight.
Drill Pilot Holes
Using a drill bit slightly smaller than the screws, drill pilot holes at the pencil marks. Pilot holes guide the screws and prevent wood from splitting. Drill straight into the studs where possible. Keep the holes clean and free of dust before attaching the bracket.
Attach And Level Bracket
Hold the mounting bracket against the wall aligning it with the pilot holes. Use heavy-duty screws to secure the bracket into the wall studs. Tighten screws firmly but avoid over-tightening. Place a level on top of the bracket to check it is perfectly horizontal. Adjust screws if needed to keep the bracket level.
Vent Adjustment
Adjusting the vent on your GE over-the-range microwave is essential for proper airflow. It controls how the microwave expels cooking smoke and odors. Vent adjustment depends on your kitchen setup and venting preferences. Choose the correct method to ensure efficiency and safety.
External Vent Setup
Use the external vent setup to push air outside your home. This option removes smoke and odors from the kitchen completely. Connect the microwave’s vent outlet to your existing ductwork. Secure the vent cover outside to prevent pests and debris.
Measure and cut the vent duct carefully. Attach it firmly to avoid air leaks. Check the vent path is clear and unobstructed. External venting improves air quality and reduces moisture buildup.
Recirculating Vent Setup
The recirculating vent setup filters and recycles air inside the kitchen. This method is useful if no external ductwork is available. Install charcoal filters inside the microwave vent. These filters trap smoke and odors before air returns to the room.
Replace charcoal filters regularly to keep the microwave working well. Make sure the vent grill is clean and free of blockages. Recirculating vents are easier to install but need more maintenance.
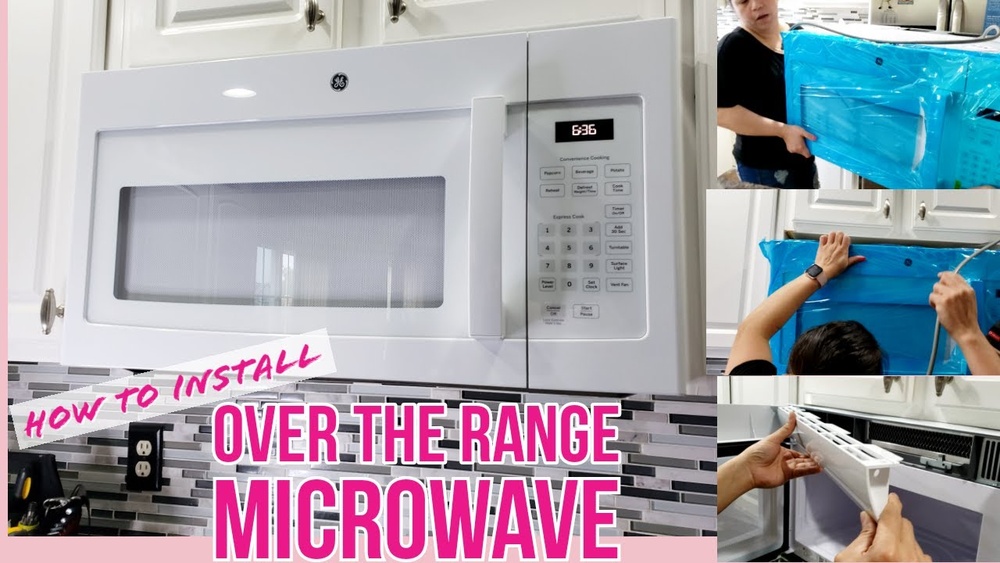
Hanging The New Microwave
Hanging the new GE over-the-range microwave is a crucial step in your installation process. This part requires careful handling and precise positioning to ensure safety and stability. Properly hanging the microwave helps it function well and look great above your stove.
Lift With Helper
Always have a helper to lift the microwave. The unit is heavy and awkward to handle alone. Hold the microwave firmly and lift it slowly. Your helper should support the other side evenly. Together, align the microwave with the mounting bracket on the wall.
Route Power Cord
Before securing the microwave, check the power cord location. Route the cord so it does not get pinched or stretched. Make sure the cord reaches the electrical outlet safely. Keep the cord away from heat and sharp edges to avoid damage.
Use Wood Blocks For Fit
Place wood blocks under the microwave for better support during installation. These blocks help hold the microwave steady and level. Adjust the blocks until the microwave fits snugly against the wall and cabinet. This step makes it easier to fasten the microwave securely.

Credit: www.cowboymaloneys.com
Securing The Microwave
Securing the microwave is a crucial step for safety and proper function. The microwave must be firmly attached to the wall and cabinet. This prevents movement during use and ensures stability.
Follow each step carefully to secure your GE over-the-range microwave. Tightening the screws correctly will keep the unit safe and steady. This step also makes sure the microwave works without issues.
Drive Mounting Screws
Start by aligning the microwave with the mounting bracket. Have a helper hold the microwave in place. Insert the mounting screws through the microwave into the wall bracket. Use a drill or screwdriver to tighten the screws firmly. Do not over-tighten, or you may damage the unit or wall. Check if the microwave feels stable and does not move. Secure any additional screws under the cabinet to support the microwave’s weight. Confirm that all screws are snug and the microwave is flush against the wall and cabinet.
Plug In And Restore Power
After securing the microwave, plug it into the electrical outlet. Make sure the outlet meets the microwave’s power requirements. Turn the circuit breaker back on to restore power. Test the microwave by turning it on and checking the display. Listen for any unusual sounds and ensure the light and fan work correctly. If the microwave operates normally, the installation is complete. If not, double-check the connections and screws for any loose parts.
Testing The Microwave
Testing the microwave is the final step to confirm proper installation. It ensures safety and confirms the unit works as expected. This step helps identify any issues before regular use.
Power On Check
First, plug in the microwave and turn on the power at the circuit breaker. Look for the display panel to light up. If the display shows numbers or symbols, the microwave has power. Listen for any unusual sounds. A humming noise is normal as the unit powers up. If nothing happens, double-check the wiring and power source.
Functionality Test
Next, test the microwave’s cooking functions. Place a microwave-safe cup of water inside. Set the timer for one minute and start it. The water should heat quickly. Stop the microwave and check the water temperature. Warm water means the microwave heats correctly. Press different buttons to test features like the fan and light. Each should respond promptly. This test confirms the microwave operates fully and safely.

Credit: www.youtube.com

Credit: www.warnersstellian.com
Frequently Asked Questions
Can I Install An Over The Range Microwave Myself?
Yes, you can install an over-the-range microwave yourself. It requires two people, proper tools, and following instructions carefully. Ensure electrical and venting needs are met for safe installation.
Do All Ge Over The Range Microwaves Mount The Same?
Not all GE over-the-range microwaves mount the same. Mounting varies by model size, vent type, and installation requirements. Always follow your model’s specific instructions for proper mounting.
What Holds An Over The Range Microwave In Place?
An over-the-range microwave stays in place by a wall-mounted bracket and screws securing it to the upper cabinet. Studs support the bracket for stability.
Conclusion
Installing a GE over-the-range microwave can improve your kitchen’s function. Follow each step carefully to ensure safety and success. Use the right tools and ask for help when lifting the microwave. Double-check measurements and electrical connections before starting. Taking your time helps avoid mistakes and ensures a secure fit.
Enjoy the convenience of your new microwave once installed. Simple planning and patience make this project doable for most homeowners.