How to Change Light Bulb in Ge Microwave: Easy Step-by-Step Guide
Is the light inside your GE microwave suddenly gone out? You rely on that light to keep an eye on your food while it cooks, so a dark microwave can be frustrating.
Luckily, changing the light bulb in your GE microwave is easier than you might think. Whether the bulb burned out or the light just stopped working, this guide will walk you through the simple steps to get your microwave light shining bright again.
You’ll learn exactly how to access the bulb, what type of replacement to use, and handy tips to avoid common mistakes. Keep reading, and in no time, you’ll have your microwave’s light back on—making your cooking safer and more convenient.
Bulb Types For Ge Microwaves
Choosing the right bulb for your GE microwave is important for safety and performance. Different GE microwave models use different bulb types. Understanding the options helps you pick the correct replacement bulb.
Microwave bulbs must handle heat and moisture inside the appliance. Using the wrong bulb can cause damage or poor lighting. Here is a simple guide to common bulb types found in GE microwaves.
Halogen Vs Incandescent Bulbs
Halogen bulbs provide bright, white light with better energy efficiency. They last longer than incandescent bulbs. Incandescent bulbs produce a warmer light but use more power.
Most GE microwaves use halogen bulbs for clear visibility inside the oven. Check the wattage to match your microwave’s requirements exactly. Avoid bulbs that are too strong or weak.
Under-cabinet Vs Surface Lights
GE microwaves installed under cabinets often use under-cabinet bulbs. These bulbs fit into small sockets and provide focused light on the cooktop. Surface lights are used in microwaves mounted on walls or as standalone units.
Under-cabinet bulbs tend to be smaller and designed to resist heat from cooking surfaces. Surface lights might have a wider beam angle for room lighting. Choose the bulb type based on your microwave’s installation style.
Checking Your Microwave Manual
Your microwave’s manual contains vital information about bulb type and size. It lists the exact bulb model and wattage needed. This ensures proper fit and function.
Look for the bulb section or lighting instructions in the manual. If you lost the manual, check GE’s website using your microwave model number. Always follow the manual’s guidelines to avoid damage.
Tools And Safety Tips
Changing the light bulb in your GE microwave requires some basic tools and careful safety measures. These steps help protect you and your appliance. Prepare well before starting the replacement process. Safety is the top priority.
Unplugging The Microwave
Always unplug the microwave before starting any work. This stops electrical shocks. It also prevents the microwave from turning on by accident. Locate the plug and pull it out from the wall socket. Never work on the microwave while it is plugged in.
Wearing Gloves For Halogen Bulbs
Halogen bulbs get very hot and can break easily. Wear gloves to protect your hands from heat and cuts. Gloves also keep oils from your skin off the bulb. Oils can shorten the bulb’s life. Use clean, dry gloves during the bulb change.
Gathering Necessary Tools
Prepare the tools before you begin. You will need a screwdriver, usually a Phillips head. Have a replacement bulb that fits your GE microwave. A soft cloth can help handle the bulb safely. Keep all tools within reach to avoid interruptions.
Locating The Bulb
Finding the light bulb in your GE microwave is the first step to replacement. The bulb can be located in different spots depending on your microwave model. Knowing where to look saves time and effort. Use this guide to locate the bulb safely and quickly.
Inside The Microwave Cavity
Most GE microwaves have a light bulb inside the cooking cavity. It lights up the interior when the microwave runs. Open the microwave door and look at the top or side walls inside. The bulb is usually behind a small glass cover or plastic lens. Sometimes it is hidden behind a metal shield or grill. Be careful not to touch any sharp edges inside.
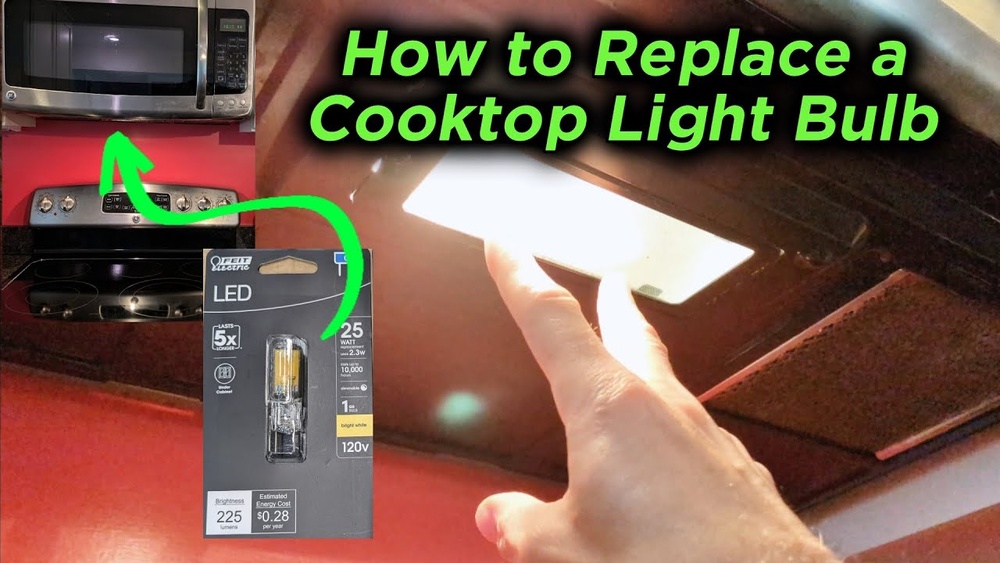
Under The Microwave Unit
Some GE microwaves have a light bulb located underneath the unit. This is common for over-the-range models. The bulb lights the stove top below the microwave. Look under the front edge of the microwave. You may see a small lens or cover where the bulb is housed. This area might require a flashlight for better visibility.
Removing Access Panels Or Screws
Access panels or screws often cover the bulb to protect it. Use a screwdriver to remove these panels carefully. Check the microwave’s user manual for panel locations. Panels can be on the inside cavity, under the unit, or behind the microwave. Keep screws safe for reassembly. Removing these panels gives direct access to the bulb socket.

Credit: www.amazon.com
Removing The Old Bulb
Removing the old bulb from a GE microwave is the first step in replacing it. Always ensure the microwave is unplugged or the power is switched off. Let the bulb cool down before touching it to avoid burns. Different GE microwaves may use incandescent or halogen bulbs, so knowing your bulb type helps in removal. Follow the proper method to avoid damaging the socket or the microwave interior.
Twisting Incandescent Bulbs
Incandescent bulbs in GE microwaves usually twist out. Hold the bulb gently but firmly. Turn it counterclockwise to loosen it. Do not force the bulb if it feels stuck. If it does not turn easily, try wiggling it slightly while twisting. Once loose, pull the bulb straight out from the socket. Avoid touching the glass with bare hands to keep oils off the bulb.
Pulling Out Halogen Bulbs
Halogen bulbs require a different approach. These bulbs often pull straight out without twisting. Grip the bulb near the base carefully. Pull it straight out with a steady motion. Avoid bending or twisting the bulb as it can break easily. Use a cloth or gloves to hold the bulb for better grip and safety. Make sure the bulb is cool before handling.
Handling Broken Bulbs Safely
Broken bulbs can be dangerous due to sharp glass pieces. Do not use bare hands to pick up broken parts. Wear gloves or use a thick cloth to protect your skin. Use tape or a damp paper towel to pick up small shards. Dispose of broken bulbs in a safe container. Clean the area thoroughly to avoid injury or damage.
Installing The New Bulb
Installing the new bulb in your GE microwave is a simple step that requires care and attention. Proper installation ensures the light works well and lasts longer. Handle the bulb carefully and follow each step to avoid damage and ensure safety.
Avoiding Fingerprints On Halogen Bulbs
Halogen bulbs get very hot during use. Oils from your fingers can cause hot spots. These spots may shorten the bulb’s life or cause it to break. Use a clean cloth or gloves to hold the bulb. Avoid touching the glass directly.
Seating The Bulb Properly
Place the bulb gently into the socket. Align it correctly before pushing it in. Make sure it fits snugly without forcing it. A loose bulb may flicker or not light up at all. Secure the bulb firmly but do not overtighten.
Testing The New Bulb
After installation, close the microwave door. Turn on the microwave light by opening the door or using the control panel. Check if the bulb lights up steadily. If it does not, turn off power and re-seat the bulb. Repeat the test until the light works well.

Credit: www.amazon.com
Troubleshooting Light Issues
Light issues in a GE microwave can disrupt your cooking experience. Troubleshooting these problems helps restore proper function. Start by checking simple parts before moving to complex ones. This saves time and effort.
Inspecting The Bulb Socket
Look inside the microwave to find the bulb socket. Dirt or corrosion can prevent the bulb from lighting. Clean the socket gently with a dry cloth. Make sure the bulb fits tightly and correctly. A loose bulb often causes flickering or no light.
Checking Door Micro Switches
The door micro switches control power to the light. If a switch is faulty, the light may not turn on. Press the switches manually to test if they click. Use a multimeter to check for continuity. Replace any switch that does not work properly.
Testing Internal Fuses
Internal fuses protect the microwave’s electrical parts. A blown fuse can cut power to the light bulb. Unplug the microwave before testing fuses. Use a multimeter to check for a broken fuse. Replace any fuse that shows no continuity.
Examining Control Board And Relay
The control board and relay send power to the light bulb. Damage or faults here can stop the light from working. Look for burn marks or loose wires on the control board. Test the relay with a multimeter for proper function. Replace damaged parts to fix the light issue.
Replacing Faulty Components
Replacing faulty components in your GE microwave can restore its light and overall function. Many times, the issue is not just the bulb. Other parts might cause the light to fail. Learning how to replace these parts saves money and time. It also keeps your microwave safe and working well.
Replacing The Bulb Socket
The bulb socket holds the light bulb in place. Over time, it can wear out or break. To replace it, first unplug the microwave. Remove the old bulb carefully. Then, disconnect the socket from its wires. Attach the new socket and secure it firmly. Finally, install the new bulb and test the light.
Changing Door Switches
Door switches control power to the microwave light. A faulty switch can stop the light from turning on. Open the microwave door and locate the switches. Use a screwdriver to remove the old switch. Connect the new switch and make sure it clicks properly. Close the door and check if the light works.
Swapping Internal Fuses
Internal fuses protect the microwave from electrical problems. A blown fuse can cause the light to fail. Unplug the microwave and find the fuse holder. Remove the old fuse carefully. Replace it with a new fuse of the same type. After replacing, plug in the microwave and test the light.
Upgrading The Control Board
The control board manages all microwave functions, including the light. A damaged board can stop the light from working. To upgrade, unplug the microwave and open the control panel. Remove screws and disconnect wires from the old board. Install the new board and reconnect all wires. Close the panel and test the microwave light.
Tips For Longer Bulb Life
Extending the life of your GE microwave light bulb saves time and money. Simple care and proper use help bulbs last longer. Follow easy tips to avoid frequent replacements and keep your microwave working well.
Avoiding Frequent On-off Cycles
Turning the microwave light on and off repeatedly shortens bulb life. Each start causes a small surge of electricity that wears the bulb. Leave the light on only when needed. Avoid switching it on and off quickly. This reduces stress on the bulb filament and increases its lifespan.
Keeping The Microwave Clean
Dirt and grease buildup inside the microwave can harm the bulb. Clean the interior regularly using mild soap and water. Remove food splatters and spills near the bulb area. A clean surface helps the bulb stay cooler and prevents damage. Cooler bulbs last longer and perform better.
Using Recommended Bulb Types
Use only the bulb types recommended by GE for your microwave model. Different bulbs have different wattages and sizes. Using the wrong bulb may cause overheating or poor fit. Check your microwave manual or label for correct bulb specifications. Proper bulbs fit securely and run efficiently, extending bulb life.

Credit: www.youtube.com
Frequently Asked Questions
How Do I Change The Light In My Ge Microwave?
Unplug the microwave first. Remove the access panel and pull out the old bulb. Insert a new bulb without touching the glass. Secure the panel back in place. Plug in and test the light. Use the correct GE microwave halogen bulb for replacement.
How Do I Change The Light Bulb In My Microwave?
Unplug the microwave. Remove the cover or panel to access the bulb. Twist or pull out the old bulb. Insert the new bulb without touching the glass. Replace the cover and restore power.
What Kind Of Lightbulb Goes Under A Ge Microwave?
A GE microwave uses a halogen light bulb, typically 120V, 20W, or a specific GE replacement bulb model. Wear gloves to avoid oils.
Conclusion
Changing the light bulb in your GE microwave is simple and quick. Always unplug the microwave before starting. Remove the old bulb carefully and avoid touching the new bulb’s glass. Screw the new bulb in gently and check if it lights up.
This small fix helps you see inside the microwave clearly while cooking. Regularly replacing the bulb keeps your microwave safe and functional. Now, you can enjoy better visibility without any hassle. Keep these easy steps in mind for future bulb changes.