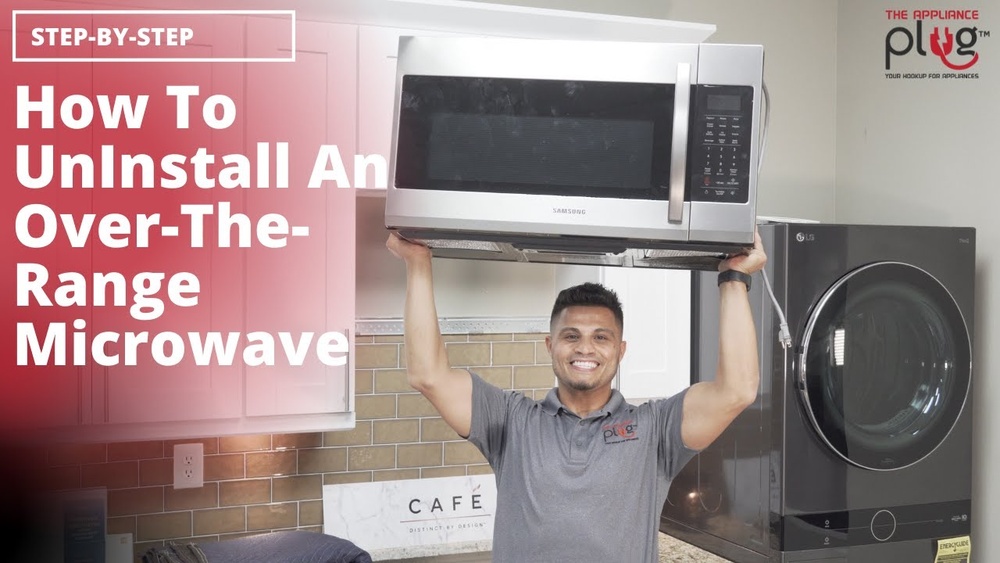
How to Uninstall Over the Range Microwave: Easy Step-by-Step Guide
Thinking about uninstalling your over-the-range microwave but not sure where to start? You’re in the right place.
Removing this appliance might seem tricky, but with the right steps, you can do it safely and efficiently. Whether you’re replacing it with a new model or just clearing space, understanding how to uninstall your microwave correctly will save you time and stress.
Keep reading, and you’ll discover simple, clear instructions that make this task easier than you thought possible.
Tools And Safety
Before starting to uninstall an over the range microwave, gather all necessary tools. Safety comes first to avoid accidents and damage. Prepare your workspace and protect yourself properly.
Essential Tools Needed
- Phillips screwdriver for screws removal
- Flathead screwdriver to pry if needed
- Socket wrench for bolts holding the microwave
- Stud finder to locate wall studs
- Step ladder to reach high places
- Work gloves to protect your hands
- Flashlight if lighting is poor
Safety Precautions To Follow
Turn off power at the circuit breaker before starting work. Do not rely on just unplugging the microwave.
Wear gloves to avoid cuts from sharp edges. Use safety goggles to protect your eyes.
Have someone help you support the microwave during removal. These units are heavy and awkward to handle alone.
Use a sturdy step ladder and place it on a flat surface. Avoid overreaching to prevent falls.
Keep the area clear of obstacles and spills. This keeps your workspace safe and organized.
Prepare The Area
Preparing the area is a crucial first step before uninstalling your over-the-range microwave. It ensures safety and makes the removal process smoother. Taking time to organize your space helps avoid accidents and damage.
Clear Surrounding Space
Remove all items near the microwave and stove. Clear countertops and nearby shelves. This gives you enough room to work comfortably. It also protects your kitchen from scratches and spills. Keep tools and equipment close by for easy access.
Turn Off Power Supply
Locate the microwave’s power source. Switch off the circuit breaker or unplug the microwave from the wall. This stops electrical current and prevents shocks. Confirm the power is off by testing the microwave. Safety first—never work on an appliance with power running through it.
Access Mounting Hardware
Accessing the mounting hardware is the first step to uninstall an over-the-range microwave. The hardware holds the microwave securely in place. You need to find and remove these parts carefully. This process allows you to safely detach the microwave without damage.
Take your time and prepare your tools. Knowing where the mounting bolts and screws are helps make removal smooth. Focus on the cabinet area above the microwave for easy access.
Open Cabinet Above Microwave
Start by opening the cabinet above the microwave. This cabinet floor hides the mounting bolts. Clear out any items inside to give yourself room to work. Use a flashlight if the space is dark. This step reveals the fasteners that hold the microwave.
Locate And Identify Bolts
Look for three large bolts near the cabinet front edge. These bolts go through the cabinet floor and into the microwave. They secure the unit tightly. Use the correct screwdriver or socket wrench to fit them. Identifying these bolts is key to loosening the microwave for removal.
Remove Mounting Bolts
Removing the mounting bolts is a key step when uninstalling an over the range microwave. These bolts secure the microwave to the cabinet and wall. Careful removal prevents damage and ensures safety. Follow simple steps to detach the microwave smoothly.
Support Microwave Front
First, support the front of the microwave firmly. Use both hands to hold it steady. This prevents the microwave from falling or tipping. Ask for help if the microwave is heavy. Keeping the microwave supported is important before loosening any bolts.
Unscrew Bolts From Cabinet
Locate the mounting bolts under the cabinet above the microwave. Use a screwdriver or drill to unscrew each bolt carefully. Remove all bolts that secure the microwave to the cabinet floor. Keep the bolts safe if you plan to reuse them. Once bolts are removed, the microwave will be free from the cabinet support.
Detach Microwave From Wall
Detaching an over the range microwave from the wall requires care and precision. This step is crucial for safe removal. Follow these clear instructions to avoid damage or injury. Take your time and proceed slowly.
Lean Microwave Forward
Support the microwave from the bottom edges. Gently tilt it forward to release the weight from the rear mounting points. This position gives access to the power cord and wall bracket. Keep your grip firm to prevent slips.
Unplug Power Cord
Locate the power cord behind the microwave. Carefully pull it out from the electrical outlet. Do not yank the cord to avoid damage. Ensure the microwave is fully disconnected before proceeding.
Lift Off Wall Bracket
Find the mounting bracket holding the microwave on the wall. Lift the microwave upward to clear the bracket hooks. Slowly pull it away from the wall. Ask for help if the microwave feels heavy or unstable.

Credit: www.wikihow.com
Handle Microwave Removal
Removing an over-the-range microwave requires careful handling. The handle microwave removal process is crucial to prevent damage. It involves lowering the microwave safely and checking for extra connections. Follow each step with care for smooth removal.
Safely Lower Microwave
Support the microwave from the front before loosening bolts. Use a helper to hold the weight evenly. Slowly lower the microwave to avoid sudden drops. Keep your hands clear of pinch points. Never let the microwave hang by the cords or cables.
Check For Additional Connections
Look behind the microwave for any wires or vents. Unplug the power cord carefully from the outlet. Disconnect any vent hoses attached to the microwave. Ensure no screws or brackets still hold the unit. These checks prevent damage and make removal easier.
Clean And Inspect Area
After uninstalling your over-the-range microwave, take time to clean and inspect the area. This step helps prepare the space for a new appliance or any repairs. It also ensures safety and a neat kitchen environment.
Dust, grease, and small debris often remain after removal. Cleaning these out prevents damage or odors. Inspecting the mounting bracket and surrounding surfaces shows if any parts need fixing or replacing.
Remove Residual Debris
Use a damp cloth to wipe down the wall and cabinet underside. Remove dust, grease, and any food particles. A mild cleaner works well for sticky spots. Check corners and edges carefully. Residual debris can attract pests or cause stains if left behind.
Inspect Mounting Bracket Condition
Look closely at the mounting bracket for rust, cracks, or bends. These can weaken its hold and affect the new microwave’s safety. Tighten loose screws or replace damaged parts. If the bracket is in poor shape, install a new one before mounting the next microwave.
Disposal And Recycling
Disposing of and recycling your old over-the-range microwave is an important step after uninstalling it. Proper disposal keeps harmful materials out of landfills. It also helps recover valuable parts and resources. Understanding your options makes the process easier and eco-friendly.
Options For Old Microwave
Several options exist for disposing of an old microwave. You can donate it if still working. Some charities or thrift stores accept used appliances. Selling online is another way to give it a second life. If broken, consider taking it to an appliance recycling center. They dismantle and recycle parts safely. Avoid throwing microwaves in regular trash due to hazardous components.
Local Recycling Guidelines
Recycling rules differ by location. Check your city or county website for specific guidelines. Many places have special collection days for electronic waste. Some stores offer take-back programs for old appliances. Follow instructions carefully to ensure proper recycling. Proper disposal protects the environment and complies with local laws.

Credit: www.youtube.com
Frequently Asked Questions
How To Take Out The Over-the-range Microwave?
Open the cabinet above the microwave. Support the front, remove the three bolts securing it. Lean forward, unplug, lift back off the wall plate tabs, then pull free.
What Holds An Over-the-range Microwave In Place?
An over-the-range microwave stays secured by a metal mounting bracket attached to wall studs. Support bolts fasten it to the cabinet above. The bracket and bolts hold the microwave firmly above the stovetop, ensuring safe and stable installation.
How To Get A Microwave Off The Bracket?
Support the microwave’s front, remove mounting bolts under the cabinet, tilt it forward, unplug, then lift the back off the wall bracket.
Conclusion
Uninstalling an over-the-range microwave is a simple task with the right steps. Start by unplugging the unit and removing the mounting bolts carefully. Support the microwave as you detach it from the wall bracket. Keep all screws and parts safe if you plan to reinstall or replace it.
Taking your time prevents damage and ensures safety. Following this guide makes the process clear and manageable for anyone. Now, you can confidently remove your microwave and prepare for a new installation or kitchen update.