How to Replace Ge Microwave Light Bulb: Easy Step-by-Step Guide
Is the light inside your GE microwave no longer working? You might think it’s a small problem, but not being able to see your food while it cooks can be frustrating.
The good news is, replacing the microwave light bulb is easier than you might expect. With just a few simple steps, you can restore your microwave’s interior light and make cooking safer and more convenient again. In this guide, you’ll learn exactly how to replace your GE microwave light bulb quickly, safely, and without any special tools.
Keep reading, and you’ll have that bright, clear view inside your microwave in no time!

Credit: www.amazon.com
Tools And Materials Needed
Replacing the light bulb in your GE microwave requires specific tools and materials. Having the right items ready makes the task easier and faster. This section covers what you need before starting the replacement process.
Choosing The Right Bulb
Select a bulb that matches your microwave model. Check the owner’s manual or the old bulb for details. Most GE microwaves use a 300-degree appliance bulb. Use the exact wattage to avoid damage. LED bulbs can work if they fit and are rated for microwave use. Avoid bulbs not designed for appliances.
Essential Tools For Replacement
You need a few basic tools to replace the bulb safely. A Phillips screwdriver is often necessary to remove the light cover. A pair of gloves protects your hands from sharp edges and heat. A small flashlight helps if your workspace is dark. Have a clean cloth to handle the new bulb without oils from your skin.

Credit: www.amazon.com
Safety Precautions
Replacing the light bulb in your GE microwave requires careful attention to safety. The microwave uses electricity and contains parts that can cause injury if handled improperly. Follow these safety tips to protect yourself and ensure a smooth replacement process.
Unplugging The Microwave
Always unplug the microwave before starting any repair. This stops electricity from flowing and lowers the risk of electric shock. Do not just turn off the microwave; remove the plug from the wall socket.
Wait a few minutes after unplugging. This allows any stored energy inside the microwave to dissipate. Only begin working once you are sure it is safe.
Avoiding High Voltage Areas
Microwaves contain high voltage components that can be dangerous. Never touch the magnetron or capacitor inside. These parts store electricity even after unplugging.
Use caution when opening the microwave’s cover. Only access the bulb area and avoid other internal parts. Keep your hands and tools away from wires and metal pieces.
Locating The Light Bulb
Finding the light bulb inside your GE microwave is the first step in replacing it. The bulb is usually hidden behind a cover to protect it from heat and food spills. Knowing where to find this cover helps you replace the bulb quickly and safely. This section explains how to access the bulb cover and identify the correct bulb type.
Accessing The Bulb Cover
The bulb cover is often located inside the microwave cavity. Check the top or side walls inside the microwave for a small panel or grille. This cover may have screws or clips holding it in place. Use a screwdriver to remove screws carefully. Gently pull off the cover without forcing it. Removing the cover reveals the bulb, ready for replacement.
Identifying The Bulb Type
The bulb in a GE microwave is usually a small appliance bulb. It often looks like a halogen or incandescent bulb. Check the bulb for any markings that show its wattage and size. Common bulbs are 20 to 40 watts and about 1.5 inches long. Use the same type and wattage to avoid damage. Buying the correct bulb ensures your microwave works safely and well.
Removing The Old Bulb
Removing the old bulb from your GE microwave is the first step in the replacement process. It involves careful handling to avoid damage to the microwave or injury. This section explains how to unscrew the bulb and handle it safely. Follow these steps to ensure a smooth and safe removal.
Unscrewing The Bulb
First, unplug the microwave to avoid electric shock. Locate the light bulb inside the microwave. Usually, it is behind a small cover or grille. Use your hand to grip the bulb firmly. Turn the bulb counterclockwise to unscrew it. Do this gently to prevent breaking the bulb. If the bulb is tight, use a cloth for a better grip. Once loose, carefully pull the bulb out of the socket.
Handling The Bulb Safely
Old bulbs can be hot if recently used. Allow time for the bulb to cool before touching it. Handle the bulb with care to avoid cuts or injuries. Use a cloth or gloves to protect your hands. Dispose of the old bulb properly. Never throw it in regular trash if it contains hazardous materials. Keeping safety in mind prevents accidents during removal and replacement.
Installing The New Bulb
Installing the new bulb in your GE microwave is a simple task that restores proper lighting inside. Proper installation ensures the bulb works safely and lasts longer. Follow clear steps to insert and secure the bulb. Check the wattage to avoid electrical issues.
Inserting And Screwing In
Hold the new bulb gently to avoid damage. Align the bulb base with the socket in the microwave. Push the bulb straight into the socket carefully. Turn the bulb clockwise to screw it in. Stop turning when the bulb feels snug. Do not force the bulb, or it may break.
Checking Wattage Compatibility
Check the bulb’s wattage before installation. Use the same wattage as the original bulb. Higher wattage can cause overheating or damage. Lower wattage may result in dim light. The correct wattage keeps your microwave safe and functional.
Testing The Replacement
After installing the new bulb in your GE microwave, testing it is essential. This step ensures the replacement works correctly. It also confirms that the microwave is safe to use. Follow a simple process to check the light.
Powering On The Microwave
First, plug in your microwave or restore power if you unplugged it. Close the microwave door securely. Press the start button or set a short cooking time. This action powers on the microwave and activates the light.
Verifying The Light Function
Look through the microwave window to see if the light turns on. The interior should be bright and clear. If the light does not turn on, check the bulb installation. Ensure the bulb fits tightly and the power supply is active. Replace the bulb again if needed.
Troubleshooting Tips
Replacing the light bulb in your GE microwave is usually simple. Sometimes, the new bulb may not work immediately. Troubleshooting helps find quick fixes before calling a technician. This section offers practical tips to solve common problems with microwave light bulbs. Follow these steps to ensure your light works properly and safely.
What To Do If Light Doesn’t Work
First, check if the bulb is screwed in tightly. A loose bulb often causes the light to fail. Turn off the microwave and gently twist the bulb clockwise until secure.
Next, inspect the bulb for visible damage like cracks or black spots. Replace the bulb if it looks damaged or burnt out. Use the exact bulb type recommended by GE to avoid issues.
Look at the light cover and socket for dirt or debris. Clean them carefully with a dry cloth to ensure good contact. Avoid using water or cleaning liquids near electrical parts.
Test the microwave door switch. The light only turns on when the door is closed correctly. If the door latch is loose or broken, the light may not work.
Finally, reset the microwave by unplugging it for a few minutes. Plug it back in and try turning on the light again. Sometimes, this resets the control board.
When To Seek Professional Help
Contact a professional if the light still fails after all checks. Electrical parts inside the microwave can be dangerous to handle without training. Avoid opening the microwave beyond the bulb area.
Call a certified technician for issues like faulty wiring or control board problems. These require special tools and knowledge to fix safely.
Seek help if the microwave shows other problems such as sparks, strange noises, or failure to heat. These signs indicate bigger electrical faults.
Remember, safety is the priority. Do not take risks with electrical repairs. A professional can ensure your microwave works well and safely.
Maintaining Your Microwave Light
Maintaining your microwave light is key for safe and easy cooking. A working light helps you see the food clearly while it heats. It also makes your kitchen feel brighter and more inviting. Keep the light in good shape to avoid surprises during meal prep. Simple care steps can extend your bulb’s life and ensure it works when you need it most.
Regular Inspection
Check the microwave light every few weeks. Look for dimming or flickering signs. Clean the light cover gently to remove dust or grease. Dirt can reduce brightness and cause the bulb to overheat. Use a soft cloth with mild soap and water. Never use harsh chemicals on the light cover. Regular checks catch problems early and keep the light bright.
When To Replace Bulbs Proactively
Replace the bulb before it burns out completely. A bulb that flickers or dims is a warning sign. Changing the bulb early avoids dark cooking sessions. Use the exact bulb type recommended by GE. Using the wrong bulb can cause damage or poor performance. Keep a spare bulb at home for quick replacement. Timely swaps keep your microwave light shining well.

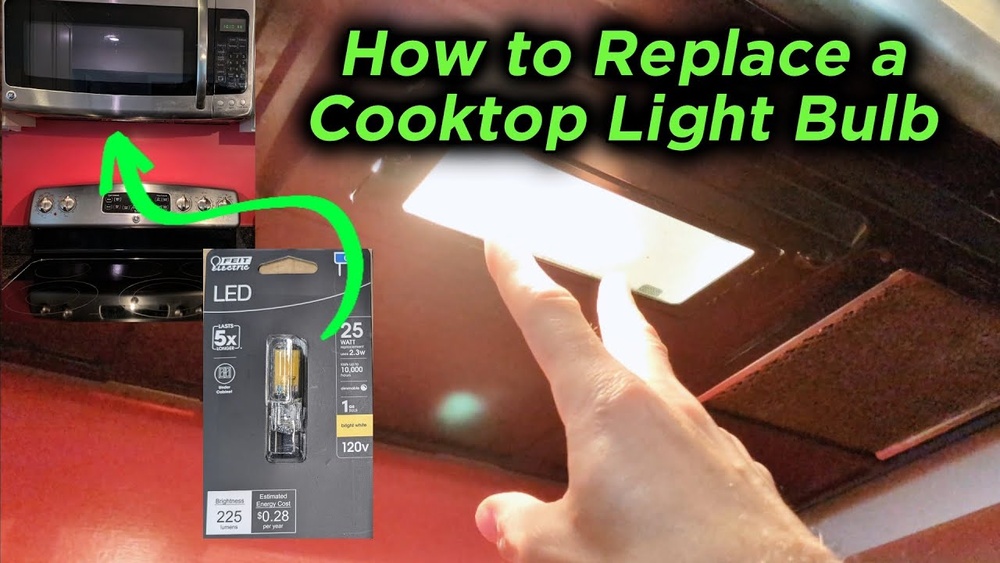
Credit: www.youtube.com
Frequently Asked Questions
How Do I Change The Light Bulb In My Microwave?
Unplug the microwave first. Remove the light cover, then unscrew the old bulb counterclockwise. Insert a new bulb and screw it clockwise. Replace the cover securely. Use the same wattage bulb to avoid damage.
How To Remove Oven Light Cover Ge?
Unplug the oven first. Twist the GE oven light cover counterclockwise. Remove it gently. Replace or clean the cover. Twist it back clockwise to secure.
Can You Still Use A Microwave If The Light Is Out?
Yes, you can use a microwave if the light is out. The bulb only illuminates the interior and does not affect cooking. Replacing the bulb improves visibility but is not required for operation. Always unplug the microwave before changing the bulb for safety.
Conclusion
Replacing the GE microwave light bulb is simple and safe. Always unplug the microwave before starting. Use the correct wattage bulb to avoid damage. Removing the old bulb is easy—just twist it out gently. Screw the new bulb in clockwise until secure.
This small fix helps you see better inside while cooking. No special tools or skills are needed. Keep your microwave bright and functional with this quick step.