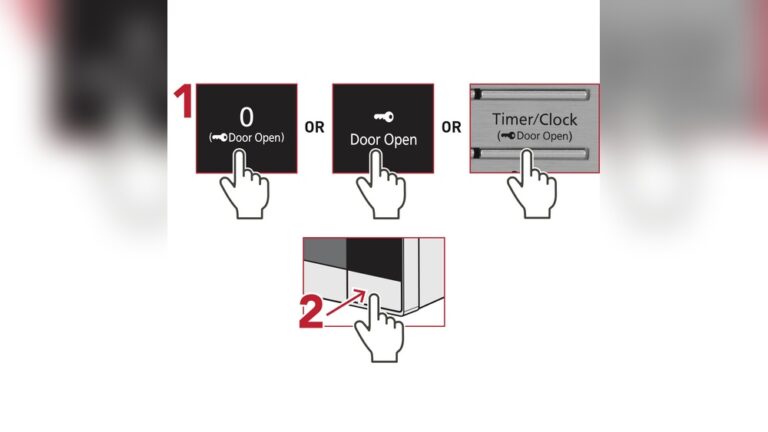
How to Clean a Moldy Microwave: Easy Steps for a Spotless Appliance
Is your microwave looking moldy and grimy? You’re not alone—and the good news is, cleaning it doesn’t have to be a tough, unpleasant chore.
Mold in your microwave isn’t just unsightly; it can affect your health and the taste of your food. But don’t worry, with a few simple steps and common household items, you can restore your microwave to a fresh, safe condition quickly.
Keep reading, and you’ll discover easy, effective ways to banish mold, eliminate odors, and keep your microwave sparkling clean—no harsh chemicals needed. Your kitchen deserves it!
Mold Causes In Microwaves
Mold in microwaves grows due to certain conditions inside the appliance. Understanding these causes helps prevent mold build-up. Microwaves often trap moisture and food residue. This creates a perfect spot for mold to develop quickly. Also, the dark, damp environment inside the microwave supports mold growth. Different types of mold can be found in microwaves, each with unique features. Knowing the causes makes cleaning easier and more effective.
Trapped Moisture And Food Residue
Microwaves heat food by creating steam inside. This steam often gets trapped, especially if the door seal is not tight. Moisture stays on the walls and ceiling of the microwave. Leftover food particles also remain after heating meals. These wet spots and food bits provide food for mold. Over time, mold colonies start to form in these areas.
Dark And Damp Environment
Microwave interiors are usually dark. Mold grows well without light. The dampness from steam does not dry quickly. This damp, dark space becomes a safe place for mold spores. Mold spores float in the air and land inside the microwave. When they find moisture, they begin to grow fast. This environment encourages mold to multiply.
Common Mold Types Found
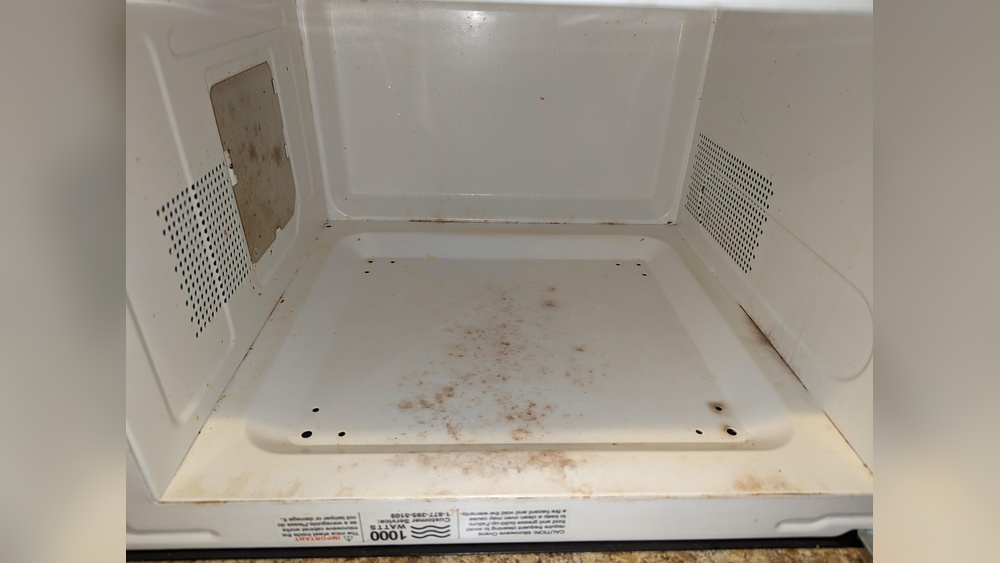
Several mold types appear in microwaves. Black mold is common and can be harmful. It looks like dark spots or patches inside the microwave. White mold also grows on moist surfaces. It appears fuzzy and powdery. Other molds include green and pink varieties. All these molds thrive on moisture and food residue.
Safety Precautions
Wear gloves and open windows for fresh air to avoid breathing mold spores. Use gentle cleaners and never mix chemicals to stay safe. Always unplug the microwave before cleaning to prevent electric shock.
Cleaning a moldy microwave requires care to protect your health. Mold can release spores that may irritate your skin, eyes, and lungs. Taking safety steps helps you avoid these risks. Simple actions can keep you safe while cleaning.
Protective Gear To Wear
Wear rubber gloves to protect your hands from mold and cleaning agents. Use a mask to avoid breathing in mold spores. Safety goggles help shield your eyes from splashes. Dress in old clothes in case of spills or stains.
Ventilation Tips
Open windows and doors to allow fresh air inside. Turn on a fan to help move air out of the room. Avoid staying in a closed space while cleaning. Good airflow reduces the chance of breathing harmful mold spores.
When To Replace Instead Of Clean
Check if mold has deeply penetrated the microwave’s walls or seals. If mold returns quickly after cleaning, replacement is safer. A strong, musty odor that won’t go away is a warning. Buy a new microwave to protect your health if these signs appear.
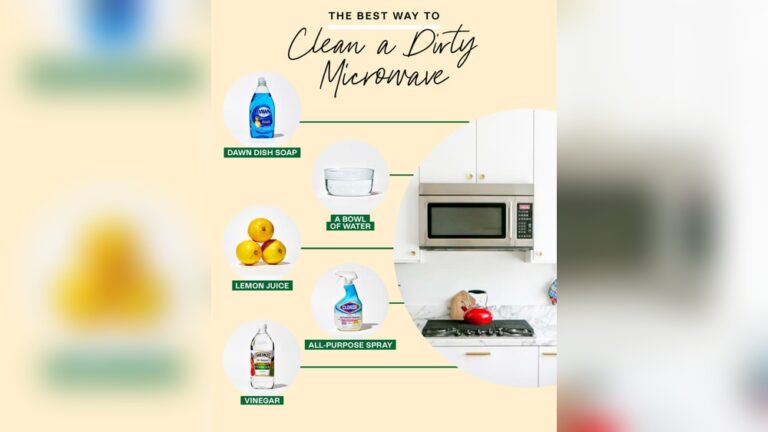
Gathering Cleaning Supplies
Gathering the right cleaning supplies makes removing mold from your microwave easier. Having everything ready saves time and effort. Use safe and effective products to protect your health and your appliance.
Natural Cleaners: Vinegar And Baking Soda
Vinegar and baking soda work well against mold. Vinegar kills mold spores and deodorizes. Baking soda scrubs off stubborn stains without scratching. Mix vinegar with water for a gentle spray. Make a paste with baking soda and water for tough spots. These natural cleaners are safe and budget-friendly.
Tools Needed: Bowls, Cloths, Sponges
Gather a microwave-safe bowl for steaming. Soft cloths help wipe away loosened mold. Use sponges to scrub gently without damage. Paper towels can dry surfaces after cleaning. Avoid abrasive tools that may harm the microwave’s interior.
Optional Commercial Cleaners
Some commercial cleaners target mold specifically. Choose mild, non-toxic formulas for kitchen use. Read labels to ensure they are safe for microwaves. Use these only if natural cleaners do not work well. Follow instructions carefully to avoid damage.
Preparing The Microwave
Preparing your microwave properly is the first step to a deep and effective clean. Removing any detachable parts and giving the interior a quick wipe helps clear loose dirt and mold. This preparation makes the cleaning process easier and more thorough. Follow these simple steps to get your microwave ready for cleaning.
Removing Turntable And Parts
Start by unplugging the microwave for safety. Take out the glass turntable and the roller ring underneath it. These parts can trap food and mold, so cleaning them separately is important. Wash them with warm, soapy water and let them dry while you clean the microwave interior.
Initial Wipe Down
Use a damp cloth or sponge to wipe the inside of the microwave gently. Focus on removing loose crumbs, spills, and surface mold patches. Avoid using harsh scrubbing at this stage to prevent spreading mold spores. This initial wipe clears the way for deeper cleaning steps.
Steaming Method For Mold Removal
The steaming method is a simple way to remove mold from your microwave. It uses hot steam to soften mold and stains. This makes cleaning easier and less harsh on the microwave’s surface. The process involves using a natural vinegar solution that kills mold while loosening grime. Follow these steps to clean your microwave safely and effectively.
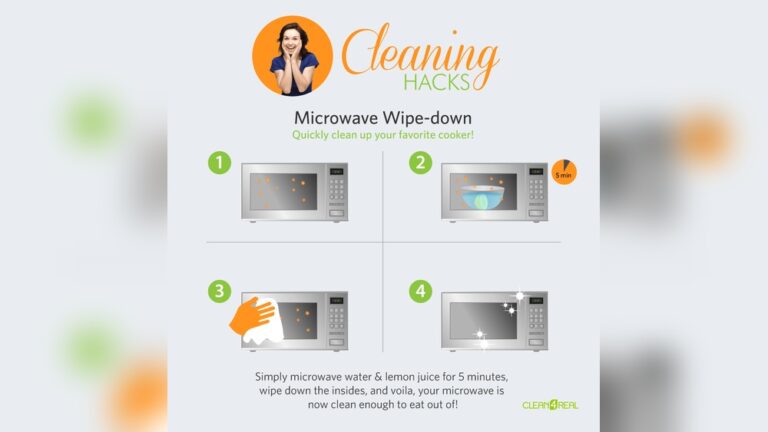
Making The Vinegar Solution
Start by mixing equal parts of water and white vinegar. Use about one cup of each. Pour the mixture into a microwave-safe bowl. Vinegar is a natural mold killer and helps break down dirt. This solution is safe and easy to prepare with common kitchen ingredients.
Microwaving The Solution
Place the bowl with the vinegar solution inside the microwave. Heat it on high for 5 to 7 minutes. The liquid will start to boil and create steam. Make sure the microwave door stays closed during this time. The hot steam will fill the microwave cavity and reach all corners.
Letting Steam Loosen Mold
After microwaving, keep the door closed for 5 minutes. Let the steam work on loosening the mold and grime. This step softens the buildup and makes wiping easier. Next, carefully remove the bowl and wipe the interior with a damp cloth. Most of the mold and stains will come off quickly without scrubbing hard.

Credit: samyxcleaning.com
Cleaning Interior Surfaces
Cleaning the interior surfaces of a moldy microwave is key to removing mold and odors. Focus on all parts inside, including walls, ceiling, and floor. Use gentle but effective methods to avoid damage.
Start by loosening mold and grime. This makes wiping and scrubbing easier. A clean microwave is safer and works better.
Wiping Walls And Ceiling
Use a soft cloth dampened with warm soapy water. Wipe all walls and the ceiling carefully. Avoid harsh scrubbing to protect the microwave’s finish. Change the cloth often to avoid spreading mold.
Scrubbing Stubborn Spots
Some mold spots need more effort. Use a soft brush or sponge with mild detergent. Gently scrub these areas until the mold lifts. Rinse the sponge frequently to keep it clean.
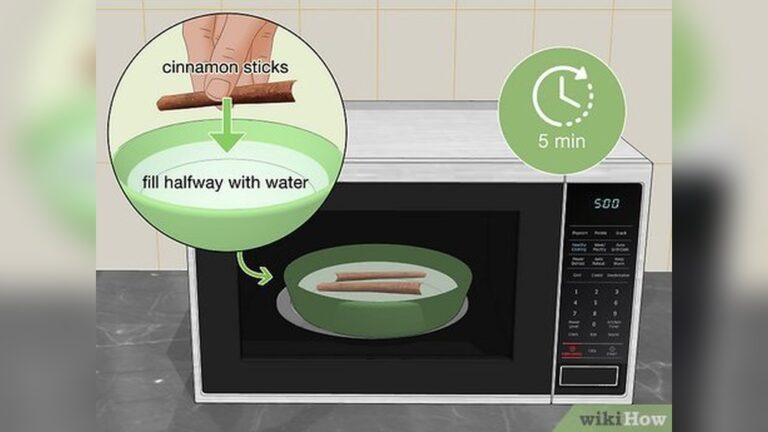
Using Baking Soda Paste
Mix baking soda with a little water to form a paste. Apply this paste to tough mold patches. Let it sit for 10 minutes to break down mold. Then scrub lightly and wipe clean with a damp cloth.
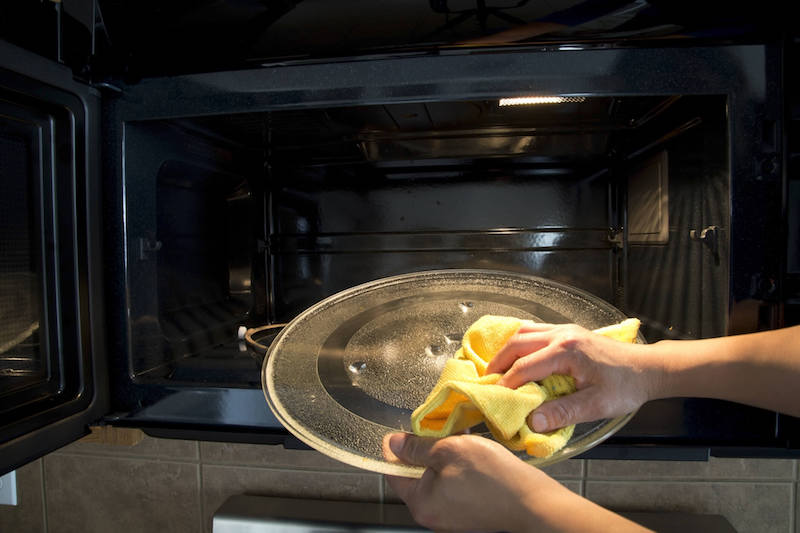
Cleaning Removable Parts
Cleaning the removable parts of your microwave is key to removing mold and bad odors. These parts often collect food spills and moisture, creating a perfect place for mold to grow. Taking them out for a thorough wash helps keep your microwave fresh and safe.
Washing The Turntable
Start by carefully removing the turntable from the microwave. Place it in the sink and wash it with warm water and dish soap. Use a soft sponge to scrub away any mold or food stains. Rinse it well to remove all soap. Dry the turntable completely with a clean towel before placing it back.
Cleaning The Turntable Area
Next, clean the area where the turntable sits inside the microwave. Use a damp cloth with a mild cleaner or a mix of water and vinegar. Wipe all surfaces to remove mold and grime. Pay close attention to corners and edges where dirt hides. Dry the area fully to stop mold from returning.

Credit: samyxcleaning.com
Drying And Final Touches
After thoroughly cleaning your moldy microwave, drying and final touches are essential. Proper drying prevents moisture buildup, stopping mold from returning. The final steps also restore the microwave’s appearance and keep it fresh. Follow these simple actions to finish your cleaning safely and effectively.
Air Drying The Interior
Leave the microwave door open for at least one hour. This helps air circulate and removes any leftover moisture. Use a clean cloth to wipe visible wet spots. Avoid using the microwave until it is completely dry inside. Drying stops mold spores from growing again.
Wiping The Exterior
Use a damp cloth with mild soap to clean the microwave’s outside. Pay attention to the handle, buttons, and control panel. These areas collect dirt and germs quickly. After wiping, dry the surface with a soft towel. Clean exteriors make your microwave look new and hygienic.
Preventing Future Mold Growth
Keep the microwave dry by wiping spills immediately. Use the microwave only for short periods to avoid steam buildup. Clean the interior weekly to remove food residue. Consider placing a cup of vinegar inside and running it for a few minutes monthly. These habits stop mold from returning and keep your microwave fresh.
Regular Maintenance Tips
Keeping your microwave clean helps prevent mold growth and extends its life. Regular maintenance stops dirt and moisture build-up. Small daily habits make a big difference in avoiding mold problems.
Daily Wipe Downs
Wipe the inside of your microwave after each use. Use a damp cloth or sponge with mild soap. This removes food splatters and moisture that mold loves. Dry the surface well with a clean towel to prevent dampness.
Avoiding Food Spills
Cover food with a microwave-safe lid or paper towel before heating. This stops spills and splatters from sticking to the walls. Clean any spills immediately to stop mold from forming. Keep the turntable clean by washing it regularly.
Checking For Mold Early
Look inside your microwave for dark spots or a musty smell. Inspect corners and seals where mold hides easily. If you spot mold early, clean it right away to prevent spreading. Regular checks keep your microwave safe and fresh.
Credit: www.themichaelrubino.com
Frequently Asked Questions
Can You Kill Fungus In The Microwave?
Yes, microwaves can kill fungus with proper use. Steam cleaning with water and vinegar helps eliminate mold and spores effectively.
How To Clean A Really Nasty Microwave?
Steam the microwave interior with water and vinegar for 5 minutes. Let it sit, then wipe grime with a damp cloth. Use a baking soda paste for tough spots. Remove and wash the turntable separately. Dry surfaces and leave the door open to air out.
What Kills 100% Of Mold?
Bleach and specialized mold-killing solutions can kill 100% of mold on hard surfaces. Proper application and drying are essential.
Conclusion
Cleaning a moldy microwave does not have to be hard or take long. Use simple ingredients like vinegar, water, and baking soda. Steam the inside to loosen grime and wipe it clean with a cloth. Don’t forget to wash the turntable separately.
Regular cleaning prevents mold from coming back. Keep your microwave fresh and safe for daily use. A clean microwave helps your food taste better and keeps your kitchen healthy. Follow these easy steps often to avoid mold buildup.